main beam - (2) 1-1/2"x72" slotted metal angles (zinc coated) (Note: you can use 1/8" 1-1/2" aluminum angles as well, but they're much more expensive and you need metal cutting drill bits to make the required five 1/4" holes)
arm, beam separators, feet - (1) 2x4x48" fir - get one as blemish free and straight as possible
string posts - (2) 3/4" diameter birch dowel - 18" minimum - get one as straight as an arrow!
arm foot - (1) 1"x5"x7" - any kinda scrap wood that's between 3/4" and 1" thick
beam fasteners - (5) 1/4"x2-1/2" bolts, nuts and washers
wood fasteners - (8) 2-1/2" dry wall screws
main arm pivot - (1) 1/2"x5" carriage bolt, 1/2" wing nut, large washer
string trees - (3) #10x2-1/2" (or thereabouts) flat head wood screws
string tie-down - (1) 5/16"x2" wall hanger screw and 5/16" wingnut, 2 washers
string post lashing - some strong unwaxed thread
glue - 5 minute epoxy to fasten in the string posts
Tools
Cutting the 2x4 - table saw or circular saw or jig saw or hand saw
Drilling the holes - electric drill and 3/16", 1/4", 1/2" and 3/4" wood bits
Tighten the bolts - box wrenches and/or vise grips
Screws - a 1/16" drill bit for pilot holes is nice, screw gun, screwdriver
Wherever "2x4" is mentioned, those sizes prevail!
Building the Jig
* Measure off and cut the 2x4 for ...
one 18" length (for the arm)
one 9" length (for the single post end)
one 7" length (for the arm support)
one 3" length (for the end piece)
two 4-1/2" lengths (for the feet)

* You'll need to cut the 2x4x7" long main arm support lengthwise, to provide a 1-1/2" wide, 1-1/4" high, 7" long piece of wood ...

The reason you need to trim off the height of this 7" long main arm piece is in order to allow the arm to be tightened to the main beam, allowing you to set the arm to whatever length bowstring you wish to spin. If you find it difficult to make this cut, ask where you purchased your lumber to make this - and all the other cuts - for you. Home Depot will usually do all of this at no charge ...
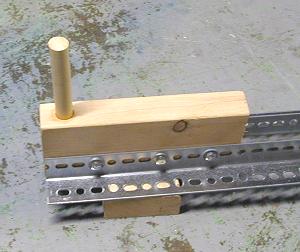
* Take the 9" length and put it between the angle beams, at one end - drill and secure with three 1/4"x2-1/2" bolts - make sure the bottom of the 9" length is flush with the bottom of the angle beams. After securing, add a 4-1/2" foot to the bottom of the 9" length with the drywall screws ...
* You'll need to cut the 2x4x3" long length lengthwise, to provide a 1-1/2" wide, 1-1/4" high, 3" long piece of wood ...
The reason you need to trim off the height of this 3" long end piece is in order to allow the arm to pass over it - thus increasing the maximum bowstring length you can spin. If you find it difficult to make this cut, ask where you purchased your lumber to make this - and all the other cuts - for you. Home Depot will usually do all of this at no charge.
Take that 3" length and put it between the angle beams, at the other end - drill and secure with two 1/4"x2-1/2" bolts - make sure the bottom of the 3" length is flush with the bottom of the angle beams. After securing, screw in a 4-1/2" foot to the bottom of the 3" length with the drywall screws...
* Take the 1"x5"x7" piece of scrap wood and fasten it to the bottom of the 7" length arm support, using drywall screws ...
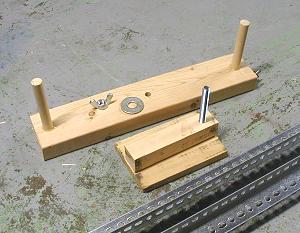
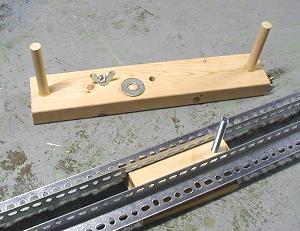
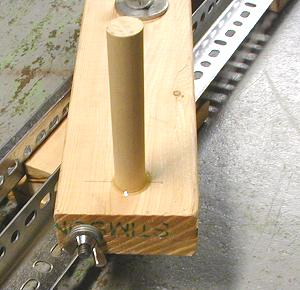
* Take the 18" length that's the main arm, mark the exact center of the 4" wide side and drill a 1/2" hole completely through (see above pic).
* About 1" from the end of the main arm support, drill a 1/2" hole completely through and insert the 1/2"x5" carriage bolt (see above pic).
* Centered about 1" from from each end of the main arm, drill a 3/4" hole as straight in as you can - it must go at least 1" deep, but could also go completely through the 2x4 ...
* Glue a length of 3/4" dowel into each main arm string post hole - bottom out the the dowel and cut off enough so that 4-1/2" remains above the top of the 2x4 (see above pic).
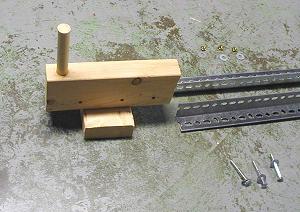
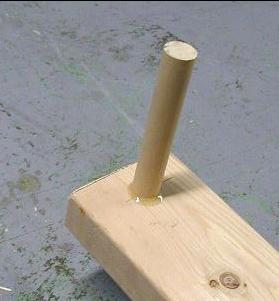
* Centered about 1" from the end of the 9" length arm support, drill a 3/4" hole as straight in as you can - it must go at least 1-1/2" deep, but could go deeper ...
* Glue a length of 3/4" dowel into each main arm string post hole - bottom out the the dowel and cut off enough so that 4" remains above the top of the 2x4 (see above pic).
* Centered, and off to one side of one end of the main, drill a 1/4" pilot hole for the 5/16" wall hanger. Screw in the wall hanger, add a few washers and screw on the 5/16" wing nut ...
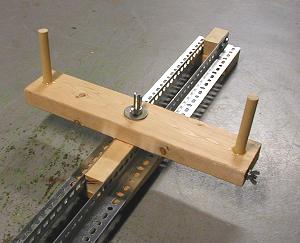
* Assemble the main arm - use the 1/2" wing nut and a large washer ...
* Next up is drilling pilot holes in the ends of all three string posts, screwing in the flathead string tree screws, binding the ends of the dowels with heavy thread or string, coating the thread/string with epoxy ...
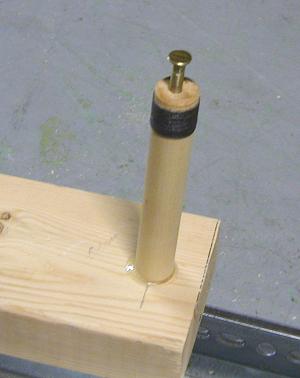
* On the single end post, I added a small plastic tube, that has a lip on one end, to the screw string tree - this rotates and makes turning the strands around it a bit easier - it's not mandatory ...

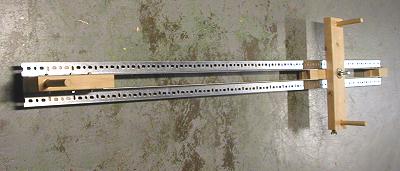
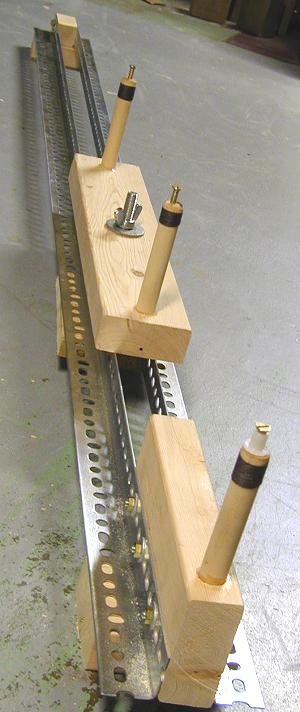
* All done ...
 |
|
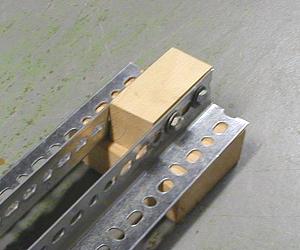
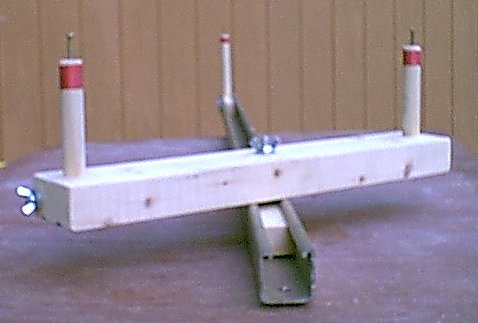
There's more'n one way to skin a cat and Coop does just that with an innovative Yankee ingenuity twist to my basic one arm jig design. Instead of mating a pair of angle lengths, Coop used a U shaped channel (Kendorf, Unistrut - readily available at electrical supply houses). This channel has a pronounced lip edge, and a wood piece can be easily cut to slide in the channel and under the lip edges. The swing arm fastens right to that sliding piece of wood with a wing nut bolt - tightening the wing nut draws the sliding wood up tight to the U channel's lip edge and holds the arm secure for setting your string length. No "feet" are needed to space the jig up off the table for the double post arm to slide, so one can easily permantly mount or just with one C clamp on the U channel secure the jig without wobble while spinning yer string! |
 |
|
Wow, the variations on a simple theme keep getting better! A.Ron Carmichael came up with a beaut of a variation on my original and Trad Coop's designs ... with a bit of a twist - it's portable! Click HERE to transport over to the Texas Archery site and complete text/image tutorial on building this neat one arm jig variation! Much obliged, Tex'ARC! |