Bowstring fiber - If your bow is rated for low-stretch low-creep bowstring fibers, pick out one and use it - "Dacron" (polyester) bowstring fiber (B50, B500) is definitely not as consistent as more modern fibers such as Dyneema, Vectran and Spectra.
Loop serving material - I prefer the soft cushioning quality of multifilament nylon (#4 nylon / #400 nylon - both are the same .017" diameter).
Center serving material - In a pinch you could use #4 / #400 nylon, but modern braided fiber is so much better - like #62 HDPE braid or Spectra Halo
Tools
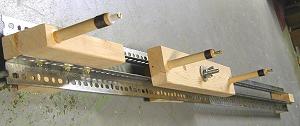
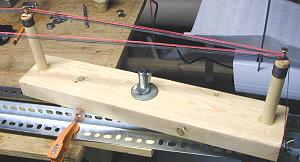
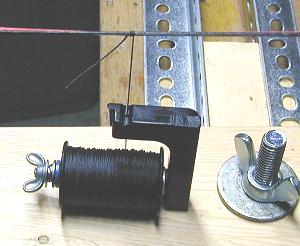
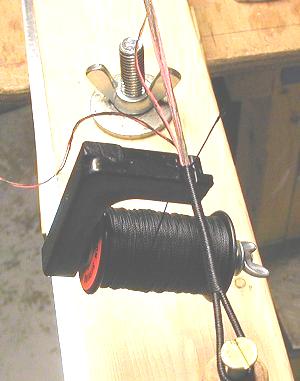
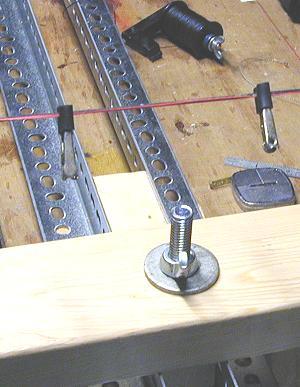
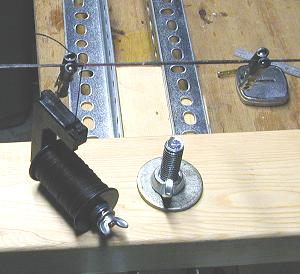
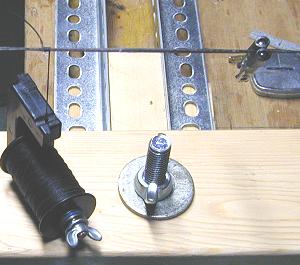
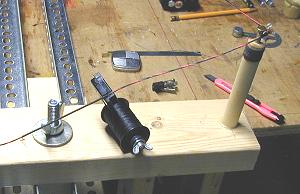
Endless bowstring jig - One or two arms, doesn't matter!
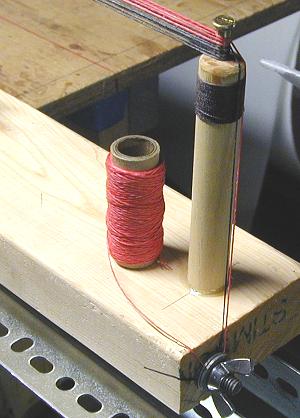
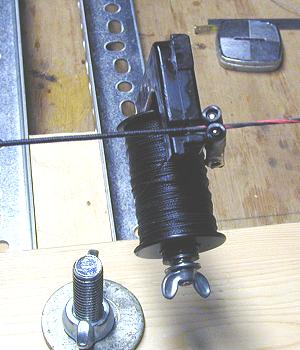
Serving jig - Cavalier or Bjorn servers are pretty good.
2 small alligtor clips - Used to mark the second loop's serving length.
Sharp knife - Razor knives are perfect.
Spinning the bowstring
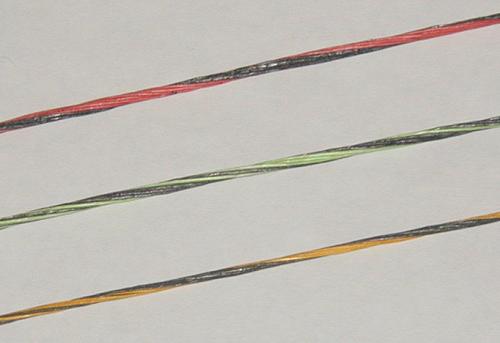
* In this tutorial, we'll be spinning a 12 strand, two color, DynaFlight'97 fiber endless bowstring using a single arm endless string jig.
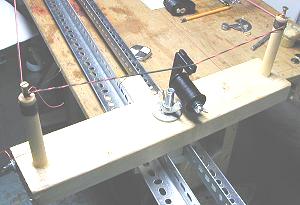
* Setting the bowstring jig for string length - there are basically two ways - [1] stick a current string on, or [2] measure from post to post (outside of each post).
* What length to make your string? Not easy to say, as there are LOTS of variables to consider, even within "AMO" string length guidelines ... considering just what brace height you require and depending on the type of bowstring fiber you use (stretch and creep factors). A wide rule of thumb is somewhere between 2-1/2" to 3-1/2" shorter than the actual running length of the bow, limb nock to limb nock. Which means to say, if you don't have an original string, you're probably going to make up 2 or 3 strings before you're a happy camper. Once you do spin a string that satisfies, make sure to write down the length you set the jig's arm, and/or mark both the jig arm and metal slotted beam (that way, you can just line up the marks for making another perfect string length!).
* One neat bowstring length setting tool is the tillering string. How to make one: Set your jig to spin the maximum length possible (with the one arm jig plans I've offered, this equates to about a 76" long string). Use whatever bowstring material you wish, but add in a few extra strands (i.e. - if you normally make a 14 strand B50 string, make it 16 strands, or if it's an 18 strand FF string, make it 20 strands). ONLY SERVE THE FIRST LOOP - and make that loop about 1-1/2" long (for versatility of size). That's it. Put that one loop on the bottom limb nock. On the plain end of the string, make a timber hitch (bowyer's knot) and set that for about 3" shorter than the string's overall length, Now brace up the bow. Adjust the timber hitch 'til you achieve a reasonable brace height. This is the length (string loop to string loop) you'll need to set your jig.
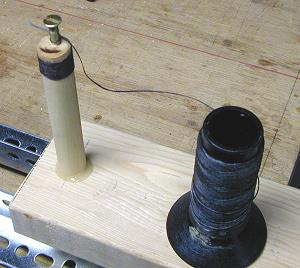
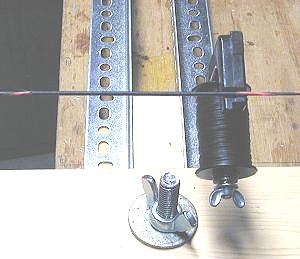
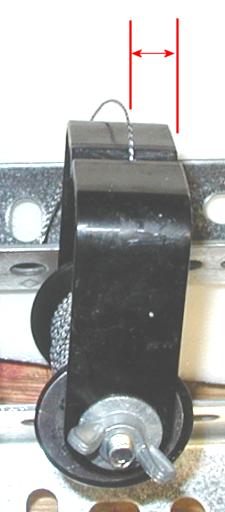
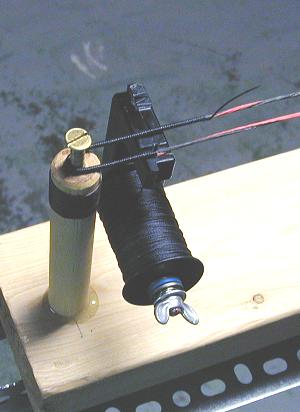
* Okay - on to spining a string! Set the arm parallel to the main beam, keeping the arm string post side that has the small wing nut as the string post outside and furthest away from the single string post on the opposite end of the jig, and measure - from the oustide edge of the single post to the outside edge of the arm's outer post - the length of the string you wish to make. Tighten down the large wing nut on the jig's arm.
* Tie on the first string color (black) to the inside post of the arm ...
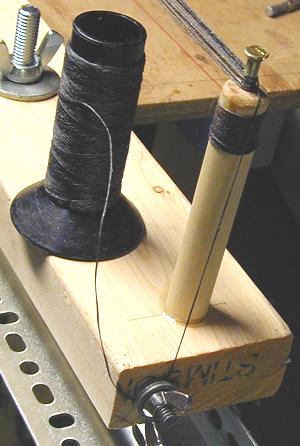
* Keeping tension on the fiber as even as possible (not at all loose, but not too tight) spin the fiber around the arm's outer post, then down to the single post and back to the arm's outer post - this completes one loop of the first color (black). Do this for a total of four loops (which equals 8 strands). NOTICE, in the below images, that the string fiber strands do not overlap each other on the posts, but instead lay next to each other. Then, at the end of the final loop, go around the arm's outer post for one full turn and pull the end down to the tie post, loop around once, lock down with the small wing nut and cut off ...
* Tie on the second string color (red) to the inside post of the arm ...
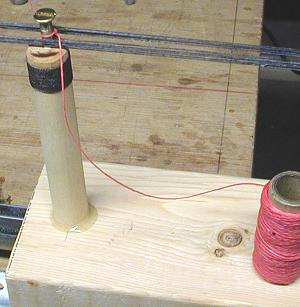
* Keeping tension on the fiber as even as possible (not at all loose, but not too tight) spin the fiber around the arm's outer post, then down to the single post and back to the arm's outer post - this completes one loop of the second color (black). Do this for a total of two loops (which equals 4 strands). AGAIN, notice in the below image, that the string fiber strands do not overlap each other on the posts, but instead lay next to each other. Then, at the end of the final loop, go around the arm's outer post for one full turn and pull the end down to the tie post, loop around once, lock down with the small wing nut and cut off ...
* Now, loosen the large main arm wing nut and move/turn the main arm so that it's at 90 degrees to the main beam ...
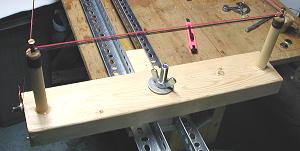
* Apply tension to the string by pulling back on the main arm - tighten the large arm wing nut.
* Making the first bowstring loop. Push the loop serving thread through strands ...
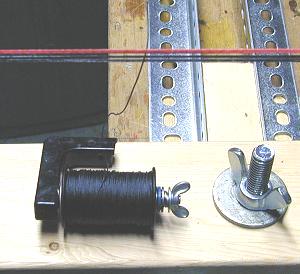
* You'll be serving the loop from left to right, and the server will wrap from bottom to top. Make sure that the thread comes off the serving spool to your left. Start a few wraps ...
* It'll take a bit of trial and error to find the right serving tension - not at all loose, and not hard/tight. There must be some amount of tension, but you don't want the resulting serving to be as hard and stiff as wire.
* Serve for a distance of about 4" ...
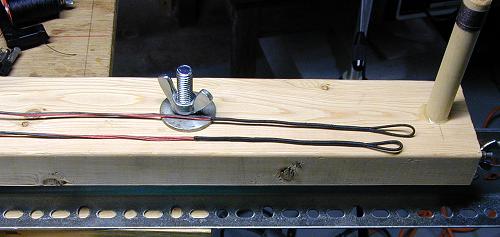
* Keeping the serving jig up against the serving, loosen the arm's large wing nut, remove tension on the string, loosen the arm's small tie-down wing nut and remove the string tag ends, carefully cut off the string tag ends that were tied to the other string post.
* Set the arm parallel to the main beam, hold the string jig intact with one hand and place the serving around the outer string post. Adjust the distance of the string jig spool from the outer edge of the string post - this determines the size of the string loop. I like to use the first loop as the bottom string loop, and usually set it for a 1" loop ...
* Close the loop by continuing to serve ...

* Once you've served past where the serving originally started, you can carefully cut off the tag end from the start of the serving thread ...
* Typical loop ends are served from 6" to 7". After 4" to 5" have been served, carefully cut off one pair of bowstring tag ends, after another inch is served, cut off the last pair of bowstring tag ends, then continue to serve to the desired length
* Whip the end of the loop serving. I like to use the pull-through method. Use a length of serving material to form a loop. Slip the loop underneath the serving and serve over the loop for 4 or 5 turns ...

* Maintain tension on the serving thread, snip off, slip the thread end into the whipping loop and pull through ...
* Pull the whipped end tight, and carefully cut off the tag end close to the serving. One bowstring loop is now completed.
* Loosen the large wing nut on the arm, take the completed loop off the arm and put it on the end single post, place the other non-served end of the string around the outer arm post, pull the arm to tighten the string.
* This will be for the top string loop, usually set for 1-1/2" to 2". Measure the desired loop distance from the outer edge of the string post - now add in the distance of the serving thread hole on the serving jig, to the end of the serving jig edge ...
...and place a small alligator clip to mark that distance (you'll notice that I placed small lengths of neoprene tubing over the clip jaws to keep from harming the string fiber). 1/2" or so past the first clip, place another alligator clip on the other side of the string ...
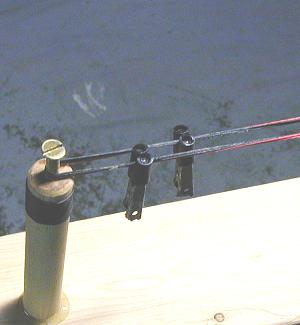
* Loosen the large wing nut of the arm, turn the arm at 90 degrees to the main beam, put tension on the arm and tighten the large wing nut - make sure that the FIRST alligator clip you used (to set the length of the loop) is on your RIGHT! ...
* As before, the procedure for serving the second loop is exactly the same as the first - the only difference is that now the alligator clips will define the exact distance of the serving ..

* Loosen the large wing nut on the arm, hold onto the server to keep it from unraveling ...
* Turn the arm parallel to the main beam, apply tension to the arm and tighten the arm's large wing nut. You're ready to close the second loop - same process as the first loop ...
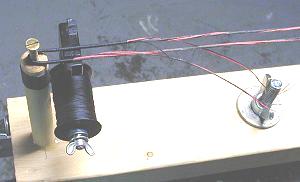
* Finished loops ...
* Two color strings are nice ...
* It's best to complete the center serving with the string on the braced bow. The serving process is the same as outlined earlier - make sure that the top limb is to your right as you serve - this insures the serving will tighten as the string is gripped by a right handed archer. Twist the string tothe desired brace height before center serving. Typical center servings run 6" to 8" in length.
* What diameter center serving thread to use? Depends on what type of string fiber, how many strands in the bowstring, what size arrow nock, and what kind of nock fit you require (very loose, loose or light snap - tight nocks are inconsistent and accuracy will suffer).