Author Topic: New Stave( Pics added)  (Read 694 times)

Offline ranger 3

  • Trad Bowhunter
  • **
  • Posts: 2147
New Stave( Pics added)
« on: March 12, 2009, 01:07:00 PM »
I have a new stave I'm working on. I have found a few pin knots in it and have a question. When scraping down to a ring do you go to the same ring that the knot is on or leave it humped up there and scrap to the next ring around it? I hope I explained this right...Howard
Black widow PLX 48@28
Black widow PSRX 48@28

Offline No-sage

  • Trad Bowhunter
  • **
  • Posts: 483
Re: New Stave( Pics added)
« Reply #1 on: March 12, 2009, 02:08:00 PM »
The back of the bow should be all one growth ring.

Offline Eric Krewson

  • Trad Bowhunter
  • **
  • Posts: 3126
Re: New Stave( Pics added)
« Reply #2 on: March 12, 2009, 04:56:00 PM »
Back in the old days I followed advice put out by one of the early writers on making bows. He recommended leaving and island of wood over pins.

After having a few "islands" fail I now follow the same grain I choose for a bows back over the pins.

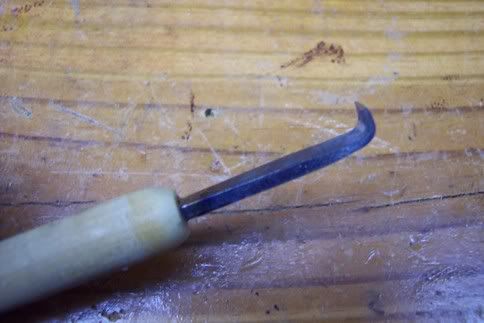
I usually use a Dremel with a steel burr to do my initial ring chasing over pins. As soon as I break through to the correct grain in most of the areas around  the pin I switch to my pin knot scraper or a curved end cabinet scraper to finish the job.

Here is a pin knot scraper I made out of a concrete nail, really good for fine work around pins.
 

Offline ranger 3

  • Trad Bowhunter
  • **
  • Posts: 2147
Re: New Stave( Pics added)
« Reply #3 on: March 12, 2009, 05:53:00 PM »
Eric do you have a picture of a pin after it is finished?
Black widow PLX 48@28
Black widow PSRX 48@28

Offline ranger 3

  • Trad Bowhunter
  • **
  • Posts: 2147
Re: New Stave( Pics added)
« Reply #4 on: March 12, 2009, 07:49:00 PM »
Here they are after I worked them down.
 
 
Black widow PLX 48@28
Black widow PSRX 48@28

Users currently browsing this topic:

0 Members and 1 Guest are viewing this topic.
 

Contact Us | Trad Gang.com © | User Agreement

Copyright 2003 thru 2024 ~ Trad Gang.com ©