Author Topic: bamboo backed bamboo build along  (Read 557 times)

Offline adam

  • Trad Bowhunter
  • **
  • Posts: 191
bamboo backed bamboo build along
« on: April 21, 2010, 11:06:00 PM »
Well i haven't posted here in a while and i was getting ready to start building a bow so i figured why not do a build-a-long while i was at it. I'm in no way an expert at building these bows but i figured if someone was wanting to build one and had no idea where to start maybe this would help answer some questions. If anyone has any advice or see's something i'm doing wrong feel free to point it out. Like i said i'm no expert. All i know is what is in TBB 4, Dean Torges dvd and what i've learned on here.

OK, so why am i doing this? I have a friend thats been showing intrest in archery so i invited him over to build a bow free of charge using all the materials and tools i have here. So, while i'm showing him what to do i figured what the heck i'll build one too. So hopefully at the end of this thread we will have to shootable bows. Just as a warning i'm not sure how long this will take. I'm working on it as i have time. If you have any questions feel free to ask and i will do my best to answer them.

To start with we had to pick out the right piece of bamboo.Here is some of the bamboo we looked through.
 

Just as a reminder when you are picking out a piece of bamboo try to find one with a good spacing between nodes. Also check to make sure you won't have any nodes at your limb tips. It just helps when tillering your limbs if you don't have stiff spots at the tips.

After you select your piece you will notice the main problem with bamboo. It is WAY to thick. This is a picture of a few pieces out of my stack showing just how thick it is.
 

So how do we get it thinner? There are many ways to do this. If you are a beginner i would suggest using a scaper or some sort of plane unless you are familiar with using power tools. You can also use a belt sander or a jointer. Just remember with power tools, go slow. It doesn't take long to ruin backing for a bow. If you are going to use a belt sander i would suggest you use a 50 grit or lower belt to help speed up the process and remember to wear a mask!

I used a jointer and after a few passes this it what it will look like.

After you have you bamboo planed flat put it in your hotbox overnight or let it sit outside for an afternoon to draw the moisture out of it. You will notice the bamboo won't be flat on the belly side anymore. The moisture being pulled out will cause it to arc some on the belly. So once again run it across your jointer,sander, scraper or whatever tool you are using to get it somewhat flat again. Sorry i didn't get any pictures of this part.

Thats all for tonight i have more pictures to upload and i will pick up again tomorrow night. Thanks

Adam
Psalm 18:33

Online Jack Denbow

  • TGMM Member
  • Trad Bowhunter
  • ***
  • Posts: 1677
Re: bamboo backed bamboo build along
« Reply #1 on: April 22, 2010, 09:15:00 AM »
This is going to be cool.
Jack
PBS Associate member
TGMM Family of the Bow
Life is good in the mountains

Offline walkabout

  • Trad Bowhunter
  • **
  • Posts: 1057
Re: bamboo backed bamboo build along
« Reply #2 on: April 22, 2010, 11:01:00 AM »
nice, ill be watching this one
Richard

Offline Osagetree

  • TGMM Member
  • Trad Bowhunter
  • ***
  • Posts: 3512
Re: bamboo backed bamboo build along
« Reply #3 on: April 22, 2010, 04:19:00 PM »
I love to follow along, I like the pics. Like they say,,, a thousand words!

Thanks for the effort!
>>--TGMM--> Family of the Bow

Offline scottm

  • Trad Bowhunter
  • **
  • Posts: 775
Re: bamboo backed bamboo build along
« Reply #4 on: April 22, 2010, 10:15:00 PM »
Thanks for your time!Ill be watching.

Offline adam

  • Trad Bowhunter
  • **
  • Posts: 191
Re: bamboo backed bamboo build along
« Reply #5 on: April 22, 2010, 10:56:00 PM »
Ok, so now we have a pretty flat piece of bamboo that is ready to become a piece of backing. The first thing I do at this point is mark a center line both vertically and horizontally. The next step is to determine how long of a riser I will use. For this bow, I will use a 12" riser that is 1.5 inches wide. Now, make a mark 6in. from both sides of center. This will be a total of 12" for the riser. Next, I will measure the width of the bamboo. This peice was 1.75 inches wide. I want it to be 1.5" wide at the fade outs so make a mark 1/8" of an inch in from both sides of the bamboo at both fadeouts and center then connect the dots. To give you a better idea this is what it looks like.


Now, measure from center to make the end of your limb and cut off the excess. This bow will be 58" when its finished so i measured 30" from center and made my cut mark. Always remember to make your bow an inch longer than you want on each end to allow for nocks.

Next step is to determine your limb taper. The bow will have a stright taper from 1.5" fadeouts to .5" nocks. To do this make a mark at your limb tip .25" off each side of center. Then take a straight edge and draw a line from your fadeout to the mark you just made at your limb tip. It should look something like this depending on your taper.


Here is where i have seen many people mess up. After the bow is cut out your tips will look like this.Sorry for the blurry picture but notice how thick the tips are. I have seen many people leave the backing like that and glue up the bow. This causes a ton of string follow because your tips are so thick. You can probably guess what the next step is. Back to the sander, jointer, scaper or whatever tool you choose to take the entire piece of backing to about a 1/16" at the edges. Also at this point sand your limb taper down to the line. If you choose to use a bandsaw to cut your limb taper remember to cut outside the line and sand to the line. You have way to much time put into this piece of backing to mess it up now.
 

Ok guys thats all for tonight. I will try to work on it some over the weekend and keep this going. Please let me know if i'm doing something wrong or if you have a better way to do something that may help someone out.

Thanks
Adam
Psalm 18:33

Online Roy from Pa

  • Administrator
  • Trad Bowhunter
  • ****
  • Posts: 20686
Re: bamboo backed bamboo build along
« Reply #6 on: April 23, 2010, 12:44:00 AM »
Adam, you are doing a fine job. I have been making BBO bow's for about 8 years now. What I have done though, instead of laying out the shape of the bow on every new piece of Bamboo. I made up a pattern out of a piece of 1/8th thick wood. Just like Dean showed in his video. I then lay that pattern on the flat side of the new piece of boo and run a string down the center and get the pattern centered on the new piece of boo. Once the pattern is centered, I clamp it down and trace out the pattern onto the new piece of boo. Saves a lot of time with a pattern. My pattern is 62 inches long, if I want a bow a little longer, I just use a straight edge and trace out each limb tip to the length I want. After my boo is cut out and sanded to the lines, and tapered from 1/8th thick at the fades, to 1/16th thick at the tips, I lay it on my slat and again use a string to get everything aligned and centered. Then with the boo clamped straight on my slat, I drill two holes about 2 inches apart in the center of the handle, and drill two holes on each side of the limb tips right up tight againist the side of the boo. Then when I glue the boo to the slat, I tap toothpicks into those holes, then snip them off flush with the back of the boo so I can lay my padding down on the back of the boo for glue up. That holds the boo in perfect position while I clamp it down in my form. Since I have been doing that with toothpicks, all of my bow's have been coming out really straight when it comes to the string running right down the center of the bow. I don't have a picture of my pattern on the boo, but here is a picture of my boo being centered on my slat.


I just keep sliding the boo ever so slightly one way or the other to get it centered with the string and clamp it down. I measure at the center of the riser, limb tips, and mid limb. Then that is when I drill the holes for the toothpicks. This picture below, I am just starting to center the boo. You can see that the limbs are not centered perfect yet in the picture, but they were shortly after.


One more tip here Adam. I used to do the straight taper from the fades to the limb tips. But what I found was, my tips were too stiff and my fades were too weak. I had to take a lot of wood off in the tillering process because of hinges at the dips. So now I make my area from my fades and dips a little wider by 1/4 inch.  

Enjoy the bow building, and learn with everyone you make.

Offline adam

  • Trad Bowhunter
  • **
  • Posts: 191
Re: bamboo backed bamboo build along
« Reply #7 on: April 23, 2010, 06:35:00 PM »
Thanks for the tips Roy! Thats what build a longs are for. Helping others learn how to do these things.

I have seen other people use a template like you do i have just never taken the time to build one. I'm sure it would speed the process up though. Actually i'm probably going to build one after i finish this bow because i'm already planning my next one.

I will try to pick up this build-a-long over the weekend. Had to get a new belt for my sander today.
Psalm 18:33

Offline yewsage

  • Trad Bowhunter
  • **
  • Posts: 73
Re: bamboo backed bamboo build along
« Reply #8 on: April 23, 2010, 09:55:00 PM »
ok man, where do you get the osage boards????
making earth a better place, one bow at a time

Offline adam

  • Trad Bowhunter
  • **
  • Posts: 191
Re: bamboo backed bamboo build along
« Reply #9 on: April 25, 2010, 05:04:00 PM »
Ok guys, I had some time to work on this bow over the weekend and this is what we have. When i left off last we had our backing rough cut to shape and it needed to be thinned down some more. I thin mine down using a 4x36 belt sander and a 50grit belt and this is the result.
This is what my tips look like after being thinned down. They still look pretty thick but they are around 1/16" i guess the picture makes it look thick.
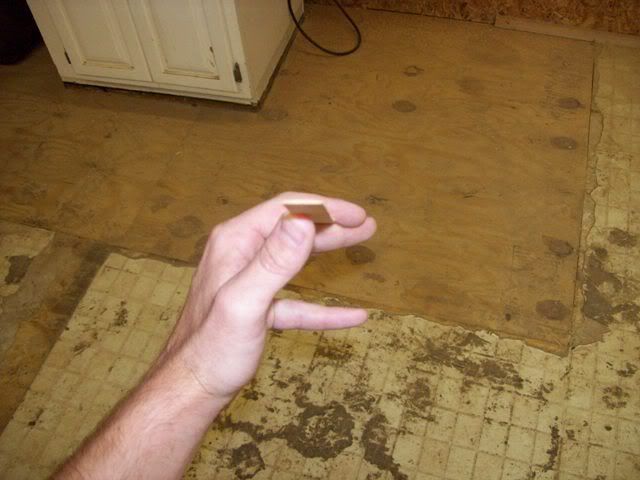
 

This is a side shot of the handle area showing the thickness. I leave it a little thicker in this area it is closer to an 1/8".
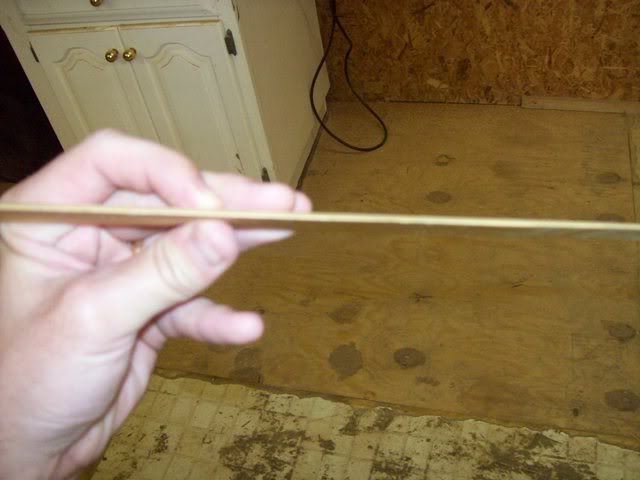
 

Now our backing is basically ready for glue up. You have got it down to a rough profile and have the thickness you are happy with. I would say you would need to rough up the backing before glue up but if you are using a 50 grit belt it is pretty rough when you get done.

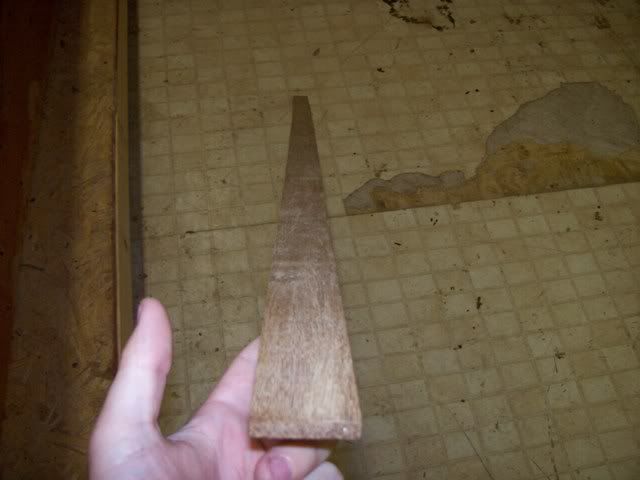
Now, its time to select your board. On this one i'm going to use bamboo in board form. I actually cut it off a piece of bamboo plywood from lumber liquidators. I'm not sure how well this bow is going to turn out because i have never used it so we will just have to see how it goes. This is what it looks like.
 

Thats about as far as i can go on the board and backing. I'm going to use a power lam in the bow and i just don't have the set up to build my own. I'm working with Kenny right now for my power lam, so as soon as i get it in we will get back to the glue up.

In the mean time we will start building our riser. The riser will be 12" x 1.5" x 1.5". I decided to start with a chunk of persimmon i had. I cut it down to dimensions on my small bandsaw and decided it wouldn't look right by itself. I started digging through a box of scraps and found some paduk and thought it would look good together. So after some measuring, cutting and sanding this is what i came up with.
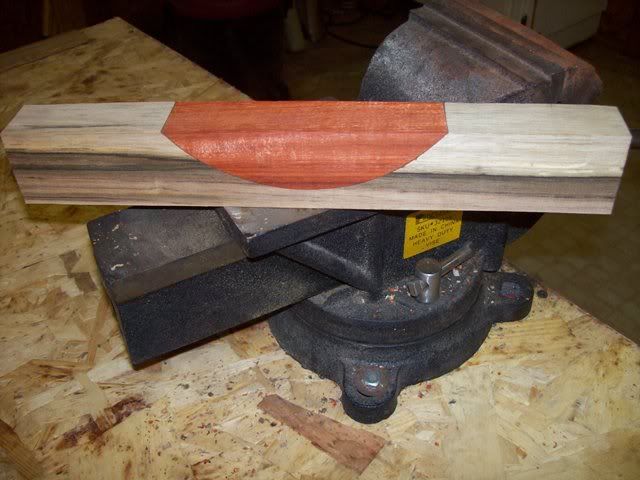
 

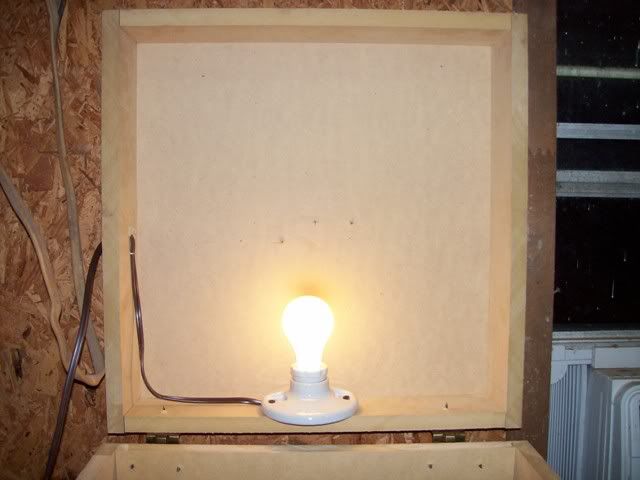
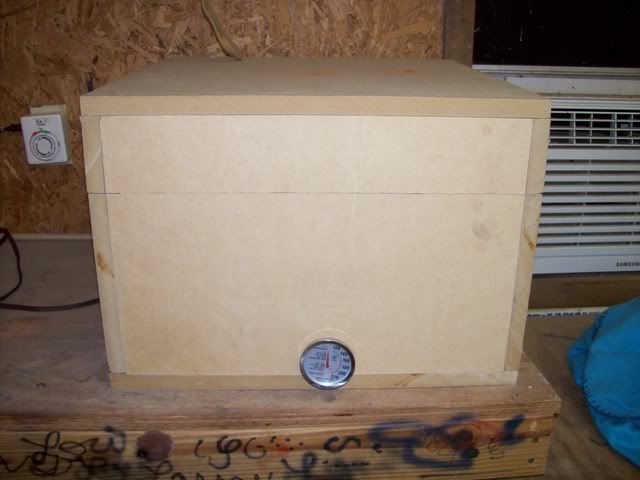
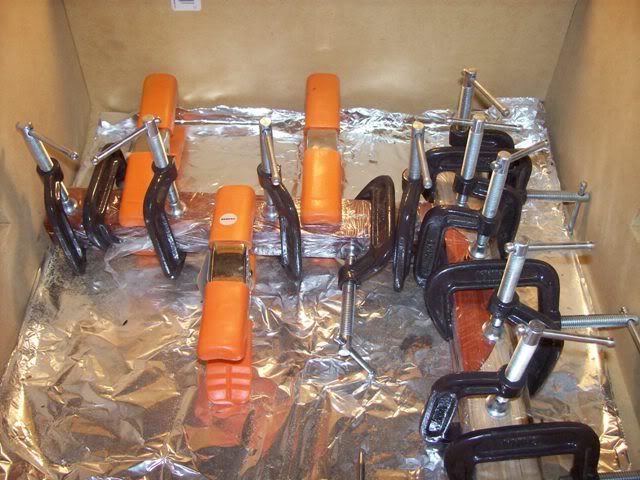
Sorry i forgot to get pictures of the glue up of the origianl riser but i have some others here. I think the persimmon and paduk looked good together but the persimmon felt kinda soft when i was cutting it so i decided to add an I-beam also. I cut the orginal glue up in half on my bandsaw and cut a section of the bamboo board for my i-beam. Once this was done i mixed up some smooth-on and glue and clamped it all up. Here is a picture of the small hotbox i use for risers. It uses 1 60watt bulb and gets up tp about 115 degrees.  
 

And a picture of the 2 seperate risers in the box.
 

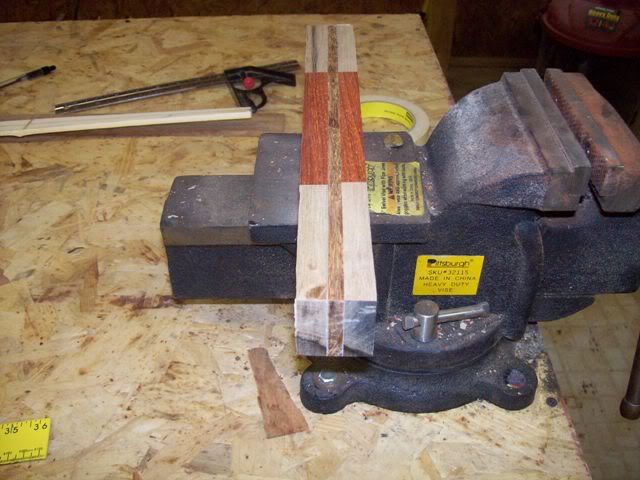
I let it cook it the box overnight and took it out the next day and cleaned up the lines and came up with this.
 

Well guys i'm gonna have to stop there now until i get my power lam. Our backing is ready, the bamboo board is ready and we have our riser. I will pickup one day this week with the glue up.
Psalm 18:33

Users currently browsing this topic:

0 Members and 2 Guests are viewing this topic.
 

Contact Us | Trad Gang.com © | User Agreement

Copyright 2003 thru 2024 ~ Trad Gang.com ©