Author Topic: Nock Photos?  (Read 316 times)

Offline barley40

  • Trad Bowhunter
  • **
  • Posts: 95
Nock Photos?
« on: November 16, 2011, 10:08:00 PM »
Lets see yer nocks!!

Offline tenbrook

  • Tradbowhunter
  • Trad Bowhunter
  • *
  • Posts: 1025
Re: Nock Photos?
« Reply #1 on: November 16, 2011, 10:30:00 PM »
Self nocks?

Offline Grey Taylor

  • Trad Bowhunter
  • **
  • Posts: 1546
Re: Nock Photos?
« Reply #2 on: November 16, 2011, 11:07:00 PM »
Here are the horn reinforced nocks I do, these are before the rest of the arrow has been built...


Guy
Tie two birds together; though they have four wings, they can not fly.
The Blind Master

Online Roy from Pa

  • Administrator
  • Trad Bowhunter
  • ****
  • Posts: 20639
Re: Nock Photos?
« Reply #3 on: November 16, 2011, 11:28:00 PM »

Offline KellyG

  • Trad Bowhunter
  • **
  • Posts: 4249
Re: Nock Photos?
« Reply #4 on: November 16, 2011, 11:43:00 PM »
Self knock reinforced with sinew. Just like Pat B taught me.


Offline tenbrook

  • Tradbowhunter
  • Trad Bowhunter
  • *
  • Posts: 1025
Re: Nock Photos?
« Reply #5 on: November 17, 2011, 09:25:00 AM »
I did a Bamboo Arrow Buildalong a few months ago.  Here is the section on how to do Self-Nocks.

You can find the complete buildalong on my website under tutorials.

   http://tenbrookarchery.weebly.com/tutorials.html  

Hope this helps.     :thumbsup:    

Tenbrook

Bamboo Arrow Build-A-Long

On to the Self-Nocks.  This is where the project becomes more fun IMO.


First I drill a 7/64" hole 3/8" from the back of the arrow at the nock end (Skinny end) on the same side I marked the stiff spot on the arrow.


Then using a razor blade I cut into the hole I just drilled.


Do the other side and pop out the center.


Offline tenbrook

  • Tradbowhunter
  • Trad Bowhunter
  • *
  • Posts: 1025
Re: Nock Photos?
« Reply #6 on: November 17, 2011, 09:26:00 AM »
Get a piece of 80gr sandpaper and fold it in half twice so it is 4 layers thick.  Use this to clean up the nock.


All cleaned up.


Now take a piece of 220gr sandpaper and place in over the sharp edge of a piece material.  Use the edge of the sandpaper to creat an angle at the end of the nock.


Offline tenbrook

  • Tradbowhunter
  • Trad Bowhunter
  • *
  • Posts: 1025
Re: Nock Photos?
« Reply #7 on: November 17, 2011, 09:32:00 AM »
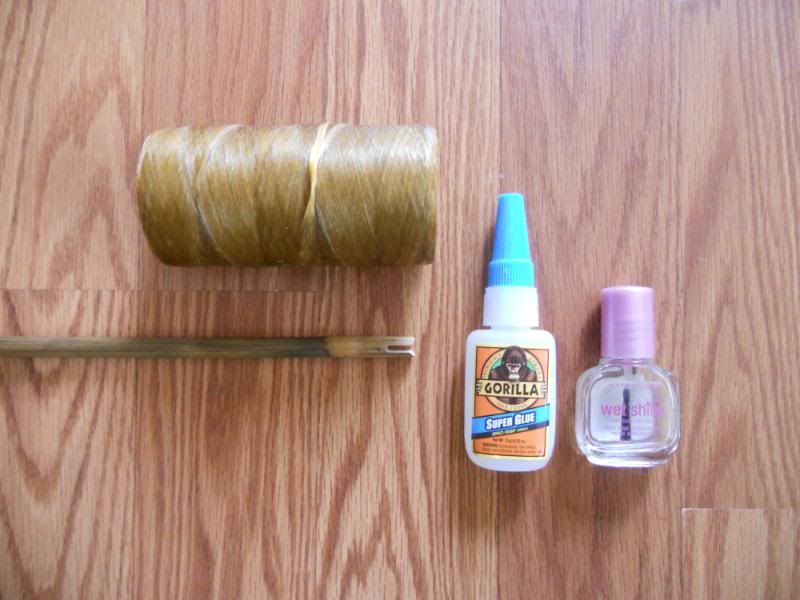
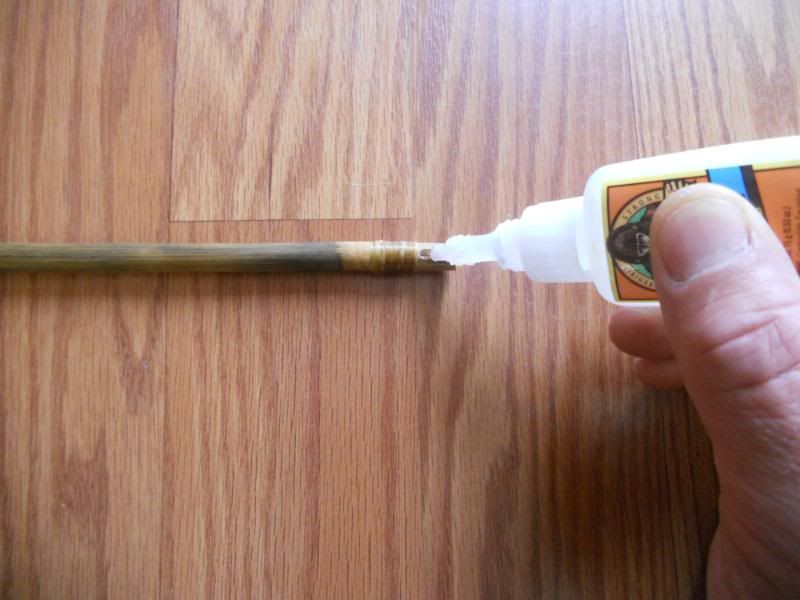
We have to wrap the Self-Nocks to prevent them from splitting.  I'm using Artificial Sinew.  Any thread will work.


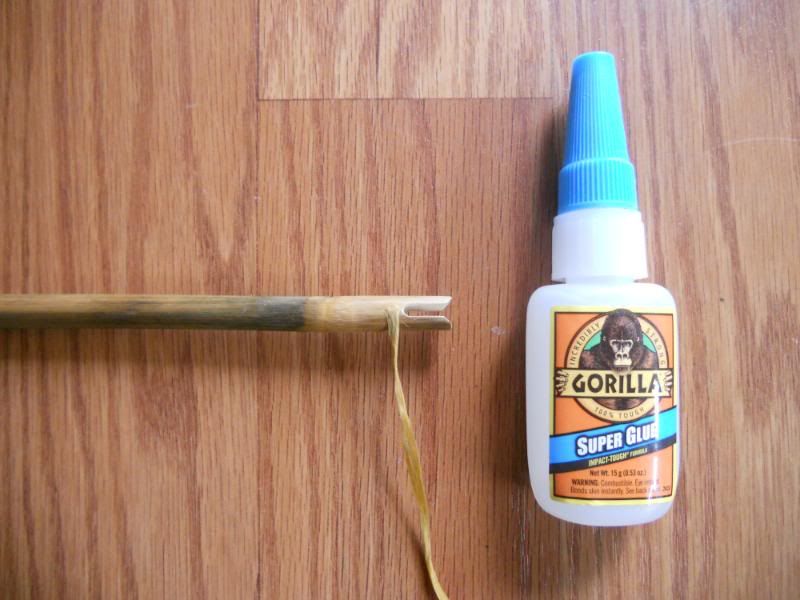
I start by gluing my Sinew down with a little dab of Super Glue.


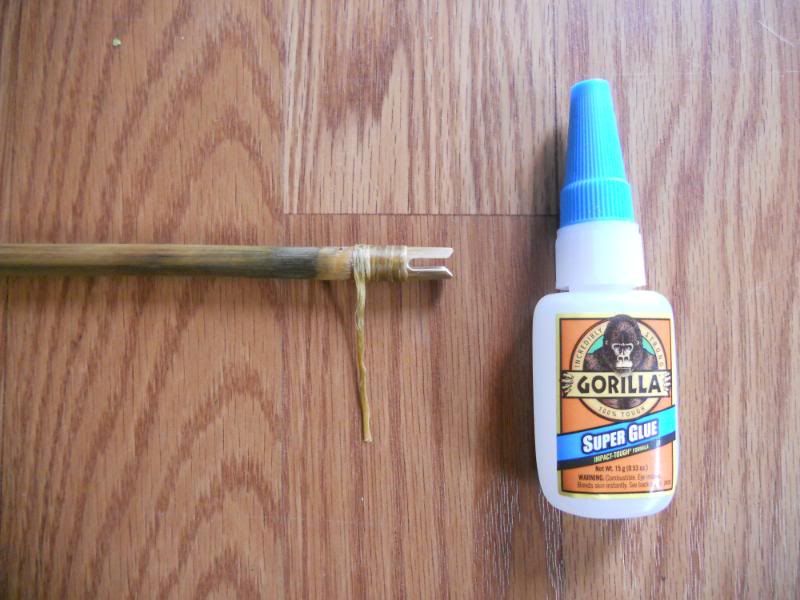
Then I just wrap down the arrow about 1/2" and secure the Sinew again with a little Super Glue.  Try and get this nice and tight.


Cut off the extra and coat the whole thing in clear nail polish or Super Glue.  You will also want to saturate the inside of the nock with Super Glue to add strength.


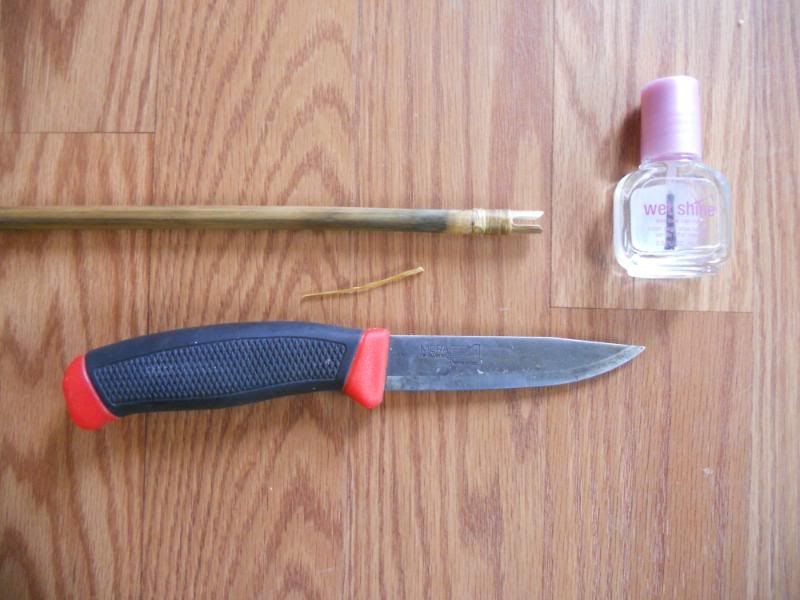
Nocks are all finished up!
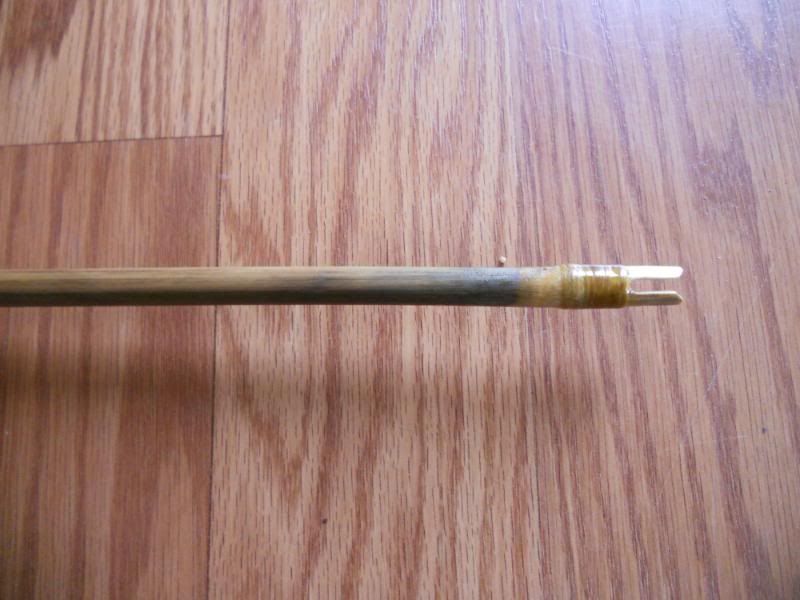
 

Offline tenbrook

  • Tradbowhunter
  • Trad Bowhunter
  • *
  • Posts: 1025
Re: Nock Photos?
« Reply #8 on: November 17, 2011, 09:37:00 AM »
Finished Arrow.


Offline Aznboi3644

  • Trad Bowhunter
  • **
  • Posts: 142
Re: Nock Photos?
« Reply #9 on: November 18, 2011, 09:04:00 PM »

Users currently browsing this topic:

0 Members and 1 Guest are viewing this topic.
 

Contact Us | Trad Gang.com © | User Agreement

Copyright 2003 thru 2024 ~ Trad Gang.com ©