Author Topic: DIY Feather Burner  (Read 686 times)

Offline die_dunkelheit

  • Trad Bowhunter
  • **
  • Posts: 88
DIY Feather Burner
« on: October 10, 2016, 08:35:00 PM »
I know this is less of a bowyering topic, but it might help someone.
I recently made myself a feather burner powered by an old PC power supply I had laying around.
On a regular molex connector the black wires are ground, red is 5v, yellow is 12v, all at 5amps.
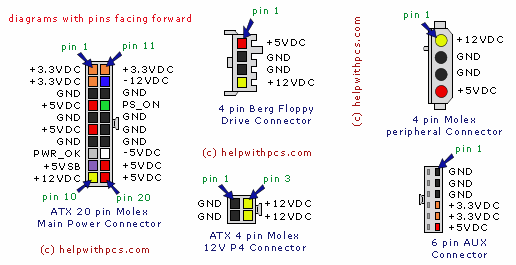
 

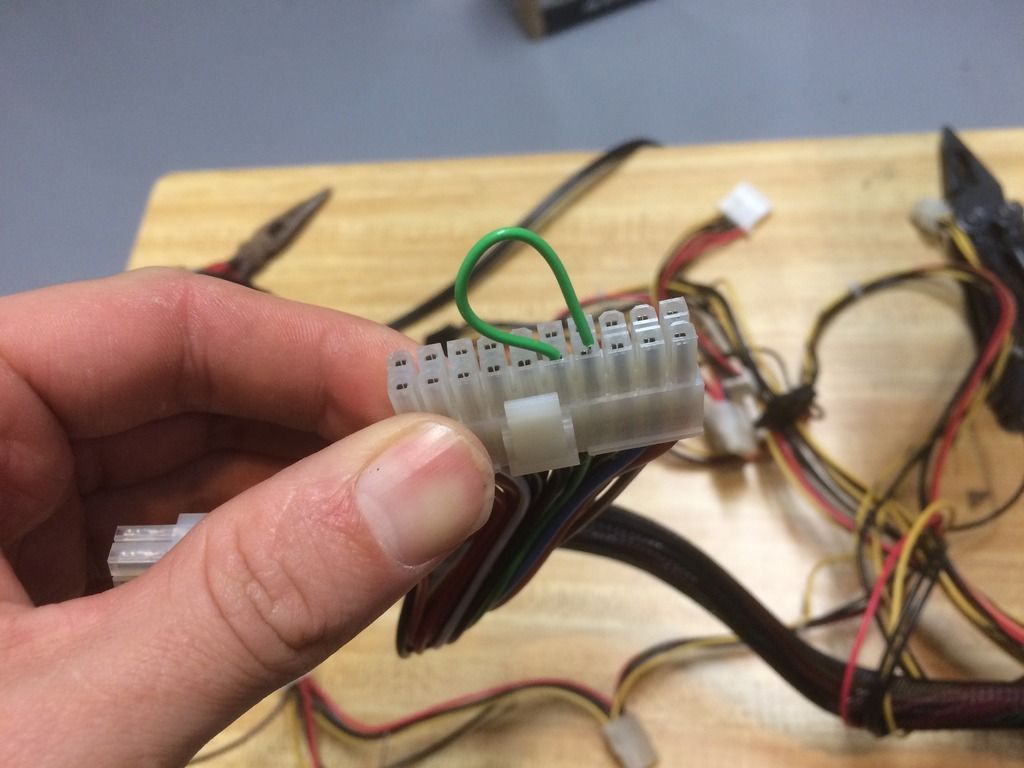
A jump needs to be made between PS_ON (it's the only green wire in the whole bundle) and pretty much any black wire on the 20 or 24 pin connector so that the power supply can be turned on with the switch on the back. In the future I'm going to replace this jump wire with a switch when I build a more permanent housing for the PSU with an output and switch panel.
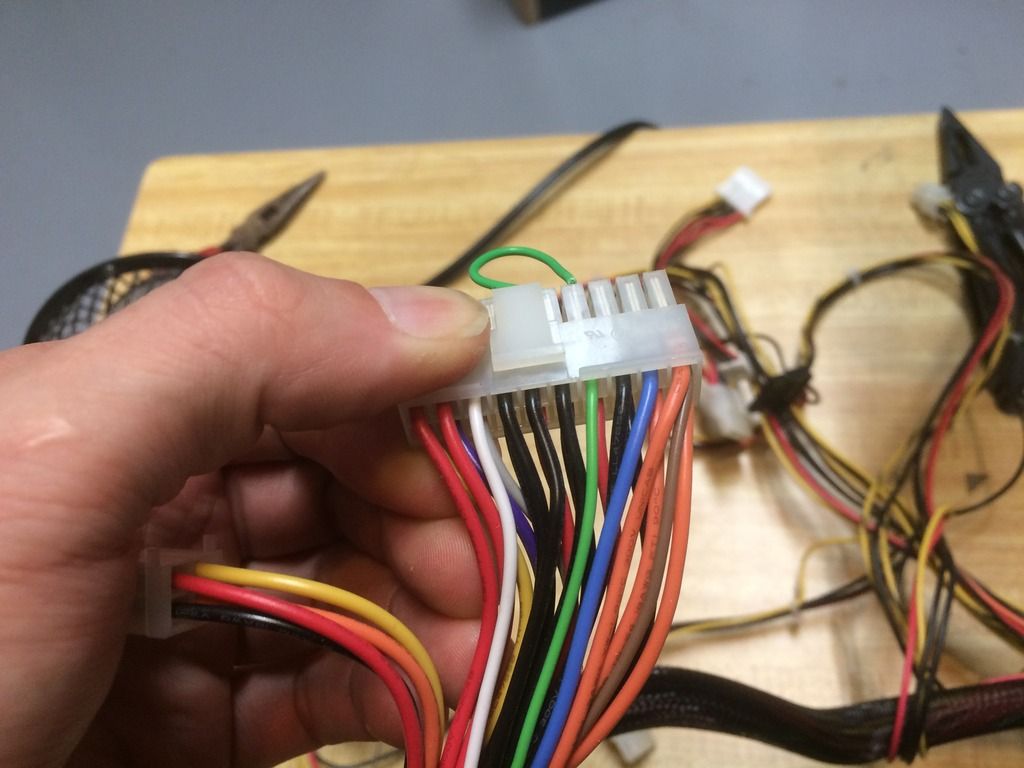


Then just pick the molex bundle you'll use and cut the end off, strip the red and one black wire and crimp on an eye (see them in use in later pics).

Next I took some random wood I had laying around which was about 1 1/2 x 3/4 and cut 2 pieces 2.5 inches long.
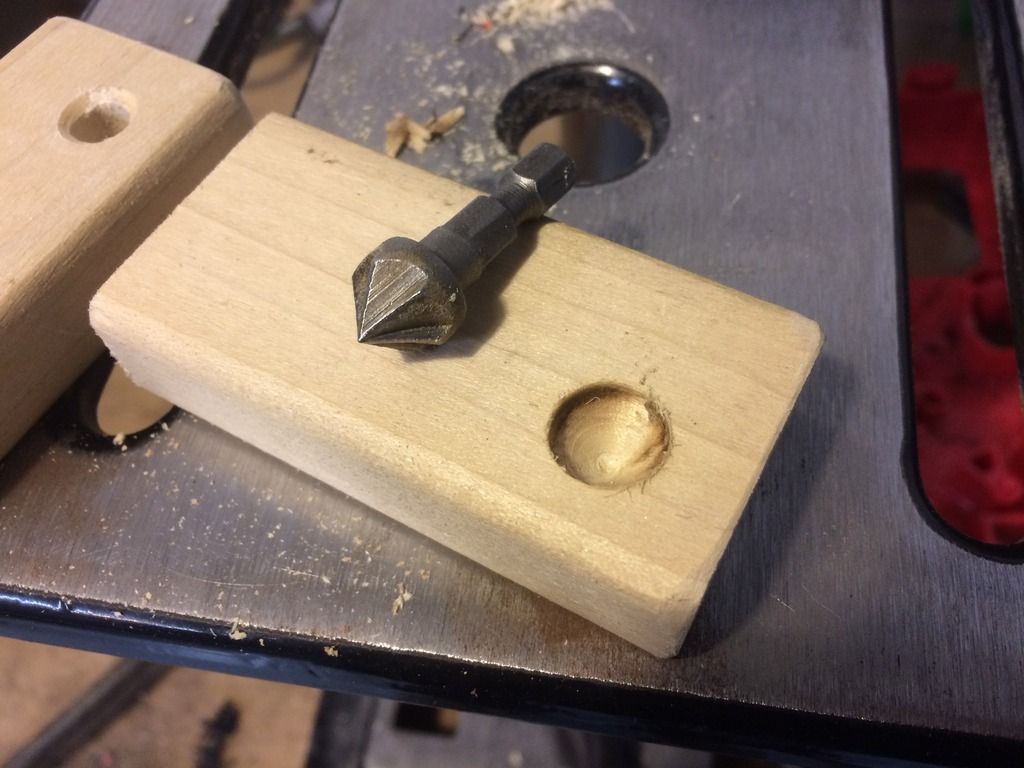
I drilled a 1/8 inch hole partially through one and all the way through the other located 1/2 inch down and 1/2 inch from the edge. I opened the one I drilled all the way through to 5/16" and used a countersink bit to tapper both sides.
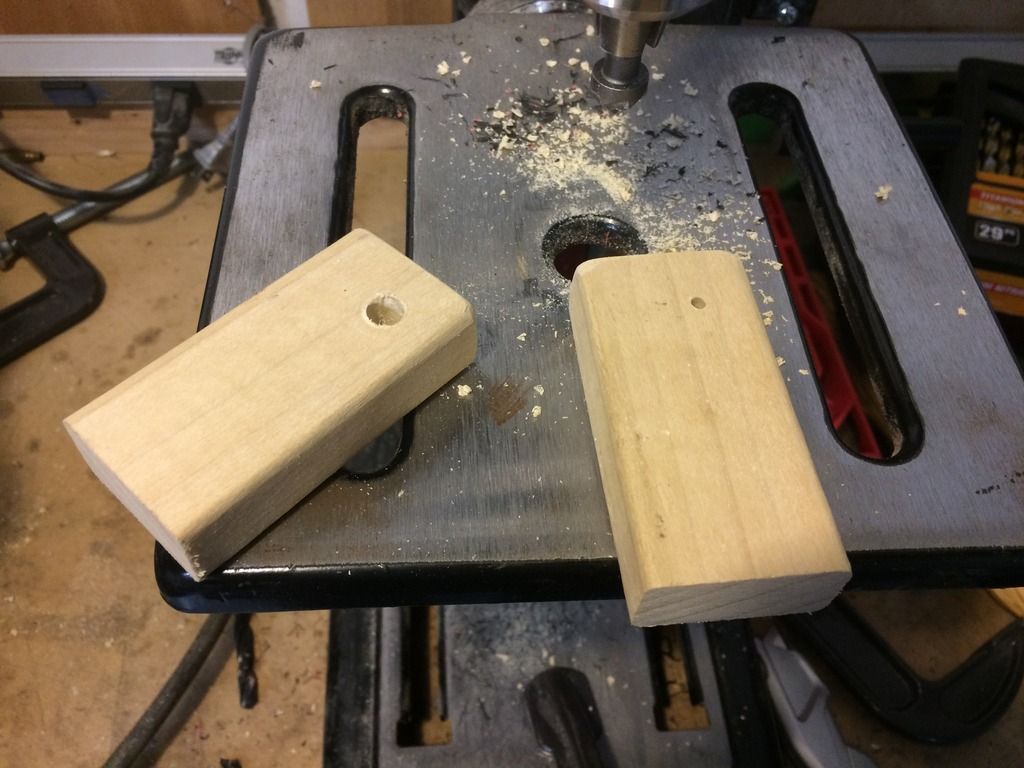
 

I then used the countersink bit to open the partially drilled hole up, until the hole was the full diameter of the countersink bit (this is the tapered hole the nock will spin in).
 

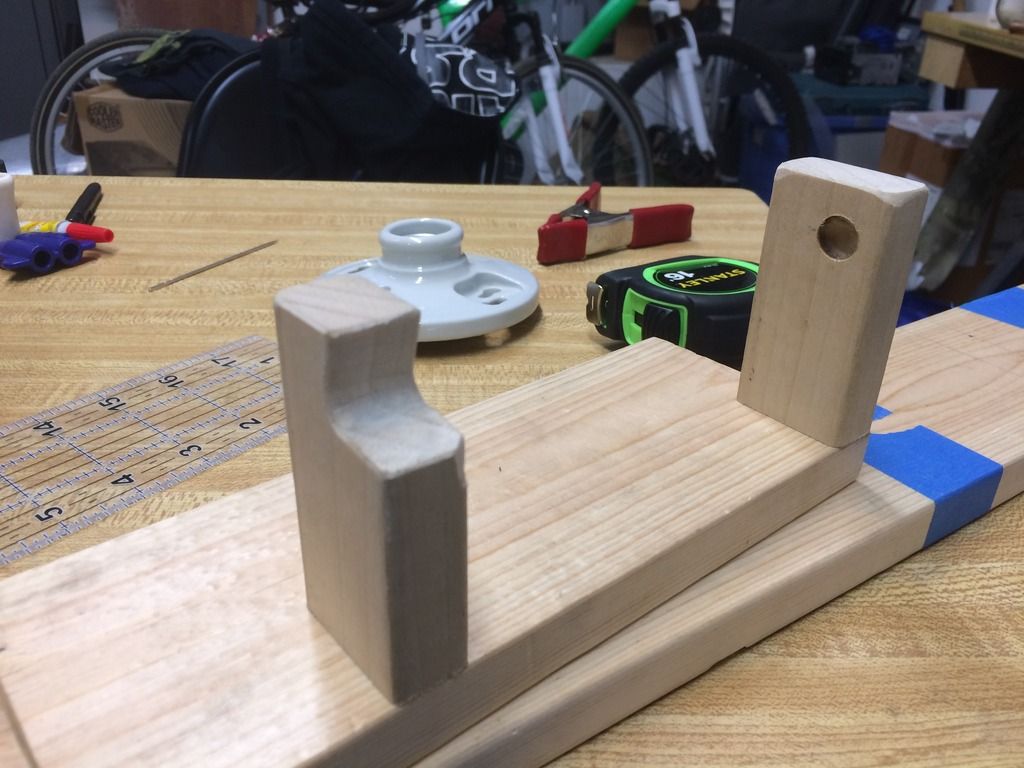
I cut the corner out of the one with a 5/16 hole and the two blocks were then mounted to the base with 2 screws each.
 

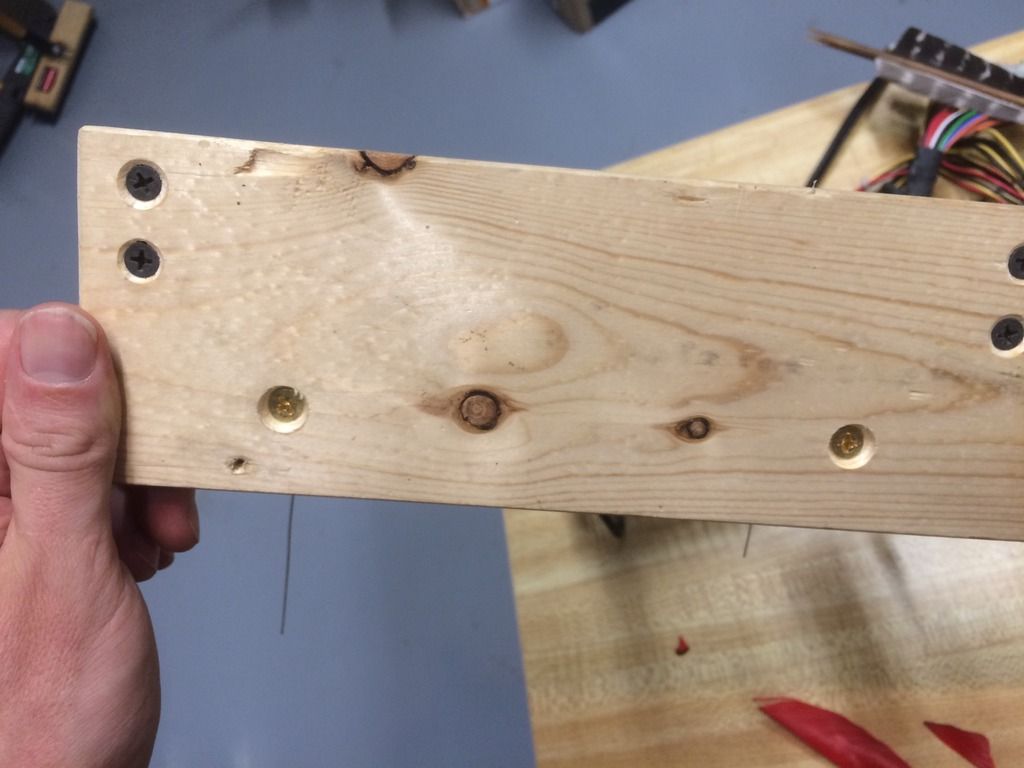
Next I drilled 2 5/32 inch holes in the base and countersunk them on the bottom side then ran a 3 inch brass 10/24 machine screw through them secured with a nut on the top. The holes are countersunk pretty deep because these screws will be electrified.
 

I added another nut 1 inch down from the top and added the 2 wires I previously crimped eyes onto followed by another nut, tightened, and another nut to double nut the top so it would come loose when I loosen the wingnuts coming next..
After that I just add my nichrome wire and a wingnut.
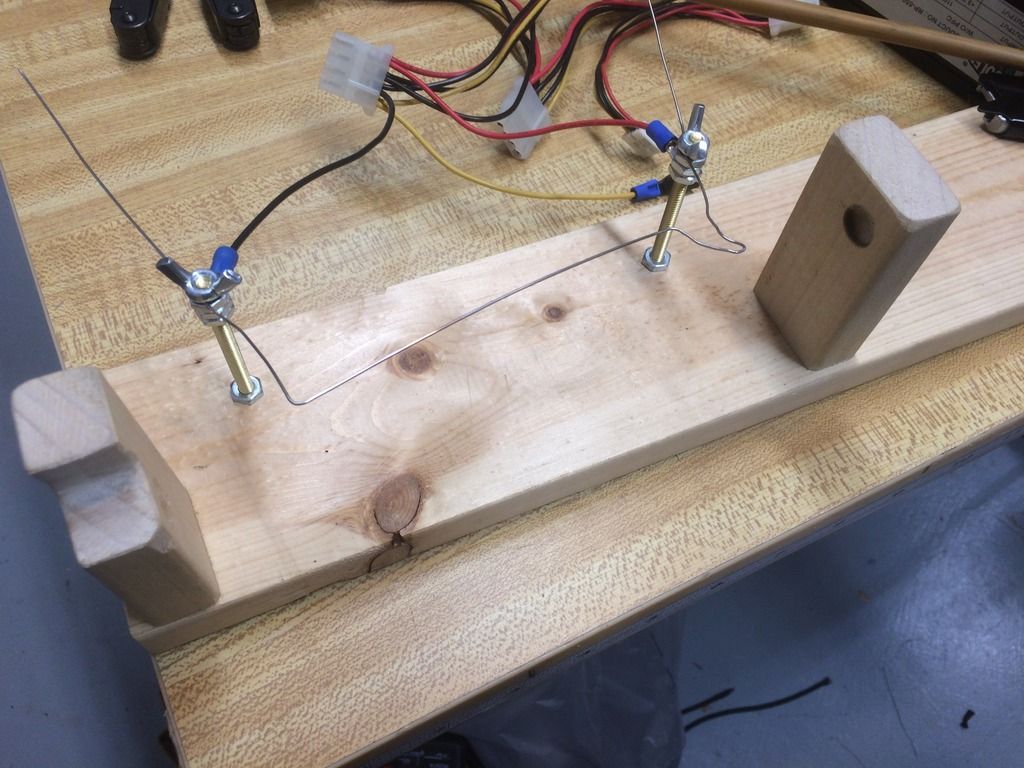
 

Turn it on with the power supply switch and it works great.
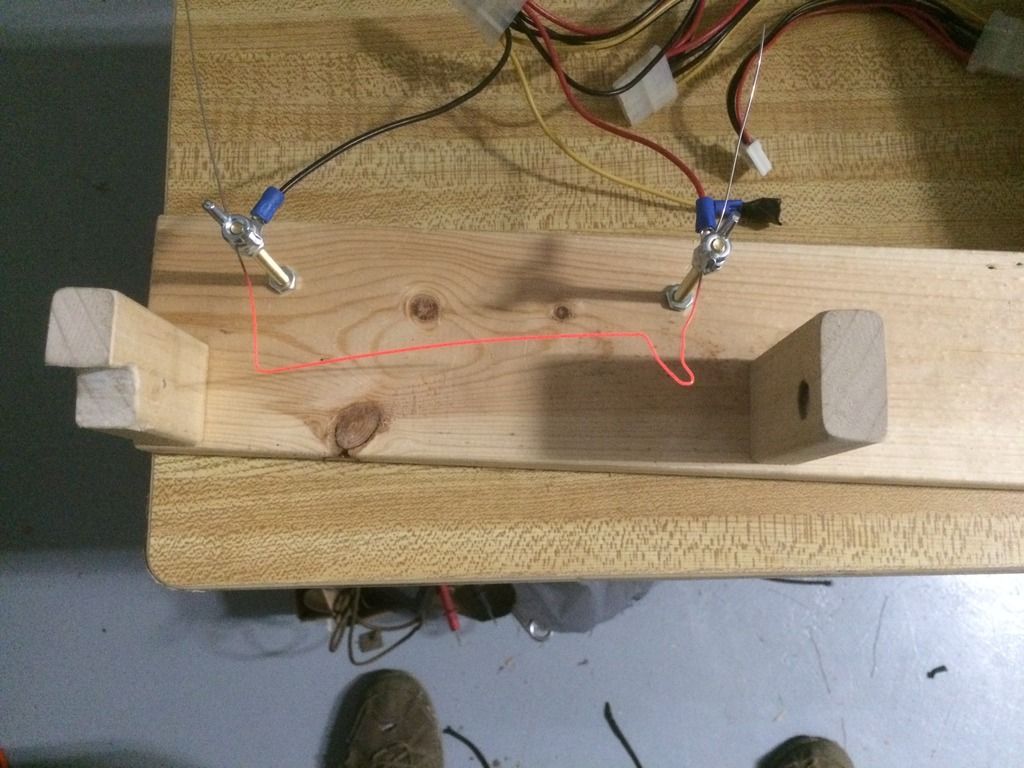
 

Use a fan to help evacuate the smoke, it's terrible. I had already burned the barred cock feather before I decided to take video. Also, for some reason the wire doesn't appear to be glowing as much in the video as the photo above.
 

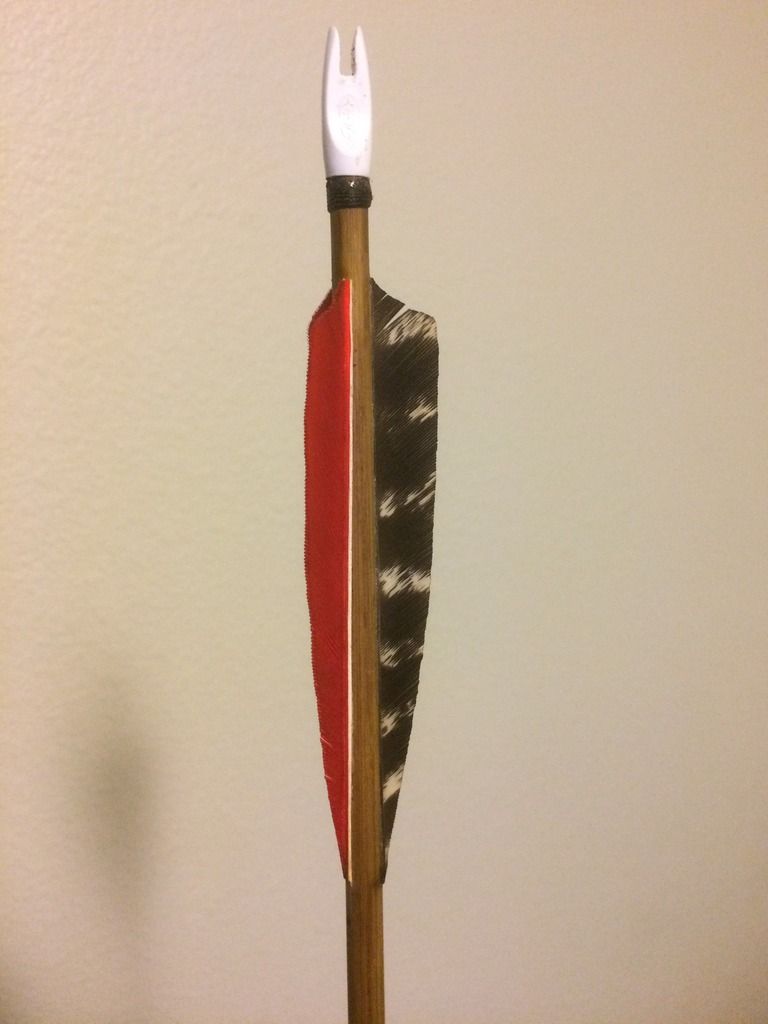
After burning just wrap your finger around the shaft and pull the fletching through to knock off the carbon.
 

Sources:
Nichrome Wire $7
I was able to find nichrome wire locally at a vape shop. I don't vape, but when googling it I found it for sale online for vaping more than anything else. A few calls and I had some nichrome wire I didn't have to wait on the mail for.

Old PC power supply. Free in this case, pretty much any PC power supply will do. I intend on making hot cutters for nylon webbing with this power supply for use in my gear manufacturing, so this made more sense for me than a model train transformer.

Brass machine screws, nuts, wing nuts. Got these at Lowe's, less than $5


Future versions:
Next time I'll use a larger diameter brass machine screw so I can drill a 1/16" hole through it for the nichrome wire to pass through to simplify the adjustment of the nichrome.
-Ghost

Online Roy from Pa

  • Administrator
  • Trad Bowhunter
  • ****
  • Posts: 20678
Re: DIY Feather Burner
« Reply #1 on: October 11, 2016, 04:59:00 AM »
Very nice.

Offline die_dunkelheit

  • Trad Bowhunter
  • **
  • Posts: 88
Re: DIY Feather Burner
« Reply #2 on: October 11, 2016, 08:13:00 AM »
Yeah I couldn't be happier, and the finished arrow looks amazing with the natural barred cock feathers.
-Ghost

Offline EwokArcher

  • Trad Bowhunter
  • **
  • Posts: 332
Re: DIY Feather Burner
« Reply #3 on: October 11, 2016, 08:49:00 AM »
Dude I love it, you put this together great as well. I'll be saving the link for a future project. Please keep those pics in your photo bucket or whatever, I always think it's sad when I find an old but would be amazing build along that has long since had its photos removed.

Offline Ringbill

  • Trad Bowhunter
  • **
  • Posts: 27
Re: DIY Feather Burner
« Reply #4 on: October 11, 2016, 05:55:00 PM »
I did the same thing. the only difference is that I wired in a light switch where the jumper goes to turn it on off easily. works great.

Offline die_dunkelheit

  • Trad Bowhunter
  • **
  • Posts: 88
Re: DIY Feather Burner
« Reply #5 on: October 11, 2016, 06:59:00 PM »
Quote
Originally posted by Ringbill:
I did the same thing. the only difference is that I wired in a light switch where the jumper goes to turn it on off easily. works great.
This power supply has a switch on the back, but I'm still going to change it a little. I regularly find myself needing power at controlled voltages/amps to do random things and I've seen PC power supplies turned into lab power supplies which would be perfect for me. So I'm going to build a box for it with an output panel with switches for each output and an overall "ON" switch under a switch hood so I don't have to flip it around to hit the switch on the back if something bad happens. I'll post some followup pics once it's done.
-Ghost

Offline passion for knowledge

  • Trad Bowhunter
  • **
  • Posts: 244
Re: DIY Feather Burner
« Reply #6 on: October 14, 2016, 07:53:00 PM »
Thanks for this....

My weekend project!
Creativity and the search for knowledge are what keep me sane(ish)

Offline die_dunkelheit

  • Trad Bowhunter
  • **
  • Posts: 88
Re: DIY Feather Burner
« Reply #7 on: October 16, 2016, 08:58:00 PM »
Quote
Originally posted by EwokArcher:
Dude I love it, you put this together great as well. I'll be saving the link for a future project. Please keep those pics in your photo bucket or whatever, I always think it's sad when I find an old but would be amazing build along that has long since had its photos removed.
No worries there, I have photos on photobucket that are more than 10 years old because they are still linked to a tutorial. Next I'll be doing a tutorial on bamboo arrows, including reinforced self nocks or plastic nocks.


Quote
Originally posted by passion for knowledge:
Thanks for this....

My weekend project!
For you, Ewok, and anyone else who tries it.
The burner itself is easy, but bending the damn wire will take more time to get right than all the rest combined. You'll also never get it exactly the same again if you change it or it gets accidentally bent.
You'll be doing this after a little while>>            :banghead:      


I thought about making a few bases with just the brass studs and arrow rests so I could just unplug the power supply from it and plug it into a base with a different pattern bent in the wire.  But then I made an executive decision that the girlfriend could deal with shield cut so I didn't go that route.

If you wanted to go that way you could get some molex male connectors and wire them in the same way, red wire + one black wire. Then literally plug the existing molex on the power supply into the burner base with the cut pattern you need. When I build the enclosure for this power supply I'll probably do that so I can move the power supply between the burner and the various webbing cutters I mentioned using it for.

Here are some new boo arrows I just made for the GF. Same natural barred cock feather, but with 2 truflight hivis yellow hens. Not that she needs hivis yellow, she's a pretty good shot, but her other arrows have yellow hens too.
   
-Ghost

Offline YosemiteSam

  • Trad Bowhunter
  • **
  • Posts: 1092
Re: DIY Feather Burner
« Reply #8 on: October 17, 2016, 01:03:00 PM »
Nice!
"A good hunter...that's somebody the animals COME to."
"Every animal knows way more than you do." -- by a Koyukon hunter, as quoted by R. Nelson.

Users currently browsing this topic:

0 Members and 3 Guests are viewing this topic.
 

Contact Us | Trad Gang.com © | User Agreement

Copyright 2003 thru 2024 ~ Trad Gang.com ©