Author Topic: First Bow Build Along  (Read 633 times)

Offline razorback

  • Trad Bowhunter
  • **
  • Posts: 2166
First Bow Build Along
« on: March 16, 2009, 10:04:00 PM »
Well I have had several threads going that have been dealing with this bow. Started with me finding a 2"*10" board in the barn at the YMCA camp that we live at. At first I was looking for a board to use to make a form to bend an osage stave on but when I got this board home I realised it was very heavy. So I ripped a piece of of it and looked for help identifying it. After much conjector by many knowlegable, and some not so, people here and in other places i finally discovered that it may be yellow Birch.      :smileystooges:  Without your help this would have been a much more difficult and less satisfying process.

 
Keep the wind in your face and the sun at your back.

Offline razorback

  • Trad Bowhunter
  • **
  • Posts: 2166
Re: First Bow Build Along
« Reply #1 on: March 16, 2009, 10:14:00 PM »
I Then continue the tillering process working on reducing the bow to 50# @ 28" which after much work on a very pesky lower limb, that just wouldn't lighten up I managed to do.


6" Brace
 

Drawn
 

Unstrung
 

Everything was going along very well so I started to round the edges smooth things out and cut a shooting shelf in. I decided to put a shelf in it for 2 reasons. Firstly I am trying to learn and this is just another skill, and secondly I like the look of them.


Keep the wind in your face and the sun at your back.

Offline razorback

  • Trad Bowhunter
  • **
  • Posts: 2166
Re: First Bow Build Along
« Reply #2 on: March 16, 2009, 10:41:00 PM »
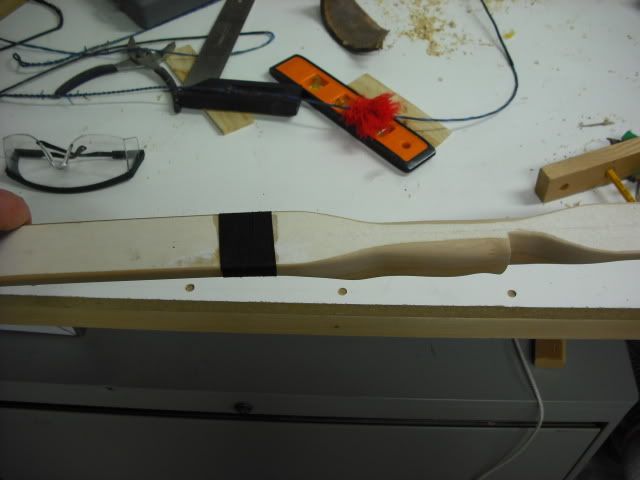
Well Everything has been going along very nicely, so it is time to start finishing this bad girl up. I start to do the sanding necesary to get it smooth and to round off all the corners. Once that is done I start to shoot her in. At first the hand shock is awful, but I get more wonderful advice and reduce the tip mass and bring the limbs into better timing. I also add wool to the string and get the handle well shaped. All of which brings the shock down to acceptable levels. I am checking it regularly on the tiller tree and only need to make a few simple adjustments. Now I am ready to do a final sanding to get it as smooth as a babies backside and put a couple of coats of tung oil on it. I am going to check it for the last ime on the tiller tree when DISASTER STRIKES!!!!!!!
                 :scared:    :scared:  
There is a splinter about 2" below the fade on the lower limb. I didn't hear or feel anything so I was lucky I saw it before taking anymore shots. I had shot it about 150 times so far.


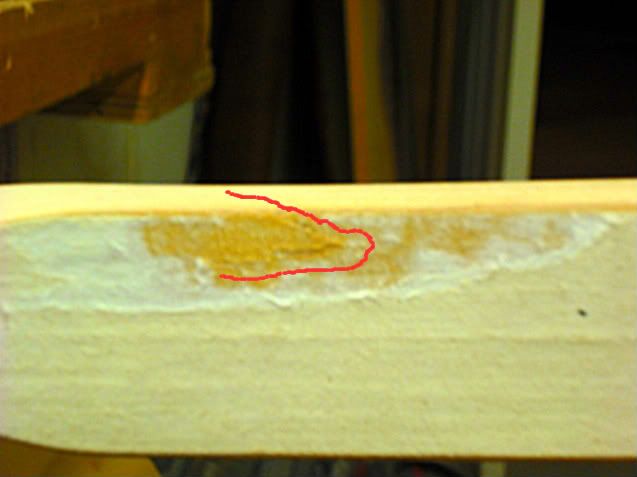
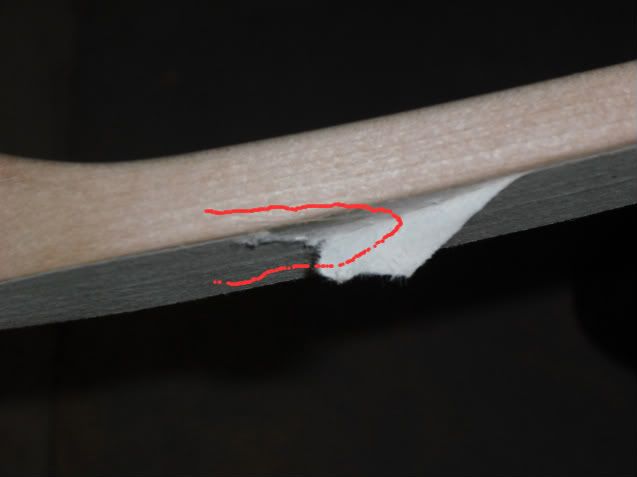
I cleared teh backing away from the area and filled the crack with super glue. I then wrapped it with serving thread and soaked that in super glue.


I will check it tomorrow to see how it will hold up and find out if I still have a bow or firewood. Either way I have a great learning experience and a looking forward to the next bow. i can get about 6 bows out of this board so I should end up with a couple of shooters.
Again thank you to all who have helped me along with this project. With out your help this would have been more difficult and frustrating and I may have thrown the towel in.
  :notworthy:
Keep the wind in your face and the sun at your back.

Online Pat B

  • TG HALL OF FAME
  • Trad Bowhunter
  • *****
  • Posts: 15009
Re: First Bow Build Along
« Reply #3 on: March 16, 2009, 11:57:00 PM »
Tony, she looks mighty good. Too bad about the splinter but it happens. You have the right attitude for sure. Congratulations!
Make the most of all that comes and the least of all that goes!
TGMM Family of the Bow

Offline razorback

  • Trad Bowhunter
  • **
  • Posts: 2166
Re: First Bow Build Along
« Reply #4 on: March 17, 2009, 06:11:00 AM »
Thanks Pat. It might work out to be a shooter yet. I have seen plenty of examples on here that look a whole lot worse and still come up good. Again, thanks for all your help and support.
Tony
Keep the wind in your face and the sun at your back.

Offline Broke another one

  • Trad Bowhunter
  • **
  • Posts: 69
Re: First Bow Build Along
« Reply #5 on: April 16, 2009, 12:08:00 AM »
Good luck man, I really hope that super glue holds. Its to good a bow to lose.
If I am wrong let me know it.

Offline Apex Predator

  • Trad Bowhunter
  • **
  • Posts: 3372
Re: First Bow Build Along
« Reply #6 on: April 16, 2009, 05:41:00 AM »
Great job so far!
I didn't claw my way to the top of the food chain to eat vegetables!

Offline kodiakkid

  • Trad Bowhunter
  • **
  • Posts: 246
Re: First Bow Build Along
« Reply #7 on: April 16, 2009, 06:07:00 AM »
Looking good to me. I have seen several on here that had the same problem and remedied the same way. There's no reason the nylon thread and super glue shouldn't work for you too. Thanks for sharing. Paul<><
Always strive to do the right thing. Don't beat yourself down when you mess up. Ask for forgivness and keep on keeping on.

Offline str8sh2ter

  • Trad Bowhunter
  • **
  • Posts: 163
Re: First Bow Build Along
« Reply #8 on: April 16, 2009, 07:28:00 AM »
Great job.Keep us posted as to the outcome.

Offline va

  • Trad Bowhunter
  • **
  • Posts: 194
Re: First Bow Build Along
« Reply #9 on: April 16, 2009, 10:21:00 AM »
Awesome work on found material.

I love the tiller.  Looking at that tiller is like rubbing a smooth stone.

great work
Poor folk with poor ways, but rich just the same.

Users currently browsing this topic:

0 Members and 1 Guest are viewing this topic.
 

Contact Us | Trad Gang.com © | User Agreement

Copyright 2003 thru 2024 ~ Trad Gang.com ©