Look at the inset with the picture showing the thumb joint along with the words written by Howard Hill. The alignment of the thumb joint is very important yet many do not even know where the thumb joint is located. I've read numerous posts where persons have mistaken the next joint along the thumb as being the thumb joint when it is not. Learning and understanding the importance of getting the heel down and aligning the bones in the wrist is a foundation to this grip.

Howard Hill had it figured out extremely well.
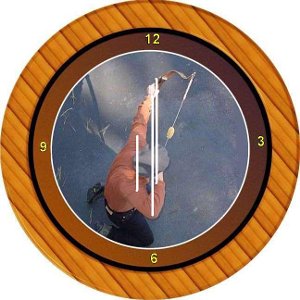
Grab a straight handle Hill bow exactly as Howard described in his book with the bow hanging from your side(pic). Experiment with the following:
First, Loosen the fingers in your grip and you will notice that the tip of the lower limb, pointed to the rear, will lower to the ground so that the bow is no longer parallel to the ground. With loose fingers, you will maintain good contact with the thumb and index finger around the top of the straight grip, but the lower part of the grip will pull away from the heel of your hand because the bow's center (balance point) is lower on the grip. Now, tighten the grip with your lower fingers and notice how the bow handle pulls up into the heel of your grip and the bow is now balanced and horizontal to the ground. Getting the bow into the heel of the hand is important as this centers your grip within the balance point of the bow. I'm of the opinion that some of the handshock felt and complained about is actually user enhanced (induced) as a result of NOT getting the heel down when shooting the straight grip. Without getting the heel down, you are choking your grip up above center causing the limbs to return out of time. This will greatly increase vibration felt throughout the grip.
Secondly, While holding the Hill bow by your side as described by Howard using the proper grip with the bow parallel to the ground:
Keep your bow hand against your pant seam with your elbow drawn tight into your side so that your arm is hanging straight down and the bow is perpendicular to your shoulders. Your bow arm is now straight with your elbow nearly locked. Your wrist will be rotated to the same position as when shooting the bow completely vertical without any cant. Notice how this straight arm position requires added muscle tension to maintain, it is unnatural. Now, relax you shouders and arm while keeping the thumb of your bow hand against your pant seam. You will notice that the elbow will pull away from your side and the knife edge side (bottom) of your bow hand will pull away from your pant seem. Your arm will naturally hang with a slight bend at the elbow and your wrist will rotate so that the tip of the top limb rotates inward and the tip of the lower limb rotates outward. Now, raise the bow to shoulder height directly in front of you and you'll notice that this natural arm position has a slight bend at the elbow with your wrist in a low/heel-down grip, and the bow will be naturally canted. This affords tension free bone support and will absorb the brunt of any bow recoil into the major muscle groups of the arm and shoulder. If your were to straighten the arm out into a locked position and rotate your wrist back straight and vertical, this would add muscle tension and would direct a good deal of any bow recoil into the weaker parts of the elbow. I'm of the opinion that such a straight arm hold is another cause of felt handshock and is a short-cut to pre-mature elbow/shoulder injuries when shooting a straight handle Hill bow.
A Hill bow will have some jump just from the pure fact that it is very light and nimble in the hand. But, using a good natural grip with a strong natural bow arm easily tames the biggest brute of a Hill bow into a smooth pussycat. This is when you will best appreciate the lightness of the bow as it will become an extension of your arm giving you that great feeling Hill bow fans often rave about.
Best, DB


