search 'leather grip build along' on the pow wow. Has good pictures on the stitching process.
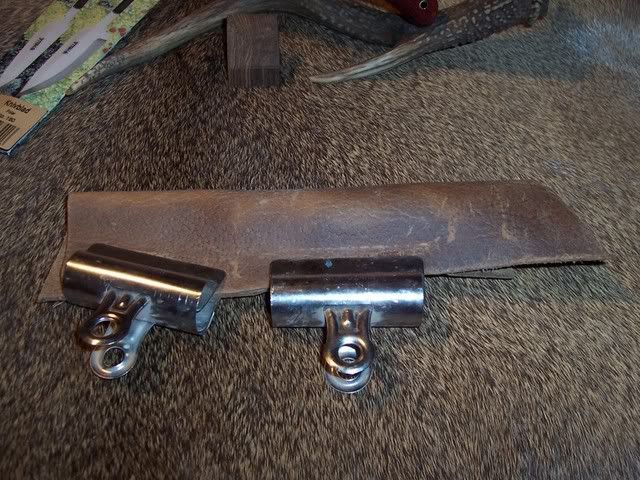
Here is a copy from razorback explaining his process for leather grips. His way of getting the leather the right size is the easiest I've found. Just cut the leather a little big, wet it, and stretch it around the handle of your bow. Hold the leather as tight as possible with the clips. When the leather dries, you have a line to cut it on.
her is how I do my grips wether it be a longbow or recurve...I have pics if needed..
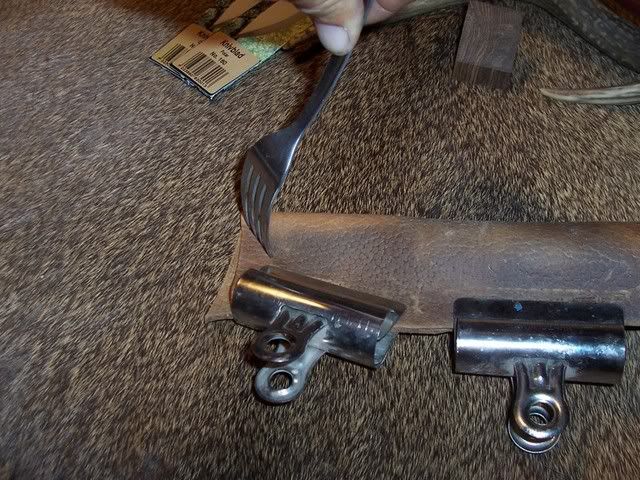
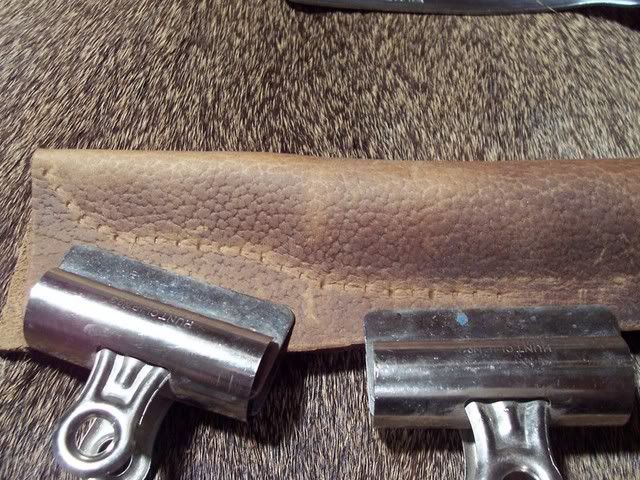
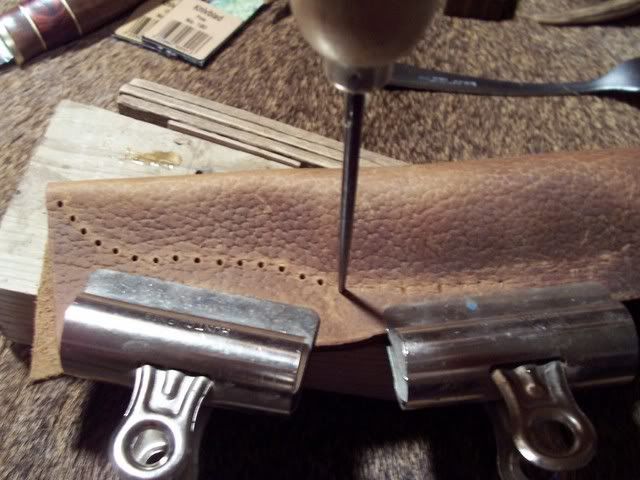
the easiest way to do this is to cut your leather to dimensions then wet the leather under water till it's soak then wring the holy heck out of it then place on your handle then pull... twist till you got it where you want it then get 2 to 3 binder clips(perferably the ones with a sharper edge and not the round edge but the round one will work also) then put the clips on the back of the handle and center it as best as you can and yes this can be done with the contour of recurves handles also and then let it dry for several hours or 24 hrs (if your bow is finished properly then moisture wont be a problem but if unsure then use saran wrap under the leather) after it's dry take the the clips off...you should have lines from the clips imprinted in the leather...then cut right down the lines and do a dry fit to make sure you are even and if you want/ or need to then cut a 1/16" more on both sides of the leather then start 1/8" in and draw a light line with a sharp pencil or nail ...measure from top and bottom before you draw your line and use either a stitching wheel (totally awesome to have and use if you work alot with leather ) or a 4 prong kitchen fork and press firm into the leather to get a imprint then use your 4th imprint as a guide and do again and repeat until you get it to where you want it and do it to the other side as well....then use a sharp awl or something similar to punch a small hole and once you get your holes all marked and punch then put a light to med. coat of barge cement on the leather until you get to a 1/4" of the holes then carefully put it on your handle and gently rub with your thumb to smooth out all the contours and glue and center the holes on the back of the handle and wait a few minutes then you could start lacing..start from the top hole and go thru 2 times and gently pull to tighten but not to much because you can tighten later...start stitching in either a baseball stitch or a "X" stitch..once you get to the bottom holes take a small and i mean small but a strong sharp awl or a nail...what ever you have on hand and go to the to the top stitch and put under the lace and gently pull out/up and go to the next one and repeat....make sure you put your thumb on the stich you just pulled when you start your next set of holes...this keeps the stich from shifting...this will tighten your stitch with out pulling thru the leather and when you get to the bottom stitch go thru those holes again and tie the lace snug...you can either tie it under the leather or top of the leather...your choice and then cut lace/string flush and burn the tips if you want and /or put a small drop of super glue on the knots and once you finish that the only thing you have to do is rub the lace with your thumb several times and step back and admire your work : ) there are many ways to do this but i perfer this way and yes it might take longer but i choose to do this and all of my leather handles i done for my self and friends and alot of other people they are still firmly in place and really look professional....hint/tip ....i like to roll the top and bottom and the sides of the leather also before i put my holes and stitch...it has a real cool look to it and i would use 2 to 3oz thick leather to do the handles any thinner it will rip in time or when you start stitching and any heavier it will feel thick in your hand....any other questions...feel free to give me a shout........artie
These are the clips he is talking about. In these pictures, I am making a sheath. The knife is in the leather.
