Most of us build bow-display racks the same way – two widely-spaced vertical wood slats studded with dowels, on which bows are positioned horizontally and displayed. We can call them Horizontal-Display Bow Racks. I’ve seen a few exceptions to these sorts of display racks, but not many.
We build them that way because that sort of common horizontal bow rack works very well. It shows off the profile of each bow, and bows can be easily taken off the rack, inspected and then returned to the rack with little fuss.
But there are situations in which a different sort of bow-display rack is desired. Occasionally, for example, I want to display just one special bow and I want that bow to be equipped with a bowquiver loaded with period-correct hunting arrows. The problem that arises is that bows equipped with a loaded bowquiver don’t generally display well on the typical horizontal racks. Inevitably the mass of the arrows either hides the bow’s profile or the arrows hide the surrounding bows.
What to do?
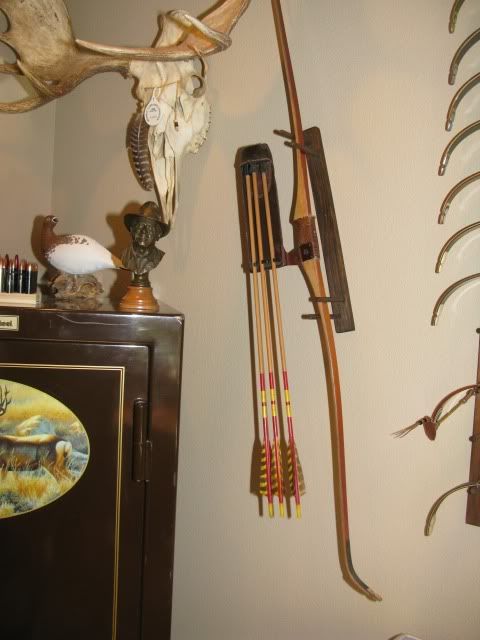
Years ago I created a bow rack I call the Suspended-Display Rack. I created it specifically to hold and highlight a single hunting bow equipped with a full bowquiver. Using this rack, the bow appears suspended in space, out away from the wall. Here are two examples
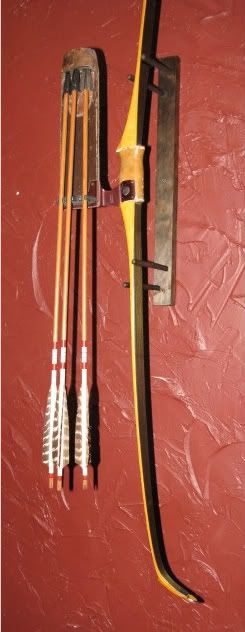
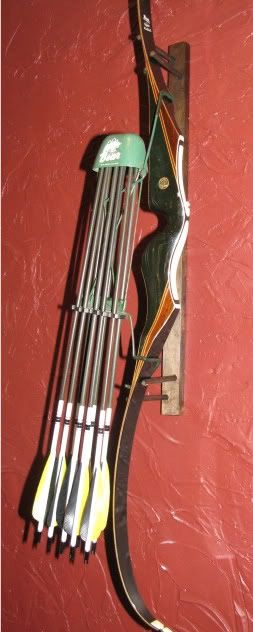
With this rack, the bow is positioned vertically, almost as if it were in use. The rack and bow can also be angled for whatever artistic effect you desire. And unlike other bow displays that anchor vertical bows to the wall with straps or bands, my suspended-display bow rack allows bows to be conveniently removed for inspection and then fairly easily returned to the rack.
The suspended-display bow rack is easy to make. I’m no wood-worker, but can turn out these rack is quick order.
The suspended-display bow rack works on the idea of holding the bow upright with the tension created by four staggered pegs, two at the top of the rack and two at the bottom. Each rack is made to fit a specific bow model. Generally, I’ll design each rack to grab the bow at top and bottom about where the riser fadeouts disappear into the limb laminations. Bows with short risers require shorter racks. Bows with longer risers, as shown below, require a longer rack. For example, the rack below for the 1950 Kodiak on the left measures just 19 inches in length, while the rack for the 1969 Super Kodiak, with it much longer riser, measures 29 inches in length.
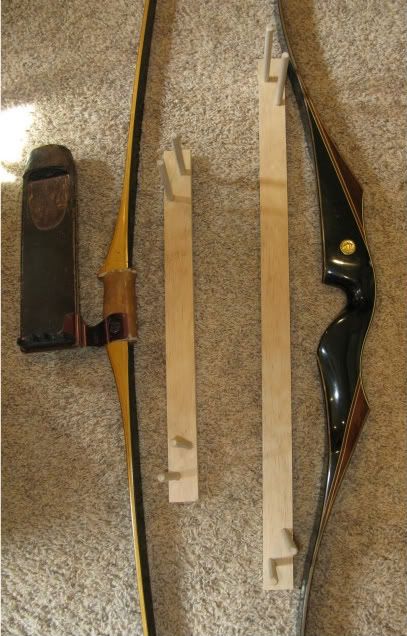
For the slat part of the rack I use a quality pine board 1.5 inches wide by .75 inches thick. Do yourself a favor and buy what is called “Select Grade Pine.” It will be denser, straighter and much less likely to split.
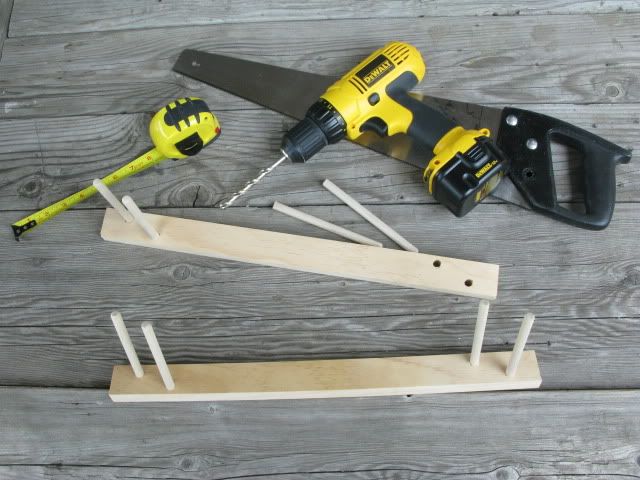
Drill two staggered holes using an 11/32-inch drill at the top and again at the bottom of your rack. A smaller pilot hole is a good idea. The dowels I use are 3/8-inch diameter pine dowels, and I cut them into 5.5-inches lengths. I round one end of the dowel with coarse sandpaper and just slightly taper the other end. After inserting the tapered end of the dowel into the drilled hole in the slat, I gently tap the dowel in place with a hammer. The fit is snug and secure. No glue is necessary.
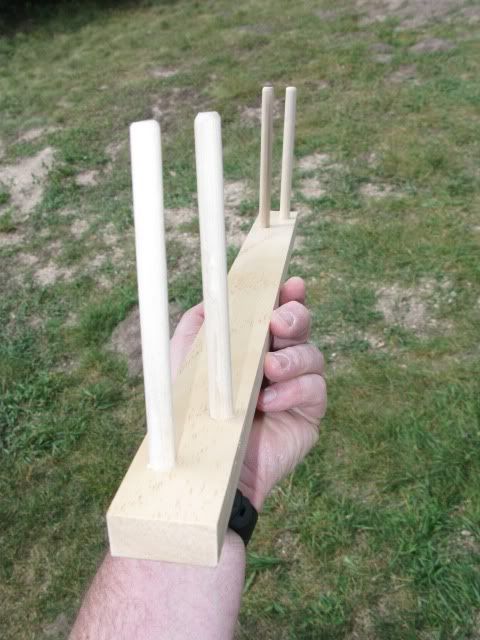
I then drill a single hole in the rack for mounting the rack to the wall, and use a black or brass 2-inch screw for that purpose. I taper the mount-hole mouth so as to be able to seat the screw flush with the wood. Using a soft cloth, I stain and seal my racks with a single rubbed-on application of Minwax Wood Finish Dark Walnut 2716.
When mounting the rack to the wall, I locate a stud in the wall and screw to that. By tightening the screw semi-firm, I can still angle-adjust the rack with the bow in place to please my eye.
The Suspended-Display Bow Rack is another way to show off your favorite bows.
What do you think of this sort of bow-display rack?
Do you have any unique ways or racks that you use to display your bows?


