INFO: Trad Archery for Bowhunters


Author Topic: Basket Quiver Build-along  (Read 12966 times)

Offline tms

  • Trad Bowhunter
  • **
  • Posts: 45
Basket Quiver Build-along
« on: July 17, 2005, 12:02:00 AM »
Hey Guys,

Earlier this week I promised to post some pictures of the basket quiver that I'm making for Mike.  I decided to make it sort of a tutorial so that anyone else could build one if they wanted.  It's really simple to do, the hard part is just getting everything together.

I have a lot of pictures, but they're small enough that you can follow along on dial-up.

This will be a quiver about 23" long.  Mike asked for 22" but because of the tapered end, I've added an inch.

The first step is to get the materials.  I use mostly Chinese reed, which is available at any basket making supplies vendor.  For this quiver, I'm using 1/4" flat, 3/8" half oval (rounded), 3/4" flat,
     

1/8" round,
     

and 3/16" bamboo chair cane.
   

You buy this stuff by the pound, and in Seattle, it costs about $9.00/lb
     

I'll post a link to my source at the end of the sequence.

Tom

Offline cjones

  • Moderator
  • Trad Bowhunter
  • ***
  • Posts: 1356
Re: Basket Quiver Build-along
« Reply #1 on: July 17, 2005, 12:05:00 AM »
Can't wait to see this one. Might have to get my wife to make me one.
Chad Jones

TGMM Family Of The Bow

Offline JHR

  • Trad Bowhunter
  • **
  • Posts: 11
Re: Basket Quiver Build-along
« Reply #2 on: July 17, 2005, 12:18:00 AM »
Cool!! Another build-along. What fun we have.

This be an excuse, I mean reason to have another quiver.

Thanks,Jerry
" I don't go out of my way to be politically incorrect" Toby Keith

Offline tms

  • Trad Bowhunter
  • **
  • Posts: 45
Re: Basket Quiver Build-along
« Reply #3 on: July 17, 2005, 12:40:00 AM »
Hey Chad,

When MY wife read your post, she pointed out two typos in my original.  Oh well, I guess we all have our talents.

Okay, the first thing to do after buying the material, is to prepare the amount that you need.  For this quiver, we'll use eleven 25" uprights of 3/8" half oval.  Since ten of them are symetrical, we can combine them into five, 50" pieces, plus one 25" piece.  You always need an odd number.

Determine the amount of flat, round, and cane material you need according to whatever pattern you've chosen.  I usually guess on the long side, as the the stuff's cheap enough, and it's a pain to prepare more if you come up short.

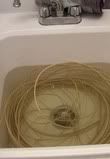
Put all the material in a tub or sink and soak it in hot water.  How long depends on your reed, your water and the temperature.  Go eat lunch or prepare your stains while the reed softens.  Be sure to allow enough time, the reed is very brittle when dry, and soaks up a lot of water.  You can't overdo this step, so take your time
     

The stains I use are water based analine dyes available at any woodworking store, or online from Rockler, or Woodcrafter.  I use the water based because I think they have a more muted color than the alcohol based dyes.

Alcohol based dyes are more color fast, and a whole lot easier to use because they don't bleed as much when working the wet reed.  I just can't get used to their vibrant color.  It seems to me that an accessory used in the woods should have a woodland color and not some brilliant eye popping hue that looks out of place.

Okay, enough soapbox.  Use alcohol based dyes, and save yourself some hassles.  Maybe I just need to learn to mix them better.

Dye the reed you want for color.  I put mine in the microwave to heat it up a bit and it seems to make the water based dyes penetrate better.  I'm not sure I'd try that with the alcohol based dye, it probably doesn't need it anyway.
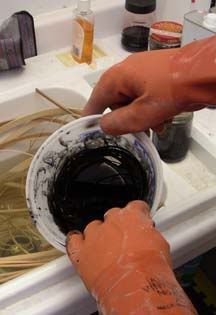
   

Oh yeah, wear gloves, or you'll have the dye bleeding out of your fingers when you handle the reed, and then you will really have a mess.

Tom

Offline tms

  • Trad Bowhunter
  • **
  • Posts: 45
Re: Basket Quiver Build-along
« Reply #4 on: July 17, 2005, 01:09:00 AM »
So, after the half oval uprights have soaked enough to become pliable, they need to be trimmed in the center to allow enough room for them all to come together at the tip.  I usually trim about 5-6" out of the center, from the FLAT side of the reed.  Trim down to about half the thickness.
   

The reed cuts easily when wet.  Don't try this without soaking it first, or you'll screw it up, and I can't help you with it.  Follow instructions, okay?

After you've trimmed the centers of the 50" pieces, it's time to put them on the form.  The form I use to make a 3" diameter quiver, is a piece of 2 1/2" schedule 40 PVC pipe.
   

Notice that the edge has been eased with a rasp.  About a 1/2" champher will do, more might be nice.  The pipe should be about 3" longer than the length of the quiver you want to make.  The holes in my form are from another use, and are not necessary.

I use a 2x2" mounted in my vise, to put the form on.  The form rotates freely so that I can get to any point on the quiver that I need.
   

The uprights are folded around the end of the form and held in position with rubber bands.  Try to bring the folds together at a point and space the reeds evenly around the form.  The last, odd upright should be inserted when everything else is even and looks good.
 

Offline KyLongbeard

  • Trad Bowhunter
  • **
  • Posts: 20
Re: Basket Quiver Build-along
« Reply #5 on: July 17, 2005, 01:13:00 AM »
I've been reading all these build-alongs and it's giving me some great ideas!

Offline tms

  • Trad Bowhunter
  • **
  • Posts: 45
Re: Basket Quiver Build-along
« Reply #6 on: July 17, 2005, 01:45:00 AM »
Next,  dig the bamboo chair cane out of the sink, and stick it under one of the uprights and start weaving over and under around the form.   Pull it up snug , but not tight enough to deform the shape of the quiver.  Make sure that each row is snug against the last.
 

It's a good idea to work over a clean floor, because the long end of wet cane, or reed, will pick up any dirt, sawdust, or table scraps you've left lying around.  And try not to step on it will ya?

Work your way around, and be careful to maintain the shape that you want the thing to have.  As you work further, be sure to roll the rubber bands down ahead of you.  If you have the bands too close, it will tighten the circumference too much, and it'll just be a pain to work as well.
 

About the time you get to the edge of the form, and the end of the tapered section, It's time to change to the 1/8" round reed.  It's a good idea to overweave a small section with both materials to ensure that the ends are well secured.
 

The round stuff, although stiffer, is much easier to weave 'cause you don't need to worry about keeping any twist out of it.  I make about eight circuits around the form with the round before I change to the next material.

Tom

Offline ber643

  • TGMM Member
  • Trad Bowhunter
  • ***
  • Posts: 9205
Re: Basket Quiver Build-along
« Reply #7 on: July 17, 2005, 06:24:00 AM »
I saw someone wearing one of this at ATAR the past weekend and it really looked neet in use, I'm here to tell you. Can't even remember now if it was a kid or adult - doesn't matter.
Bernie: "Hunters Are People Too"

Ret'd USMC '53-'72

Traditional Bow Shooters of West Virginia (Previously the Official Dinosaur Wrangler, Supporter, and Lifetime Honorary Member)
TGMM Family of the Bow

Offline ky_longbow

  • Trad Bowhunter
  • **
  • Posts: 65
Re: Basket Quiver Build-along
« Reply #8 on: July 17, 2005, 06:26:00 AM »
ill follow this thread closely.............always wanted to make on of these!
if your not living on the edge,your taking up too much room!!
MEMBER-K.T.B.A.

Offline Killdeer

  • TG HALL OF FAME
  • Trad Bowhunter
  • *****
  • Posts: 9153
Re: Basket Quiver Build-along
« Reply #9 on: July 17, 2005, 06:40:00 AM »
I am all eyes!  :eek:
Long, long afterward, in an oak I found the arrow, still unbroke;
And the song, from beginning to end, I found again in the heart of a friend.

~Longfellow

TGMM Family Of The Bow

Offline Osagetree

  • TGMM Member
  • Trad Bowhunter
  • ***
  • Posts: 3512
Re: Basket Quiver Build-along
« Reply #10 on: July 17, 2005, 08:02:00 AM »
MORE, MORE!
>>--TGMM--> Family of the Bow

Offline frankb

  • Trad Bowhunter
  • **
  • Posts: 123
Re: Basket Quiver Build-along
« Reply #11 on: July 17, 2005, 08:09:00 AM »
"Don't try this without soaking it first, or you'll screw it up, and I can't help you with it. Follow instructions, okay?"

I love it when these build-aongs are catered for my specific needs!"


 :D   Thank you, thank, you, thank you!   :D

-Frank B
"Until we meet again, may the Great Spirit make sunrise in your heart." ~Author Unknown~

Offline countrygirl

  • Trad Bowhunter
  • **
  • Posts: 598
  • Charter Member
Re: Basket Quiver Build-along
« Reply #12 on: July 17, 2005, 10:05:00 AM »
Now this is a cool thread.
"Gator n 'Dilla Killah"

Offline Philip Morris

  • Trad Bowhunter
  • **
  • Posts: 72
Re: Basket Quiver Build-along
« Reply #13 on: July 17, 2005, 10:31:00 AM »
I agree, gonna try this myself.
Proverbs 27:1 Boast not thyself of to morrow, for thou knowest not what a day may bring forth.

Offline ky_longbow

  • Trad Bowhunter
  • **
  • Posts: 65
Re: Basket Quiver Build-along
« Reply #14 on: July 17, 2005, 11:06:00 AM »
Thomas- i see a video in the works.........heck id gladly pay you for one............   :thumbsup:  
anyone else willing to lay down some cash-for knowledge?????
if your not living on the edge,your taking up too much room!!
MEMBER-K.T.B.A.

Offline Flatstick

  • Trad Bowhunter
  • **
  • Posts: 544
Re: Basket Quiver Build-along
« Reply #15 on: July 17, 2005, 11:33:00 AM »
The information on this site is endless! Thanks for giving us another great build-a along  :thumbsup:
"Good Luck" & "Shoot Straight!"

Offline Hawken1911

  • Moderator
  • Trad Bowhunter
  • ***
  • Posts: 467
Re: Basket Quiver Build-along
« Reply #16 on: July 17, 2005, 11:36:00 AM »
This brings back memories Tom.  I made the one partially shown below about 15 years ago.  I haven't weaved anything since then, but my quiver finally started to fall apart last month.  Your thread has me thinking about trying to make a replacement now.  Thanks.

 
ST. HUBERT'S RANGERS, Brotherhood of the Medieval Hunt.
MICHIGAN LONGBOW ASSOCIATION
Scott Spears Osage English longbow,50#@28"

Offline ky_longbow

  • Trad Bowhunter
  • **
  • Posts: 65
Re: Basket Quiver Build-along
« Reply #17 on: July 17, 2005, 02:26:00 PM »
hawken- maybe your quiver aint fallin apart-MAYBE that big critter peeking from behind that tree got ahold of it........
if your not living on the edge,your taking up too much room!!
MEMBER-K.T.B.A.

Offline Teacher_of_the_Arcane

  • Trad Bowhunter
  • **
  • Posts: 437
Re: Basket Quiver Build-along
« Reply #18 on: July 17, 2005, 08:49:00 PM »
Tom,

After you've shown us how to do it, you should print it out and send it to "The Bowyer's Journal"  .... Brian's looking for good stuff!
Lobo Lohr -- Old School Hunter

Offline tms

  • Trad Bowhunter
  • **
  • Posts: 45
Re: Basket Quiver Build-along
« Reply #19 on: July 18, 2005, 12:01:00 AM »
Okay Gang,

Back to work!  I'm skipping ahead a little.  My last post suggested eight circuits with the 1/8" round reed after the chair cane.

Assuming you've done that, I add a few circuits with the 1/4" flat reed.  You'll notice that the 1/4" flat is really easy to soften.  It's also less ridged when dry, so I try only to use it for accents.

After the flat accent, I repeat the eight circuits with the round.  The round reed makes a very strong basket, but at only 1/8", it goes pretty slowly, and without some contrast it would be pretty boring, IMHO.  Some of you might think that my patterns are too busy, well fine then, make your own damn quiver!  You should be able to  when we're done with this.

Next, I start a run of the 3/4" flat.  The important thing here is that we're going from 1/8" round to 3/4" flat. That's big difference, so we're going to have to taper the flat to make a smooth transition.  Remember to cut it after it's soft, or you'll screw it up.


Tuck it in, and proceed as before.  You'll notice that this is really easy stuff to weave, and at 3/4", you're really makin' tracks now.


When you get to the end, don't forget to taper it for the transition back to the 1/8" round.  Yes, we're going back to the round, because it adds contrast, and strength in the middle of the quiver, and because I like it that way.


After the round, comes another section of the 3/4" flat, and then you should have something that looks like this.


Tom

Users currently browsing this topic:

0 Members and 2 Guests are viewing this topic.
 

Contact Us | Trad Gang.com © | User Agreement

Copyright 2003 thru 2024 ~ Trad Gang.com ©