Well, it has been a long week for me. I was able to sneek in a few minute here and there and get the final tiller done, the sanding done and the first coat of finish on(very late last night). I'm not going to spend a lot of time on sanding and finish except to say that all the wood is sanded down to a 400 grit surface. I use Fuller Plast Satin and a real heavy first coat. There are always runs in my first coat but when you are working with oily woods like cocobolo or bacote you want to be sure that you have a heavy coat on so that subsequent coats don't soften it enough to to lift. Also I let that first coat cure completely, this will aid in run removal.
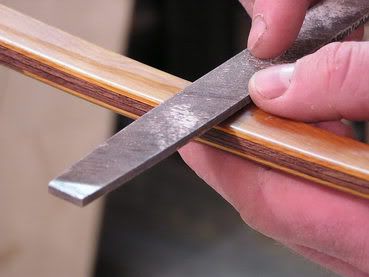
I use an 8" single bastard file to remove the heavy areas in the finish.

When used lightly the file will produce a nice smooth surface that with a little light sanding is ready for more finish.
I will put on 6 more lighter coats, wet sanded every other coat with 400 grit. I haven't actually got this far but you'll see it in the end.
Going back to tiller. The fisrt setting is the braced tiller. I set the brace height at 6 3/4" on my bow, after that you reall don't need a ruler. I use an arrow and mark the position of the string with my thumb of the upper limb. (This should be the deepest of the two measurements.) Then compare it to the bottom limb.

This bow has played nicely the whole game. After checking for limb twist, adjusting the upper limb slightly and sanding, the difference between the limbs is 1/4" and the weight at 28" is #53.
Now I'd like to an area of theory which is definately open for discussion. In the next picture it is my intention to demonstrate what I think is the way my bow should be tillered. Using the John Scrifes method of drawing lines on pictures, which is really cool

, I show my final tiller.

I have the bow drawn to 28", with the hook where the middle finger would be if drawing split fingered. The green line is where the arrow would be. The blue line is the center of the bow this show the 2" between the center of the string and the buttom if the arrow. The red line between the tips show that the upper limb moves just a little more (1 1/4") being slightly weaker and pulled by the short half of the string. The black lines which intersect the extended centerline show the extra action in the upper limb as well. This I think demonstrates how a longbow works. The middle of the palm of the gripping hand is roughly in the middle of the bow (blue line). The drawing hand grips the string at the nockpoint with most of the pressure on the middle finger, under the arrow (green line). Like I said before I'm open to discussion here. This is the way I've tillered these bows but I'm not against making them better and with the experience on this site I'm sure that if I'm missing something someone will come to the rescue.
With the warmer weather I have shot this bow a little of the the last couple days. I'm happy so far.
More later,
Ken


