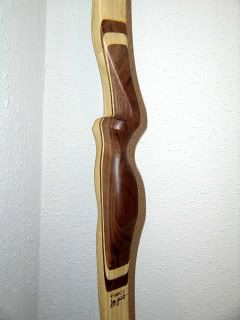
INFO: Trad Archery for Bowhunters


Author Topic: Bow Build Along.......let the fun begin  (Read 21268 times)

Offline initialimage

  • Trad Bowhunter
  • **
  • Posts: 47
Bow Build Along.......let the fun begin
« on: September 06, 2006, 10:47:00 PM »
I've decided to do my first Trad Gang build along.  I've seen so many good ones lately that I wanted to give it a try.  I have been designing my next bow, but have been putting off starting it for one reason or another.  This will get me in gear to get it done.  I'll probably be very long winded at times but I'll try to be thorough for those that have never attempted a bow before.  I've done lots of reading, and seeing what others have done have helped me a lot.  I made my first bow over 10 years ago.  After making a couple of board bows, a stave bow and a fiberglass bow, I got side tracked and have just started building bows again.  Made my first one in 9 years in January.  The second one I made is the one I've been shooting, but it's 68" ntn and I want something shorter for hunting.  I've designed a 58" ntn bow.  I am going to make a bamboo backed bow for this build along, but I'll be making fiberglass bows also from the same design so I'm making a fire hose form.  

I have my own business making prototypes and visual models.  There was a recent thread about cnc machines.  Well I have a couple and I use them.  I don't use them for the bows, but I do for templates.
 

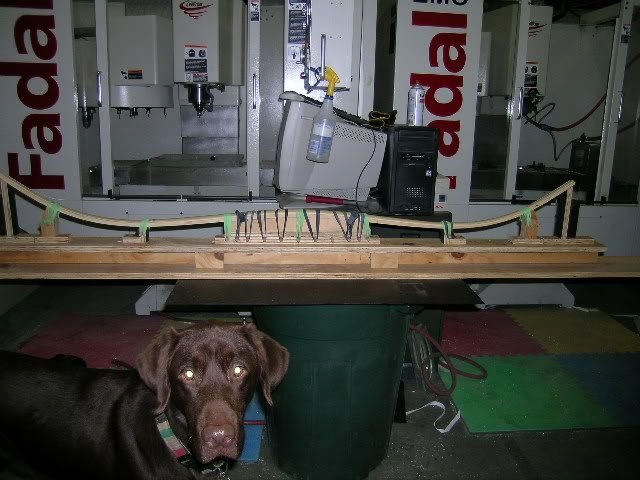
Here is a pic of the form I use for bamboo backed bows.  I use inner tubing for part of it and spring clamps in between.
 

This is how my last one turned out.  I'll be using most of the same materials on the build along, so I thought I'd include these.
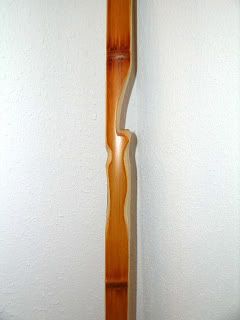


Enough of the past bow.  Time to start the build along:

I use the following program at work and it works great for my design work:   http://www.rhino3d.com

Here is a comparison pic of the previous design versus the new one.


I was interested in the Torges Ambush Bow Challenge.  While I didn't enter, I thought about making a shorter bow than what I'm used to and wondered how I would design it.  I looked at some of my older recurves that have a more forward handle design and decided to use a recurve style riser with severely deflex reflexed limbs.  I'm not worried about this design in a fiberglass bow, but I'm not sure yet of my tillering skills with this type of bow.  Time will tell.

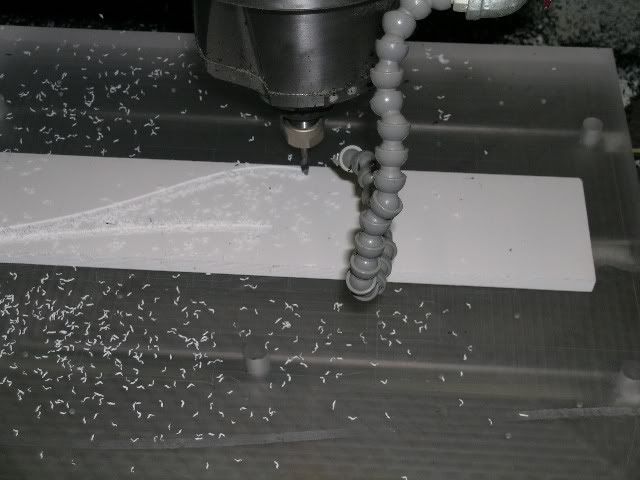
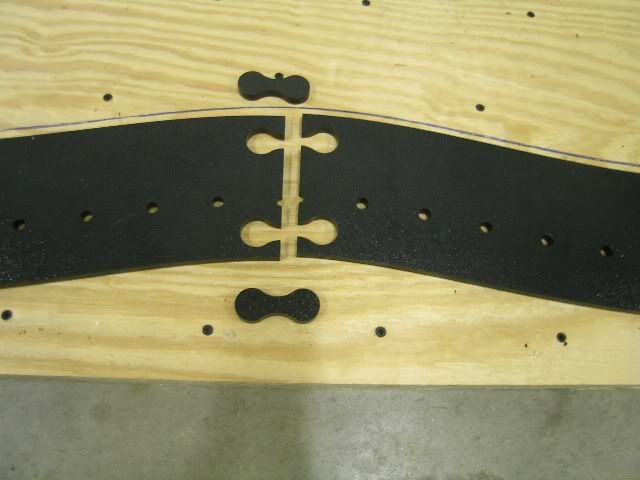
I started by gluing/screwing some plywood together and machining a template.  My maximum dimension on my mill is 20" so I'm limited in what I can cut so I improvise.  I split my template into 4 parts and have them keyed together with peanut shaped pieces.  Fits nice and tight to give a good template.
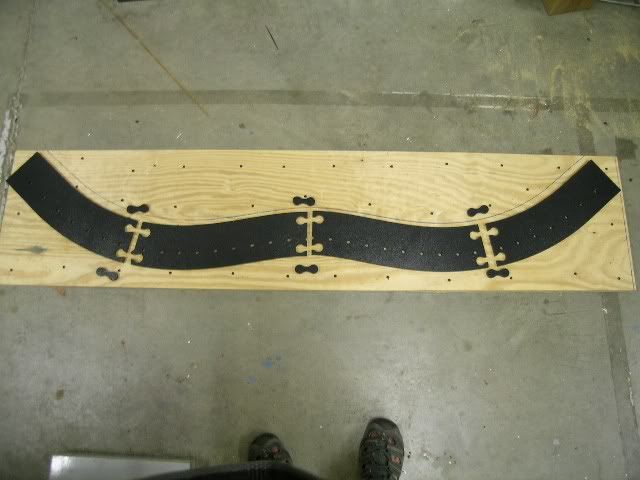
 

Closeup...
 

Offline initialimage

  • Trad Bowhunter
  • **
  • Posts: 47
Re: Bow Build Along.......let the fun begin
« Reply #1 on: September 06, 2006, 10:47:00 PM »
You may be wondering why there are holes in the template.  When I first started the project I was going to use a bottom form only and use pegs for a tire inner tube glue up.  They were reference holes for the pegs.  Once I decided on fiberglass bows too, the airhose form seemed the likely choice.  I'll use the template to cut the bottom of the mold with my router and a flush cutting bit.  I'll have pics of that later.  

You can see an older hose form in the background of this one.


The form layout is drawn on the side with the metal strips placed.


The form has been rough cut and the metal strips test fit.


Closeup...


More to follow.............(hopefully tomorrow vs. Friday)

Offline Lost Arra

  • Trad Bowhunter
  • **
  • Posts: 1110
Re: Bow Build Along.......let the fun begin
« Reply #2 on: September 06, 2006, 11:06:00 PM »
Holy Cow!  :scared:  

My bow building IS primitive compared to this, more like prehistoric!

Very interesting though. Keep it going. (Great photos)

Offline Holm-Made

  • Trad Bowhunter
  • **
  • Posts: 1505
Re: Bow Build Along.......let the fun begin
« Reply #3 on: September 06, 2006, 11:08:00 PM »
Lookin forward to this one.  Looks like you got your poop in a group. (know what your talking about)  ;)  Chad

Offline Fritz Brown

  • Trad Bowhunter
  • **
  • Posts: 78
Re: Bow Build Along.......let the fun begin
« Reply #4 on: September 06, 2006, 11:40:00 PM »
I see in the second picture that the quality control department is paying close attention to the goings on.  Charge on,  we are watching.

-Fritz
What demon possessed me,
that I behaved so well.
          -H.D. Thoreau

A straight line may be the shortest distance between two points,
but it is by no means the most interesting.
-Dr. Who

Offline Shaun

  • TG HALL OF FAME
  • Trad Bowhunter
  • *****
  • Posts: 3619
Re: Bow Build Along.......let the fun begin
« Reply #5 on: September 06, 2006, 11:43:00 PM »
This is gonna be good. Thanks in advance for taking us along.

Offline huntwithastick

  • Trad Bowhunter
  • **
  • Posts: 89
Re: Bow Build Along.......let the fun begin
« Reply #6 on: September 07, 2006, 01:31:00 AM »
Dude,

Keep it coming!  I'm stuck in Iraq for about 60 more days but have the "ingredients" for 3 bows awaiting my return.  I didn't have a CAD program for the profile, but have decided on a severe D/R desing.  I love what seems to be the technical approach that alot of you guys use.  Also, the photos of your bows in the beginning are beautifull!
Socialism is a philosophy of failure, the creed of ignorance, and the gospel of envy, its inherent virtue is the equal sharing of misery - Winston Churchill

"Tough Times Don't Last, Tough People Do"

Offline Brian Halbleib

  • Trad Bowhunter
  • **
  • Posts: 613
Re: Bow Build Along.......let the fun begin
« Reply #7 on: September 07, 2006, 07:04:00 AM »
Alright! Keep it coming...

-Brian
 www.bowyersjournal.com

Offline Billy

  • TGMM Member
  • Trad Bowhunter
  • ***
  • Posts: 1144
Re: Bow Build Along.......let the fun begin
« Reply #8 on: September 07, 2006, 07:44:00 AM »
um, can i come over to your shop to play...?  :bigsmyl:
TGMM Family of the Bow

Taker of the Founders Red Pill

Offline Coop

  • Trad Bowhunter
  • **
  • Posts: 266
Re: Bow Build Along.......let the fun begin
« Reply #9 on: September 07, 2006, 08:00:00 AM »
Nice work. Can't wait to see it progress.
"Twenty years from now, you will be more disappointed by the things that you didn't do than by the ones you did do"

-Mike

Offline TexMex

  • Trad Bowhunter
  • **
  • Posts: 2199
Re: Bow Build Along.......let the fun begin
« Reply #10 on: September 07, 2006, 08:08:00 AM »
Oh Yeah, keep it coming!

Offline Tom Leemans

  • Trad Bowhunter
  • **
  • Posts: 2339
Re: Bow Build Along.......let the fun begin
« Reply #11 on: September 07, 2006, 08:23:00 AM »
I too did not enter the ABC challenge, mainly because I dealt with about a month of walking pneumonia at the wrong time to be able to finish on time. I see though that a couple of you were also thinking of reverse (or forward) handled bows. While Jeff's limbs are a bit different from what I have in mind, he's thinking in the same general direction. What's cool about the ABC challenge is that it's going to get a lot of people building bows and experimenting with design. Everyone keep working. ABC II is just around the bend.  ;)
Got wood? - Tom

Offline Longbow_Jim

  • Trad Bowhunter
  • **
  • Posts: 17
Re: Bow Build Along.......let the fun begin
« Reply #12 on: September 07, 2006, 07:42:00 PM »
i thought i had it good having a cabinet shop full of tools to use you got it made myson

Offline initialimage

  • Trad Bowhunter
  • **
  • Posts: 47
Re: Bow Build Along.......let the fun begin
« Reply #13 on: September 08, 2006, 03:14:00 AM »
Not much progress made, but I'll post as I go.  I was able to get the bottom of the form routed today.

I setup outside because this step makes a big mess.  I clamped my template to the bottom of the form and lined it up to my previous marks.


Here is a shot with the form fipped over and my router setup.  I bought a 1/2" router bit that is very long so I can use it on a form up to 2" wide if needed.


I take it very slow during this step so I don't mess up anything.  If the router is tipped at all and not held flat, it will gouge.  I end up with a very smooth square cut that matches the template.


Offline initialimage

  • Trad Bowhunter
  • **
  • Posts: 47
Re: Bow Build Along.......let the fun begin
« Reply #14 on: September 08, 2006, 05:46:00 PM »
Here is the next tool that I used.  It is my drill press with a sanding drum in it.  This picture shows the acrylic plate I machined years ago.  I normally leave it bolted to the drill but I've needed it for other things recently and just used double stick tape to hold it on.  The hole in it allows me to get the drum below the surface of the table and sand the full width of the form.  It also has a guide like my router bit that I can screw on to the bottom and use it to sand shapes flush to any templates I make.


I sand until my blue line is gone.


Here is the form put back together.  Notice how much cleaner it looks now compared to when it was just roughed out.


I just got an aluminum project I need to get running.  Later I hope to get to the spacers so I can see about finishing up the form.  

...........stay tuned

Offline Crooked Stic

  • TG HALL OF FAME
  • Trad Bowhunter
  • *****
  • Posts: 6075
Re: Bow Build Along.......let the fun begin
« Reply #15 on: September 08, 2006, 05:56:00 PM »
The form is looking good
High on Archery.

Offline AZStickman

  • Trad Bowhunter
  • **
  • Posts: 967
Re: Bow Build Along.......let the fun begin
« Reply #16 on: September 08, 2006, 06:54:00 PM »
Nice build along........Terry
"The reward of a thing well done is to have done it.".. Ralph Waldo Emerson

Offline NorthShoreLB

  • Trad Bowhunter
  • **
  • Posts: 634
Re: Bow Build Along.......let the fun begin
« Reply #17 on: September 08, 2006, 09:36:00 PM »
What Bob (lost arra) said  :bigsmyl:    :bigsmyl:    :bigsmyl:    :bigsmyl:
"Almost none knows the keen sense of satisfaction which comes from taking game with their own homemade weapons"

-JAY MASSEY-

Offline initialimage

  • Trad Bowhunter
  • **
  • Posts: 47
Re: Bow Build Along.......let the fun begin
« Reply #18 on: September 08, 2006, 10:07:00 PM »
Here's the last update for today.  I have the spacers done and basically the form is done(details left).  This picture show the spacers which aren't glued on yet.  I like a smooth form and like to make them where cleanup is easy if epoxy gets on them.  I'll take everything apart, including the spacers and sand(palm sander) the sides of the entire form to smooth them up more than what they are now.  Once sanded I'll blow them clean and glue the spacers in place.  After the glue is dry I'll apply a thick single coat of polyurethane to seal the wood.  When I'm ready for a glue up I'll wax(regular Johnson's paste wax) the side of the form which is easier to do with the sealer on it versus the unfinished wood.  You can also see in the picture the piece of metal I'm holding up.  This isn't what I'll be using, but I wanted to show that I'll put an adjustable stop on the sides of the form to keep the lams from shifting.  The first fiberglass bow I ever glued up turned out, but the glue up was almost a disaster.  When I aired up the hose, my lams slid all over the place.  The side stops keep them from shifting out the side of the form.  The other thing I need to do is to glue a piece of material to the bottom half of the mold.  I've used formica in the past but will be using a thin piece of galvanized metal.  There is a sheet metal business across the parking lot from me which has its perks.  Did I say at the beginning of this thread that I may get long winded at times?  


Offline Crooked Stic

  • TG HALL OF FAME
  • Trad Bowhunter
  • *****
  • Posts: 6075
Re: Bow Build Along.......let the fun begin
« Reply #19 on: September 09, 2006, 01:02:00 AM »
Still looking good. May I suggest rounding the corners on your metal pieces. Sometimes easier on the fingers when you get in a hurry.
High on Archery.

Users currently browsing this topic:

0 Members and 2 Guests are viewing this topic.
 

Contact Us | Trad Gang.com © | User Agreement

Copyright 2003 thru 2024 ~ Trad Gang.com ©