3Rivers Archery


The Trad Gang Digital Market


Contribute to Trad Gang and Access the Classifieds!

Become a Trad Gang Sponsor!

Traditional Archery for Bowhunters


LEFT HAND BOWS CLASSIFIEDS TRAD GANG CLASSIFIEDS ACCESS RIGHT HAND BOWS CLASSIFIEDS


Author Topic: Straight Limbed Longbow Build-Along  (Read 553 times)

Offline tjdeerslayer37

  • Trad Bowhunter
  • **
  • Posts: 29
Straight Limbed Longbow Build-Along
« on: January 24, 2008, 06:20:00 PM »
i wrote up this build along a month or two ago and figured i should post it over here. enjoy.

Hi all,

Im building a 62" straight limbed longbow for my mom. She doesn't hunt, just shoots. She gets cold and bored too easy, lol.  :roll:  She's currently using my old compound to shoot but I figured id make her this bow and maybe she'd be more into it.  :idea:  I let her pick all the woods, and i "designed" the accents and what-not. So lets cut to the chase.   :D  

First off, I want to be sure that everyone knows this is only my second bow and if I do anything wrong please let me know. I pretty much just do what i learned from the Binghams instructions and from reading online. Also whenever im building anything its at my grandpas house, cause he has all the tools and the knowledge.   :D   So along the way hes always pointing out things i could do better and what not.

Kay, I ordered all the materials from binghams and as usual they were great to work with and helped me with the task of shortening the bow and also the riser.

First thing i had to do was make the form. Since it's just a straight limbed bow the form was super simple. Glue and screw a few pieces of Particle board together until it come out 1 1/2", cut it through the middle, run the bottom half through the jointer, cut out the riser area, drill for the brackets and lay down the formica strip. You'll see it later on.

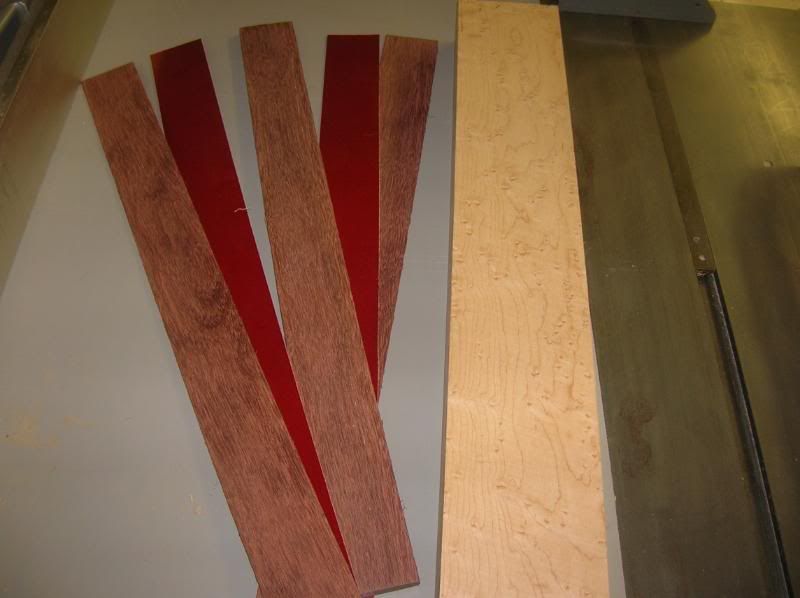
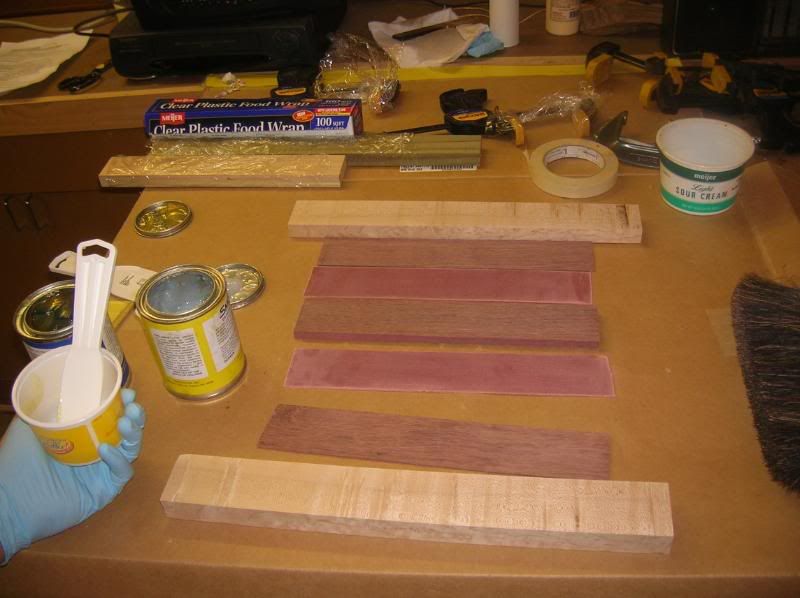
The next thing i had to do was lay up the laminations in the riser block. I made sure none of the accents went too far into the fadeout area. This is how the handle was glued up from top to bottom.

Birdseye maple, 1/16th" purpleheart, 1/16th" red phenolic, 3/8" purpleheart, 1/16th" red phenolic, 1/16th" purpleheart, birdseye maple.
whew guess id better show you.

Heres the pieces before i split the maple in half,
 
Before glue.
 
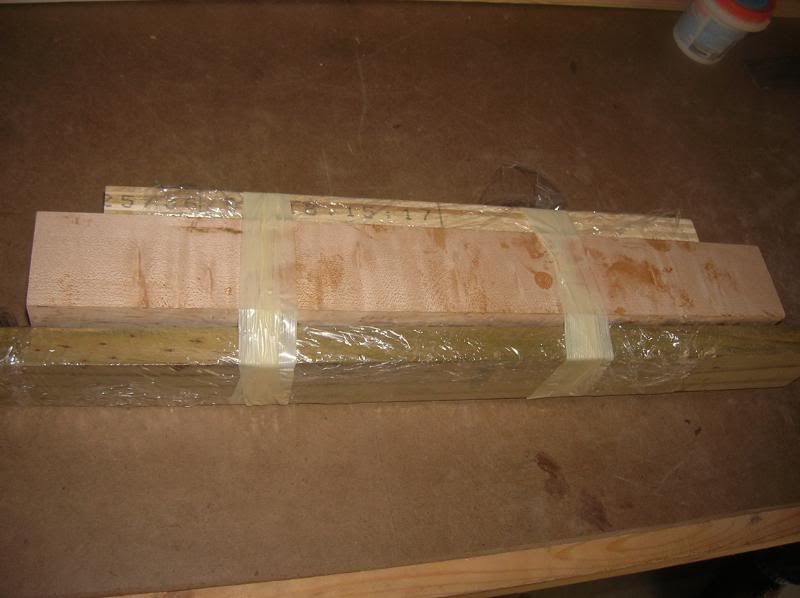
Heres the block before clamps, lol, i had to make sure nothing would slip up.   ;)  
 
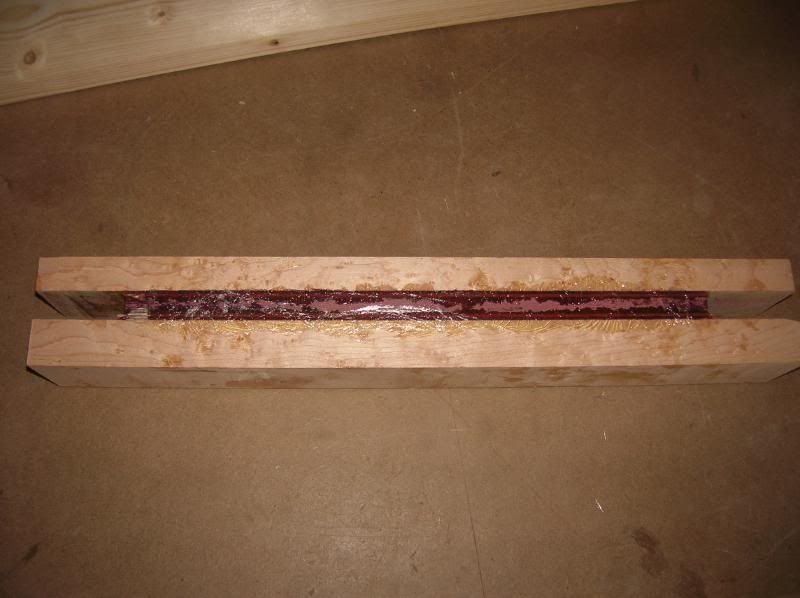
And fresh out of the oven.
 
save a tree... shoot a buck.

Offline tjdeerslayer37

  • Trad Bowhunter
  • **
  • Posts: 29
Re: Straight Limbed Longbow Build-Along
« Reply #1 on: January 24, 2008, 06:20:00 PM »
The Next step was to cut the block to length and rough cut the fade outs. I used the template from the blueprints for the fade outs but i used a 16" riser instead of the 18" that they use for the 68" bow.

Here it is right after rough cutting. I got pretty darn good glue lines in the riser if i may say so myself.  :lol:
 
Up close.
 

Next, I sanded down the fades to the line and super thin at the ends, but im afraid i might not have gotten them as thin as i could've i was just afraid of tearing through them. There should'nt be anything wrong with it though as i didnt leave them that thick just not see through for a whole 1/2" they're see through for about 1/4"

Sanding.
 
Pretty thin.
 
save a tree... shoot a buck.

Offline tjdeerslayer37

  • Trad Bowhunter
  • **
  • Posts: 29
Re: Straight Limbed Longbow Build-Along
« Reply #2 on: January 24, 2008, 06:21:00 PM »
Glue up was next.   :o  I guess i don't find this as stressful as some people do. lol. The limbs are laid up like this.
Clear glass, purpleheart parallel lam, two parallel actionboo lams, one tapered purpleheart lam, clear glass.
I laid it all out, brushed all the dust and stuff off, then started putting on the glue. I use Smooth-On. Also i realize i should've spliced the two parallel lams together but i didn't. oops.  :shock:  

All laid out in order.
 
Glueing.
 
save a tree... shoot a buck.

Offline tjdeerslayer37

  • Trad Bowhunter
  • **
  • Posts: 29
Re: Straight Limbed Longbow Build-Along
« Reply #3 on: January 24, 2008, 06:21:00 PM »
Its hard to take pics while laying up the laminations so i dont have pics of that but i have them of the bow in the form. I placed all the laminations in the form, lined them up, bolted on the top, and inflated the hose to 65 PSI. Off to the oven for 4 1/2 hours.

Ready for the oven. I know i shouldn't use the plastic wrap stuff but i made sure none of it was in the laminations before i threw it in the oven.
 

After the bow was out of the oven i needed to lay out the limbs with the templates. When tracing the limb templates from the Binghams blueprints i found that there wasnt a true centerline on it, plus i didnt like how the limbs narrowed so much towards the handle and i felt that the handle should stay wide. So a nice guy from the LW drew me some templates on a CAD program and emailed them to me.

Tracing the limb profile. I know the template is off center here, but it doesnt matter because i was just making sure there was wood on either side of the template and the riser slid a little bit during lamination.
 
 
save a tree... shoot a buck.

Offline tjdeerslayer37

  • Trad Bowhunter
  • **
  • Posts: 29
Re: Straight Limbed Longbow Build-Along
« Reply #4 on: January 24, 2008, 06:22:00 PM »
Then rough cut and sand the limbs to shape. Heres where i really wish i had a belt sander.  :x  
 

After that i filed string grooves and i had to find out which limb was stronger and made that the bottom limb and i also checked for limb twist and adjusted where needed.

Braced. (This pic was after the overlays were on and the tips were filed.  :roll: )
 

Next i put on the tip overlays and handle accents. Since i don't get to go to my grandpas house much i glued all the overlays on at the same time. BAD IDEA. It's a pain in the butt to get everything lined up and on the handle theres simply no place for clamps.

Tips, birdseye maple on 1/4" red phenolic.
 
On the handle we took a piece of 2x4 and cut it to fit on the fadeouts then clamped the whole thing.  :idea:
 
The whole thing.
 
save a tree... shoot a buck.

Offline tjdeerslayer37

  • Trad Bowhunter
  • **
  • Posts: 29
Re: Straight Limbed Longbow Build-Along
« Reply #5 on: January 24, 2008, 06:23:00 PM »
Then i had to draw out how i wanted the riser shaped and where the shelf was to be cut. After it was all drawn out i rough cut it with the bandsaw and started sanding with the drum sander.


Also i drew out the tips and rough shaped/cut them. And yes i realize they're HUGE  :shock: but thats how mom wanted them and they dont seem to affect shooting much.

Drawn out.
 
Shaping.
 
Hand sanding.
 
save a tree... shoot a buck.

Offline tjdeerslayer37

  • Trad Bowhunter
  • **
  • Posts: 29
Re: Straight Limbed Longbow Build-Along
« Reply #6 on: January 24, 2008, 06:24:00 PM »
Filing the shelf. Notice the tape on the file and the aluminum on the window so i dont accidentally cut something i didnt want to.
 

Then i started rounding off the handle and the accents and continued on the tips.

The sanding block works a little but i liked just using the sandpaper better.
 
Rounding the back. Sharpies and sandpaper worked pretty good. lol
 
Filing the tips.
 
Tips.
 
 
save a tree... shoot a buck.

Offline tjdeerslayer37

  • Trad Bowhunter
  • **
  • Posts: 29
Re: Straight Limbed Longbow Build-Along
« Reply #7 on: January 24, 2008, 06:24:00 PM »
I dont have any pics of me tapering the ends of the accents but i just put the aluminum flashing stuff up the butt of the accents then sand down as close as i can then sand to the glass without the aluminum on there.

After a BUNCH of hand sanding and a little power sanding i had everything shaped how i wanted it to be. All that was left was to sand all the clear stuff off the glass and then sand the whole thing from 150 down to 320 grit sandpaper and then i finished it off with 0000 steel wool before finish. Ive got two coats of gloss on it right now so it needs a couple more coats and the last one or two are gonna be satin.

Heres the bow with the two gloss coats.


I was shooting for 45# @ 28" but i really dont know where it's at as i dont have a scale to weigh it on. Once ive got it completely finished ill try to find a 2x4 and use the bathroom scale trick.


Any comments, questions, and critisism (sp?) are welcome.
save a tree... shoot a buck.

Offline tjdeerslayer37

  • Trad Bowhunter
  • **
  • Posts: 29
Re: Straight Limbed Longbow Build-Along
« Reply #8 on: January 24, 2008, 06:26:00 PM »
here it is finished


save a tree... shoot a buck.

Offline ZaneD

  • Contributing Member
  • Trad Bowhunter
  • ****
  • Posts: 391
Re: Straight Limbed Longbow Build-Along
« Reply #9 on: January 24, 2008, 06:55:00 PM »
Great job! that'll be my next project.

Offline **DONOTDELETE**

  • Trad Bowhunter
  • **
  • Posts: 10441
Re: Straight Limbed Longbow Build-Along
« Reply #10 on: January 24, 2008, 06:55:00 PM »
Wow, Great looking bow. Your Mommy will love it.

Offline twosheds

  • Trad Bowhunter
  • **
  • Posts: 518
Re: Straight Limbed Longbow Build-Along
« Reply #11 on: January 24, 2008, 06:57:00 PM »
Great looking bow.
Bob Lee Hunter Recurve 55# @ 29''

Online kennym

  • TG HALL OF FAME
  • Trad Bowhunter
  • *****
  • Posts: 17317
Re: Straight Limbed Longbow Build-Along
« Reply #12 on: January 24, 2008, 07:03:00 PM »
Excellent!! Gettin ready to start a purpleheart limbed bow for my wife. Glad to see a pic of some!! Thanks.
Stay sharp, Kenny.

   https://www.kennysarchery.com/

Offline Kevin L.

  • Trad Bowhunter
  • **
  • Posts: 1439
Re: Straight Limbed Longbow Build-Along
« Reply #13 on: January 24, 2008, 07:03:00 PM »
Nice job, regardless of the age of the bowyer. You're off to an amazing start    :thumbsup:
Appalachian LB 66"57@26
Appalachian LB 68" 60@28
Appalachian Flatbow 64" 56@28
Appalachian Archery RC 58"62@28
Bighorn LB 68" 57@28
HH Wesley LB 66" 53@27
HH Cheetah LB 66" 52@26
Saxon American RC 58" 60@28

Offline Eastern fisher

  • Trad Bowhunter
  • **
  • Posts: 386
Re: Straight Limbed Longbow Build-Along
« Reply #14 on: January 24, 2008, 07:16:00 PM »
Stunning job.  Can I be your daddy???  When you laminate or glue the slabs together and put them in the form, is it necessary to put them into the oven as well?  Or does the oven just speed up the process?  I know even less about this procedure than I do the self bow, which I am STILL trying to find wood for.
A bad day of hunting is still far better than a good day at work.

Offline mmgrode

  • Trad Bowhunter
  • **
  • Posts: 1314
Re: Straight Limbed Longbow Build-Along
« Reply #15 on: January 24, 2008, 07:26:00 PM »
Very Cool!  I know it takes a lot of work to write up a build along like this and you did a great job! That's awesome that you'd make your mother a bow.  Nice job! Thanks, Matt
"We are what we repeatedly do. Excellence, then, is not an act, but a habit."  Aristotle

Offline buckshot95

  • Trad Bowhunter
  • **
  • Posts: 200
Re: Straight Limbed Longbow Build-Along
« Reply #16 on: January 24, 2008, 07:31:00 PM »
WOW i really like that bow!! that thing is very petty!! Great Job!!
52#@28"-60" Thunder Stick Moab
45#@28"-64" Fred Bear Montana

Offline SOS

  • Trad Bowhunter
  • **
  • Posts: 1571
Re: Straight Limbed Longbow Build-Along
« Reply #17 on: January 24, 2008, 08:20:00 PM »
:clapper:

Offline tjdeerslayer37

  • Trad Bowhunter
  • **
  • Posts: 29
Re: Straight Limbed Longbow Build-Along
« Reply #18 on: January 24, 2008, 09:34:00 PM »
thanks everyone,

are you talking about the pieces that are put together to make the form? thats just OSB and it has wood glue between the layers and screws holding it together.
save a tree... shoot a buck.

Offline SouthMDShooter

  • Trad Bowhunter
  • **
  • Posts: 591
Re: Straight Limbed Longbow Build-Along
« Reply #19 on: January 24, 2008, 10:09:00 PM »
great job!
"Two roads diverged in a wood, and I --
I took the one less traveled by,
And that has made all the difference."
- Robert Frost

Users currently browsing this topic:

0 Members and 1 Guest are viewing this topic.
 

Contact Us | Trad Gang.com © | User Agreement

Copyright 2003 thru 2024 ~ Trad Gang.com ©