Author Topic: My First Holmegaard Type Bow Attempt (Compleated Pics - 09/14)  (Read 17732 times)

Offline ber643

  • TGMM Member
  • Trad Bowhunter
  • ***
  • Posts: 9205
OK, tradgang friends - I am so pleased to have this new forum here on Tradgang. I have been posting the following (long thread) on another  fine board (paleoplanet) and was going to just transfer my posts without the added comments. However - it could get confusing, and I know none of those folks would mind their posts being on here - plus some of them are members here. So I decided to split the difference and post the ones that add info or continuity but not perhaps all of the glowing accolades (LOL) and/or abuse (another LOL). OK? OK.

I'll be posting quite a bit of stuff (and pics), in different entries, so you may want to wait 'till I finish up (I'll let you know) before posting (but on the other hand, waiting is not mandatory - if you can get a word in edgewise                 ;)                ) The main thing is - please enjoy, and learn with me. At this point it is going well but I make some side tracks along the way, as you will see. I am currently at Floor Tiller and preparing to tiller, with more reduction. I still do not know if the "Holmi" will succeed or fail (and whip me into submission -                 :D                ).

BTW - I have applied finishing steps/proceedures to a few other bows but have only actually made two compleat bows prior to this attempt, a wood lam and a self Osage, both previously chronicaled on Pow Wow here at tradgang.

I really wanted to post this thread here all along but just hadn't yet - now I'm glad I waited.

..........................................

Here is the ( sort of false) start:

Well, I decided to at least make a stab at starting on my first Hickory stave (a nice one, I think, a friend gave me as an extra, in a knife materials trade). I hope to turn it into a Holmegaard (another first), when I get going but for now I am just trying to get it ready to outline the bow on. What I would like to know is, does this look like a proper way to start working up a back for the bow. The only stave I've worked before was an Osage with nice wide rings. This Hickory's rings are closer than skeleton skin. (I think) I want to not go any deeper than needed on the back - to give myself room to - well, you know - do dumb moves - especially when I start working on the belly of the Holmi. Maybe only one or two rings removed - make sense?

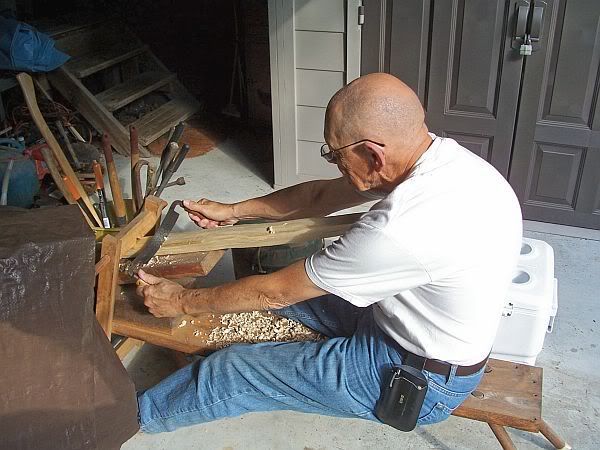
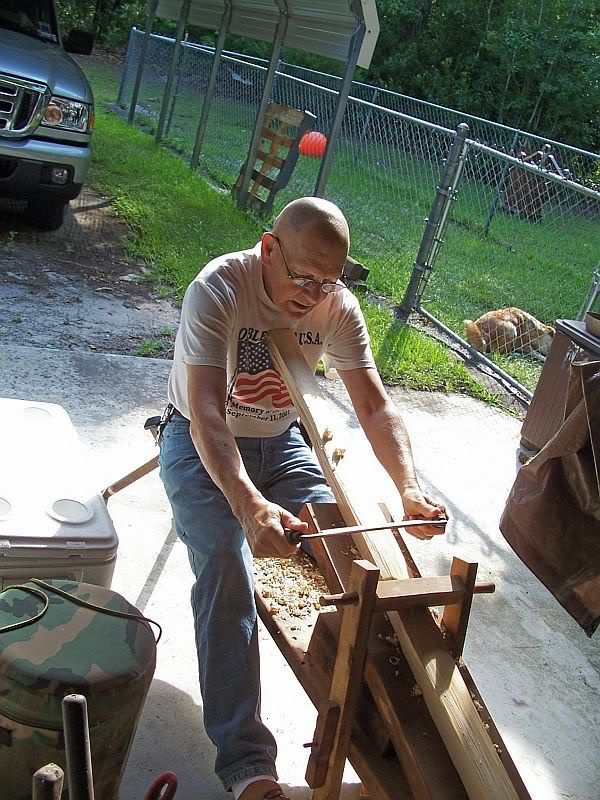
I got set up out in the car port and had my wife take a couple of pics of what I was up to:


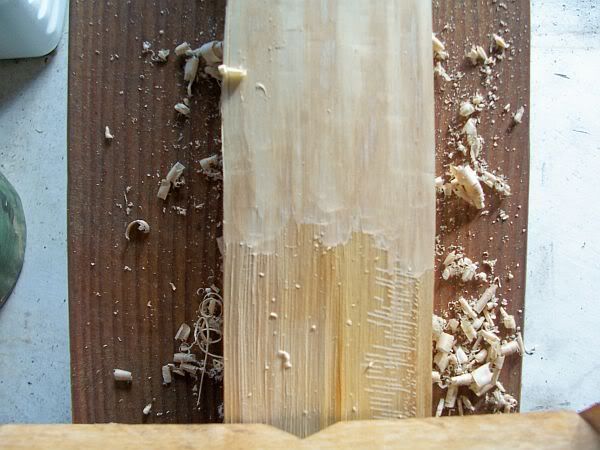
This shows (I hope) where I have started taking off the kind of rough under bark surface with the Draw knife, on one end:


A pic taken from the other end to show the stave before using the draw knife and the portion that was worked, at the far end:


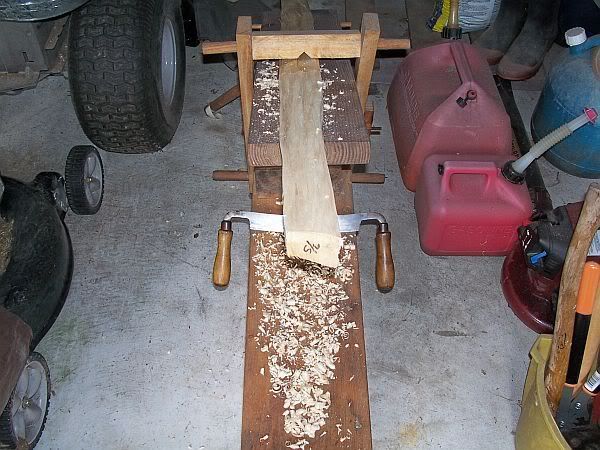
Here is a close up of the back, untouched - it's sort of smooth but with little longitudinal ridges and scratches (probably tool):
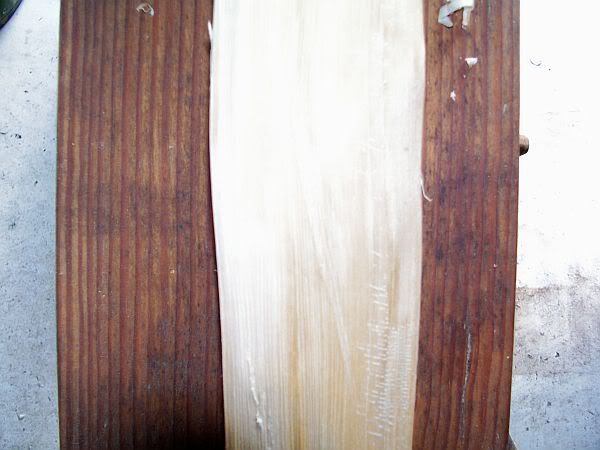


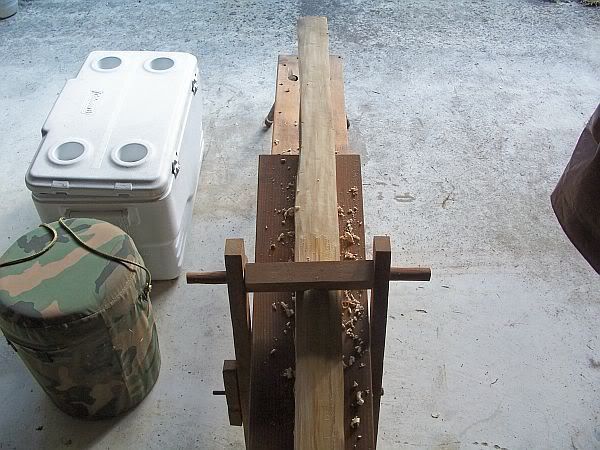
And here is a close up shjowing the area I have worked against the part i haven't worked, for comparrison. Wadda ya think, guys? I didn't go any further than this, until I get some input: As I mentioned earlier, in another thread, my bowyering mentor, Mike, is tied up tighter than a snare drum these days - and he hasn't ever got into Holmegaards.


Toxiophileken posted:

Bernie, I'm not sure why you are chasing a ring on hickory. Normally, you can just use the first ring under the bark, unless there is a problem with that ring. Looks like you are doing a good job, though. More power to you, if you are diligent and patient enough to try it!

With thin white wood rings, I like to use a scraper instead of a drawknife or spokeshave. I used a couple of sort of "bowyer's edge" like tools in Bulgaria, that Juri made, and they work just great! Faster and with less hand pressure (and fatigue) than a scraper, but still with the control to stay within a thin ring.

You might want to finish your stave the way you are going, then take it carefully down one more ring, using a such a tool, or a scraper.

Correct lighting is key when chasing a growth ring. Have the light bouncing off the stave into your face, as if the back of the stave was a mirror, and you wanted to look at the light in it (the light, the stave, and your face, all in a line). This will show the early wood and late wood off against each other much better, as they reflect the light differently. Sound is also your clue as to which ring you are cutting. The earlywood will be crunchier than the latewood. Don't know if all that applies to hickory, but it has worked with osage, BL, and several whitewoods for me.

Iktomiwicasa said:

Bernie, are you chasing a ring or just scraping off the cambium layer?


I replied:

Thanks for the input, Ken. I didn't really want to chase a ring, like with Osage, but wasn't sure if I could just get away with only taking it smooth - so to speak. So I guess the answer would be, "cause I don't know any better" LOL. I probably will finish as I'm going then - to get rid of the longitudinal ridges (and tool scratches) you can see in the pics. Then I will do whatever is needed, probably with my K-Bar (don't have any good scraper otherwise), to smooth it to a good back. (Had a set of three scrapers but can't find where I "hid" them.) I recall the "noise and crunchy feel" of the earlywood with the Osage (and loved it) but sure didn't feel, hear, or see anything like that today witth this old dry (harvested in '06) Hickory. I also remember kneeling/stooping to eyeball down my Osage stave to see where I was and where I wanted/needed to go (as I saw you doing in one of the Bulgaria pics also). I did a little of that today but again wasn't seeing it as plain as with Osage. (I knew I loved Osage - shoulda stuck with it - LOL). "Correct lighting" is probably something I don't have when working here at my place but moving around to eyeball it from different angles, as Mike taught me, certainly helped get the different light plays and bring out things.

The guy who sent me the Hickory stave, put on the note, "Have fun - This stuff is Hard!", and Mike told me Hickory would be a lot tougher on my arms to use the Draw Knife on then the Osage was. Funny part is it seemed to respond pretty well to my "shaving" today (felt good too) - but then that isn't like the work I will have to do on the belly - especially when I take the working limbs of the Holmie down so thin, and the outter limbs so narrow. Oh well, I didn't join the Marines, take up trad (and then primitive), or get married a second time because I thought any of it would be easy - LOL Thanks again, Ken, my friend.

Ooops, hope that also answers your question, Iktomi - didnm't see it 'til I finished posting. Again, I'm not sure what I am doing, I reckon.

Jawge chipped in:

Bernie, don't smooth up the ridges or chase a ring. Just make a bow. Do take out the nicks and make the back glassy smooth. Sand with medium (100 grit) and then fine (220). Easy does it. Let the wood guide you. One step at a time. No need to restrict yourself to a certain design or one that is difficult to accomplish like a homie. For example, I often lay out my bows full width to just past mid limb. As I tiller, in addition to removing wood from the belly, sometimes obstinate staves do not respond to belly removal so I begin taking woods from the sides to bring the tiller home. I know. I know. you have your heart set on a homie.  Jawge  

Again I replied:

LOL - Yeh, Jawge. Originally I figured the Hickory would make another good Flat/NA type bow such as I made "It", my Osage, and I really like that style. Then I got to thinking that I had just done that. Then I got to thinking about Holmegaards and didn't see why that couldn't come out of that stave with any luck, and some careful work. So that's what I set out to do with it but I do realize that the stave/wood may tell me, "Huh-uh, I ain't playin' that game," and, if it does, I will be quick enough to let it lead me, as I do my knife handles - I'm easy that way ;^). I know your advice is good (and sound) but I really didn't know you could just sand the back. Shouldn't have started what I did with the draw knife, I guess but probably better do the other end too (now) and then go from there with the sanding. I wouldn't want to have to sand out all those ridges - but I don't think I would really want them left there either. Is that wrong thinking?

Jason said:

I left the ridges on the hickory bow I made. I simply used a scraper to remove all the cambium I could without scraping too much off the ridges, then sanded it. The cambium left on made a nice dark on light pattern on the back. Im not sure you can do too much to destroy hickory. I had pieces left on the ground after the hatchet work that I played with. It was very hard to break them. They just kinda keep bending no matter what.

I'm looking forward to following your work in a build-along again Bernie!

Jason

And then i waxed eloquently (ha-ha):

Wow, guys - I have always been a heavy reader and had the benefit of relatively easy understanding but, I swear, after the above posts and as much reading as I have done in the TBBs, especially volume one, I couldn't believe I had missed that important info. Particularly so, because it was what I was specifically looking for in my latest re-readings. Blah! Double Blah!! Early this AM I went back to Vol 1 and rececked in the chapter on Osage to see if maybe it had mentioned there (for instance) the important words "unlike whitewoods". Well, not really, but it did say enough to send me scurrying back to the next chapter - on "Other Bow Woods", with the growing feeling I had missed something very important there because I had the Osage procedure so fresh and implanted in my mind (and had enjoyed it so much). Sure enough, where I had read over it a number of times and at least twice in the last week - right there on page 154, about 2/3 of the way down the page - some dirty scoundrel had surepticiosly inserted in my copy, the following two magic passages, that obviously were not there before. (Forgive typos in quoates, please. I know "you" have full knowlege of this info but I need to re-impress it in my poor ol' brain.)

"Here's another point worth mentioning . Almost everyone removes the sap wood from Osage orange. Working their bows down to an interior growth ring."

Of course, I got that!
In the next paragrapph it goes on to state:

"With healthy hickory, ash, elm, walnut, oak, and birch, you don't have to remove the outer wood" (What? Where were you when I was looking for you???) "You can make the bow's back out of the wood imediatly under the inner bark." (Oh sure, now you say that!) "If you pull the bark off in the summer, taking the inner bark off with it, the wood you are looking at on the outside of your stave is the back of the bow." (Get out of here! I will find the knave that stole these passages from my book in the past, causing me to make a fool of myself, and has now replaced them. BUT wait, what's this?) "And you don't have to do a single thing to it. The only exception is when the wood has suffered ..."

There is more of course, but you get the idea. Is my face red? You betcha bippy!Last night my dear responders, friends that I respect, all, must have thought, "What kind of a medevil dolt are we dealing with here? Surely the ol' fool has never read a single thing about building bows!

Ken, Iktomi, Jawge, Dirty Harry, forgive my lapse in cognizant reading, and my burdening of your minds with this conundrum in futile non-thinking - LOL. I'll bet you one thing though - I bet it is NOW implanted in my mind as well as the Osage part - DOH! I just hope I haven't confused or led any other poor unsuspecting beginner down a rose strewn (thorny) path with my digressions. Well, I must now supply my poor, violated Hickory stave with a new back, and ask it's forgivness, before I proceed. Bless it's poor heart(wood) - perhaps I will dub it "White Osage" or "Shaggy Bark Orange"  
......................................

So much for a strange start but it worked and this is a good place to stop (as i must go take care of unexpected family things) but i will continue with a more normal build-a-long when i return. Thanks for bareing with me.
Bernie: "Hunters Are People Too"

Ret'd USMC '53-'72

Traditional Bow Shooters of West Virginia (Previously the Official Dinosaur Wrangler, Supporter, and Lifetime Honorary Member)
TGMM Family of the Bow

Offline **DONOTDELETE**

  • Trad Bowhunter
  • **
  • Posts: 10441
Re: My First Holmegaard Type Bow Attempt (Compleated Pics - 09/14)
« Reply #1 on: August 19, 2008, 10:48:00 AM »
looking great bernie.

Offline ber643

  • TGMM Member
  • Trad Bowhunter
  • ***
  • Posts: 9205
Re: My First Holmegaard Type Bow Attempt (Compleated Pics - 09/14)
« Reply #2 on: August 19, 2008, 03:45:00 PM »
Thanks, mg. We have things under controll (more or less) on the home front for awhile so I will continue transferring the thread - and glad to be able to.

.............................................

Jawge came back with tis sage anecdote:

LOL, Bernie, I went merrily along for years thinking I didn't have to remove the sapwood on black locust. Well, you do. Get the back to one ring now. I bet the rings are pretty thin. Have fun.  Jawge
..............................................

Did a little scraping today to see if I could make a (new) back (since i had "chewed" at the one end a little) with out taking too very much off. Took some pics when I finished, just for reference (and/or consideration). I'll post em in a few minutes.

After my "False start" LOL - Here is how the back looks now:


A close up at the center of the stave back :


and close ups of both ends:


Bernie, go out side tomorrow and look at it under sunlight. You'll be able to tell better. Looks like you've been a busy bowyer.  Jawge


Uh- Jawge, (I'm a little gun-shy about missing meanings now - LOL) I'm not sure if we are going to have any sunshine in NC today but if we do, and/or when we do, and I take the stave outside for a better "relief" look - Are you seeing something I am not, and you want me to look closer, or are you just reminding me that is the best way to "scan" one's work???  ber643

Sorry, Bernie. No I'm nor seeing anything bad. Looks good. Looks like you did it. But I can't see much in that photo. You'll see better in the sunlight. Jawge


(Whew! - LOL) OK, Jawge, thanks for the continued interest, I mean that - always. ber643

From what I can see, not much admittedly, it looks like you might be into a decent back.

Carry on ! Iktomwicasa

All help counts, Iktomi - mostly I was concerned if I had kept the back thick enough, and was hoping the ends might help show that - but I feel pretty good about it (for now anyway - LOL) ber643

Good stuff hickory, bernie. As you work you'll come to realize it. Take a long thin saving/split of it and try to break it. LOL. Pretty hard. You have a lot of help here. I wish this site and the other 3 are frequent multiple times daily were here when I started. Jawge

It's kinda like exercise, for your back, triceps and your eyes..chasing rings that is.. Rich Saffold

Yep, I get that exercise bit, Rich - LOL. I wake up stiffer'n one of Jawge's Hickory splinters myself but I sure enjoy it, and the results blow me away. I am still chomping to get to a BBI, and to more Osage bows. Not sure which I'll do first after this one but those two will be next ones in line, Lord willing. ber643
Bernie: "Hunters Are People Too"

Ret'd USMC '53-'72

Traditional Bow Shooters of West Virginia (Previously the Official Dinosaur Wrangler, Supporter, and Lifetime Honorary Member)
TGMM Family of the Bow

Offline ber643

  • TGMM Member
  • Trad Bowhunter
  • ***
  • Posts: 9205
Re: My First Holmegaard Type Bow Attempt (Compleated Pics - 09/14)
« Reply #3 on: August 19, 2008, 04:09:00 PM »
Please, everyone, know that I appreciate any help and corrections that will help keep me somewhere's close to on the straight and narrow in this new hobby I enjoy so well. That is why I like to show what I am doing, while doing it - so that I may learn more, and perhaps help others learn and prevent them from making the same erors that I might/may.

I have now outlined (especially because it is such a strange shaped bow) the bow I hope to make on/out of that stave and just before lunch I did quite a bit of preliminary shaping with Draw knife (rough) and Farrier's Rasp (Man, I love that thing). I will throw a couple more pics up here
in a minute or eight ;^). I may not go at it quite as others would but I do have a basic plan in my head-bone, based on others sound principles. Or perhaps i better say, my understanding of their sound principals - LOL

The Outline of My intended Holmi:


It's a start - with draw knife and farrier's rasp, used on the side areas that require the most reduction to start out.


Then to the other side of the non-working, outter portion of the limb:


Next I will do the same rough-out of the Non-working part of the other limb.

I did the other non-working tip (sides) last night (I'm not as lame as I expected to be this AM - LOL, probably get to me tomorrow). This AM I laid out the belly side of the bow so I (hopefully) won't get confused about where the crazy thing goes "in", and where it goes "out" - or is that "up" and "down" ;^)?) I wanted to keep working on it but I had to get ready to leave that Thurs. for WV and ATAR (my Ride was to arrive on Wed.).
Bernie: "Hunters Are People Too"

Ret'd USMC '53-'72

Traditional Bow Shooters of West Virginia (Previously the Official Dinosaur Wrangler, Supporter, and Lifetime Honorary Member)
TGMM Family of the Bow

Offline ber643

  • TGMM Member
  • Trad Bowhunter
  • ***
  • Posts: 9205
Re: My First Holmegaard Type Bow Attempt (Compleated Pics - 09/14)
« Reply #4 on: August 19, 2008, 04:21:00 PM »
My next step will be to take some of the not needed excess off the belly surface of the wide, working sections of the limbs and get the belly rises from them to the tips, and to the handle, headed/beveled in the right directions. Then I think I can safely/reasonably get to serious tillering.


OK - Back to "work" the last two days. My Holmegaard is still pretty rough but have done a lot of shaping (and fussing at myself), using most all of my hand tools, and my belt sander. One end, and the handle, is shaping up pretty good. About to play catch-up on the other end now, and shape the handle a little more. Like Boomer in his Holmi thread, I may have to add a piece to the handle, not sure yet but there is a side that isn't as deep as the other edge. Also the "first" end has a bit of "propeller twist" (I'd call it) that I may have to heat out, before starting any serious tillering. Are we having fun yet? YEP! (it says so right here in fine print)


I read what they said about the original artifact Holmegaard in the TBBs, and what they had to say about later bows, made in that style, both as "replicas" and ones to improve performance of a sound design. Then I read what I could find about ones made by folks on this forum and PA (as well as an article in PA, pluse checking out a How To web site devoted to the Holmegaarde, that another member gave me the link to). Then I put all of the info that I understood, my particular stave characteristics, the dimensions I most wanted (and/or saw repeated the most often) together, and picked/made my layout from that and called it a Holmegaard "Attempt",or "Style", bow - interchangably. Please understand I am not trying to sound argumentive (I don't know enough about bows, and making them, to do that intelligently - LOL), just explaining how I got to where I'm at. It remains to be seen if it works, or not, for me and mine but I've seen/handled some "Holmies" that have characteristics I like, i.e. string angle for no finger pinch, little to no hand shock, good caste, etc. Besides I think the shape is neat, and as I've said often in other threads; I started out thinking they were "ugly" bows but the more I saw them in threads and read about them, the better I liked both the looks and touted performance. Who knows, it may break/blow in the attempt, or wind up as just a "wall hanger", or it might just fool me and be a shooter (that'd be nice - LOL). In any case I'm having fun, with a liberal sprinkling of frustration of course, and learning more about bows and bow making in general while I'm at it.

I worked on my bow some more yesterday PM, and some this AM. A little more basic width and thickness scraping/shaving. I think I now have the basic shape I want but I still have a fair share of thinning to do, especially in the working and non-working limb areas, some handle shaping (later), and of course the nocks. I plan to do pin nocks, more or less, if I can. Here are some pics I just took.

Back:


Edge:


Belly (in this one I had it turned a little but what makes the shape look uneven on the top limb the most is the slight twist it has - I believe):

 
Bernie: "Hunters Are People Too"

Ret'd USMC '53-'72

Traditional Bow Shooters of West Virginia (Previously the Official Dinosaur Wrangler, Supporter, and Lifetime Honorary Member)
TGMM Family of the Bow

Offline JEFF B

  • TGMM Member
  • Trad Bowhunter
  • ***
  • Posts: 8246
Re: My First Holmegaard Type Bow Attempt (Compleated Pics - 09/14)
« Reply #5 on: August 19, 2008, 04:22:00 PM »
it looks good uncle bernie!  :notworthy:    :clapper:    :clapper:
'' sometimes i wake up Grumpy;
other times i let her sleep"

TGMM FAMILY OF THE BOW

Offline ber643

  • TGMM Member
  • Trad Bowhunter
  • ***
  • Posts: 9205
Re: My First Holmegaard Type Bow Attempt (Compleated Pics - 09/14)
« Reply #6 on: August 19, 2008, 04:29:00 PM »
Still making progress but this tough ol' Hickory is tearing up my puny li'l ol' arms. Having to scrape so much on (or "off"  ) the working parts of the limbs. Now I wish I had started with a square-edged piece (and a band saw - if I had one  ). The durn thing isn't even thinking about bending yet! I also do some work on the bow in my carport, as I am in the process of cleaning that (mess) up and making a new work area. Hot out there though these days but did get a floor, standing fan the other day to help some.

Pic this AM, "fresh" from yesterday's labor (Is it even changing any?  ):


All of the sudden last evening something changed (perhaps technique - or perhaps my arms just woke up from a long sleep - LOL). In any case I actually made some decided progress on scraping both (working) limbs. Perhaps I was just being a little too timid in my approach. While I am not just ripping away at it, I am gaining on it now, and in a relativly short period of time last evening I did two sessions on each limb that I actually could see some distinct progress from. I think I have a handle on it now and actually feel like I can see some light, at the end of the tunnel, towards reaching a state of "bending the bow", if this keeps up. It may be a little premature to yell yippee but I do feel good about last evening. (Could it be that it was the little "reward" I gave myself? - LOL)

A gent called Griffin offered this sound advice:

Looks good.

I have an advice tho.
When you start to take of more wood, be sure to get rid of those dips very carefully.
You don't want them to be bigger.

I'm talking about where the handle meets the limb, and where the limb meets the thick tip.
Just there, you have a dip - a section where you have less wood.

From the handle it should become thinner and thinner. Not thinner wider thinner.

I broke a bow because i had a dip like that.

I replied:

Yes, I think that is very good advice, Griffen. I Also was getting worried about that, as I was having a hard time getting the dips to go away - and stay away. I did know I had a lot of wood to correct it in but wanted to catch it sooner, rather than later. I think I am getting a handle on that too now though, and thanks for noticing. I definitely want those areas level/flush before I start bending it.

here is another pic. Still not bending - LOL - but, between yesterday eve and this AM, I was able to thin the working limb areas some more and get them a little more level, I believe. I also worked on the bevel angles at each end of the wls, to keep them more even. Thicknes of working limbs is now at 6/8" (measured from the crown) but about 5/8" on the edges. When I start back up I will be checking her on the floor often for bending and then for floor tiller, so she doesn't sneak up on me ;^).

 
Bernie: "Hunters Are People Too"

Ret'd USMC '53-'72

Traditional Bow Shooters of West Virginia (Previously the Official Dinosaur Wrangler, Supporter, and Lifetime Honorary Member)
TGMM Family of the Bow

Offline ber643

  • TGMM Member
  • Trad Bowhunter
  • ***
  • Posts: 9205
Re: My First Holmegaard Type Bow Attempt (Compleated Pics - 09/14)
« Reply #7 on: August 19, 2008, 04:40:00 PM »
One thing I should point out at this juncture was brought up to me by my friend, and fellow "traveller" in this excursion into daring-do of bowyery - ;^). Please be aware, folks, that my outer limb sections have only been shaped in the barest sense of the word and are a lot thicker, and more cumbersome looking (and feeling - BTW), than they will be in the end - (if all goes well) while still maintaining the prerequisite of stifness, to act as a "lever" . (I hope, I hope, I hope!)

Still scrapping away whenever I get the chance. Going slow but I have the two working limb areas down to about 1/2" thickness now. Still not bending but they do feel a little different now - like they might be considering it (perhaps if I had more oomph - LOL - I don't think so though. Probably just break it). The overall look hasn't changed enough yet to warrent another picture but soon hopefully. Getting a little more done on my carport/shop each day - whew, what a chore in this heat/humidity.

Well I guess the half inch measurment was really just on the edges - not true thicknes from crown to belly - but anyway - I've scraped some more (working limbs), and I did a little decreasing on the (stiff) outter limb sections to keep them from looking sooo overbearing in size, and here are a couple pics taken this AM (didn't take one of the back). Hope it shows some change from last pics. Took the bow outside (for some air - LOL) so at least the pics would be different. I'm still pleased with how it's coming but do wish I was making a little faster progress. I actually can feel a tiny bit of give to the limbs now when attempting floor tiller.


Couple more waste baskeds of shavings made - and still changing slowly - I know, you wish I'd get to tillering (so do I - LOL). Anyway, if you look carefully, you'll see changes in the outter limbs, fades, and handle - also thickness of working limb sections, though it's harder to notice. I also wanted to show a little thing I found to help me support my limb tips so they won't bend out from under the tool. It is of course one of my old, full size, adjustable, camera tripods - top is even pre-padded - ha. It comes in really handy on a thin limbed bow where you don't want, or can't, shorten the distance from the vice without perhaps crushing the edge wood. The second picture concentrates more on the tripod use. So easy to adjust and use - probably everyone else has already discovered this handy aid - LOL. That's what you get for listening to beginners - we're like kids, discovering "new" old "stuff" all the time.


Bernie: "Hunters Are People Too"

Ret'd USMC '53-'72

Traditional Bow Shooters of West Virginia (Previously the Official Dinosaur Wrangler, Supporter, and Lifetime Honorary Member)
TGMM Family of the Bow

Offline onemississipp

  • Trad Bowhunter
  • **
  • Posts: 668
Re: My First Holmegaard Type Bow Attempt (Compleated Pics - 09/14)
« Reply #8 on: August 19, 2008, 04:43:00 PM »
Looking great, Bernie!!
Dustin
_ _ _________________________________ _  _

Offline ber643

  • TGMM Member
  • Trad Bowhunter
  • ***
  • Posts: 9205
Re: My First Holmegaard Type Bow Attempt (Compleated Pics - 09/14)
« Reply #9 on: August 19, 2008, 04:43:00 PM »
So far I'm sticking with my Holmie Type (and saving/savoring my BBI - LOL). I'm going to show you some pics this AM of a little more visible progress. However, first I want to talk about something that amuses me. I think I mentioned before that a friend (at ATAR) made me a most welcome gift of Dean Torges' book, "Hunting the Osage Bow". I make it a practice to (most always) read while I am lingering over breakfast, and I have been really enjoying said book, and learning a lot (I hope). Now, what I am going to say next is in no way ment to be deprecating or argumentive, (because being a true Libra, I am blessed, or cursed, with the ability to see both sides of most any argument, discussion, or opinion), I'm just saying ........  making an observation, as it were. Unless you really can separate the two things, perhaps it is not the best ,or wisest thing to read that particular book, while at the same time attempting your first Holmi type bow. Now I realize the great (IMO) author is talking about mostly short, simple, primarily Osage, Hunting bows - as he openly states. I also discovered a number of things in there that have helped me along on my Holmi, such as how to clear up ripples from scrapping by (quickly) filing the tops back flat - before they become uncorrectable and hingy. Also how not to cause them when scraping, in the first place - perhaps. BUT - One might find Mr. Torges firmly stated opinions/statements regarding such undesireable things as flat bellies, wide limbs, and non-working limb tips (that act more as levers) a bit disconcerting, and contray to the descriptions and (dare I say) requirements of a Holmi type bow, if you are in the thros of struggling to produce one. Now, I can and have separated the two - and am still enjoying the book and the building of the Holmi Type project, at the same time. I also am relatively sure that if I read his book while attemting an osage bow of the type discussed in the book, I would accept his findings as near gospel and follow them as best I could, without a second thought. In fact, I probably will do just that, more or less, after I am done with the current Holmi project, one way or the other . I'm just saying (again) ..... it might not be advisable to read or recommend the reading of that fine book, while attempting a Holmi - at least not without being exposed to this disertation (or friendly warning -  ) Nuff, said (I hope I haven't stepped on any toes - I didn't intend to -  Now to the "progress" pictures. My first shaping (and also attempt) of Pin Nocks on this bow, with a couple more close-ups. I probably will shape them a little more but they should be usable now, when needed (which I hope is soon ):


... and after more scraping, shaping, and muscle aching - here is proof that my Holmi type actually is beginning to bend a little, in floor tiller attemps (and even looking more like a bow - of some kind, I hope):


If you can see the strip of blue masking tape on one edge, and part of, the top limb, that is an area I want to steer clear of, until I catch the rest of the working limb sections up with it. (If you can't see the tape - it isn't even there, and everything is as it should be - LOL)
Bernie: "Hunters Are People Too"

Ret'd USMC '53-'72

Traditional Bow Shooters of West Virginia (Previously the Official Dinosaur Wrangler, Supporter, and Lifetime Honorary Member)
TGMM Family of the Bow

Offline ber643

  • TGMM Member
  • Trad Bowhunter
  • ***
  • Posts: 9205
Re: My First Holmegaard Type Bow Attempt (Compleated Pics - 09/14)
« Reply #10 on: August 19, 2008, 04:55:00 PM »
The following suggestions were made by a couple of gents:

keep a pencil handy when working on your bow and mark the limb with XXXXXX where you don't want to touch,, say a potential hinge for instance.
at least that's the way I do it.
simply a suggestion Bernie...

It gives a better perspective of how long that bow is in that last pic...unless you're only 4' tall  ..in which case the bow is still plenty long. Sonny

and

looking good Bernie. i might be wrong, but it looks like on the lower limb in the picture the transition between your handle and the limb is a bit sharp, might cause you problems later...

please understand im not being critical, just observing some preventive maintenence. :

Phil

My following post:

Perfectly all OK guys - observations help everyone see more things (IMO), and I truly appreciate the observations and/or comments. In most everything I do/learne, I take all the input handy - use what works (or makes sense) for/to me, and don't use what doesn't work for me - sometimes to my grief, I must admit - but I still always appreciate all input. Please, never worry about that.

I'm not just making excuses (just explanations) but the "How To" I am using as my guide the most, tends to leave the final diminishing of the tips until After tillering - then take them down to as light as one can without them bending (although some respected bowyers/folks do profess to prefer some varying degree of tip bending in "Modified Holmis"). On the fades/transitions I find that each time I get to a new level on the working limb thickness, then I have to rework the transitions, as well as the tips (so you can see I do deviate a little - I've reworked the tips 3 times already). My Opinion (formed as I read/research/and progress with this bow) is that I will wind up with the outer limbs quite a bit smaller than they are now, and the transitions flatter/less of a steep grade. I also am still a long way from final shaping of the handle and those fades to it, as well as the fades to the tips, and size/stiffness of the tips.


I do use a pencil as you mention (a bunch) in working with wood, Sonny, but if I get a little carried away in a specific area (by dumb mistake or overzealous effort) I slap a piece of that bright blue masking tape on it (I also use it in making knives), to really flag it for me, for a while. It's like, "Here's yer sign, Bernie!"

I am a little taller than 4' - but only 5" 10 1/2" (used to be 5'11" until I started "age shrinkage" - LOL) The bow ("pretender") is 66 3/16" TtoT, I just measured it. Don't ask me where the 3/16" came from (I thought it was 66") - perhaps it is "age growth" - Ha-ha


Hi Bernie, I so know what you mean about having to re-work those tips each time you reduce the limbs. I love these style bows, my question is do you think this one more tricky than your osage bow? To me it was great fun making and I learned a lot about shaping the transitions of the different parts of the bow. I am looking forward to seeing this one shooting! What style are you looking at making next?

Nat


It certainly has been for me, Nat. A big part is, I have been on my own on this one, as far as personal, one on one guidance (like Mike was able to give me on my first two - a HBM and my Osage, "It"). He has been really busy with work, and home improvements, etc., plus he never was real interested in Holmegaard Types before, anyway. We have phone talked once or twice, and e-mailed a couple times, but mostly just Mike commiserating with me for having to scrape so much tough Hickory - LOL. Also I know it would have been a lot less work (and less tricky) if I had a bandsaw and the stave had been squared off so that I could have cut a lot of the excess tough Hick away - but the trade off is I probably wouldn't have learned near as much. Even should this bow fail (heaven forbid), I still will have learned much, and got more practice at making shavings and sawdust, with pretty much hand tools, than the law allows. Best of all, I have really enjoyed it, and still am. Thanks for asking.

My next will be a BBI longbow for which I already have a beautiful glue-up on hand from Rich Saffold's shop in CA. Should be considerably easier - but with me, I never know. I wanted a good head start on that one, because I want my, probably only, BBI to have every chance to be as good a bow as I can possiblly make. I'm really impressed with the look of the glue-up. After that, it will be back to my first, and abiding, love in self bow woods - OSAGE. I am keeping my eyes and ears open for a good Osage stave all the time - you know, one that "speaks" to me, for some reason - LOL. I love the Osage bows, and I love working the Osage wood. BTW, I won an Osage bow Friday night in a (free) drawing on one of the forums. Blew my mind, and I am quite excited about it. (Bowyer unknown - so far.) It should arrive this weekend, or first of next week.
My wife says, "Just what you need - another bow." (She pretends not to understand - LOL - but she knows me.) ber643

The last couple of days (as often as I could) I have been working on, and refining, the shape and floor tiller of my Hickory, Holmi Type bow. I've decreased and evened the thickness (and width) of the working limbs, decreased and shaped the fades/transitions (all 4) more, and did a little more shaping on the handle and the pin nocks.

I then did another floor tiller - outside, to better compare with the last pic - this time I put down a foam pad to keep from getting the tip wet and smudged from the old steps:


Bernie: "Hunters Are People Too"

Ret'd USMC '53-'72

Traditional Bow Shooters of West Virginia (Previously the Official Dinosaur Wrangler, Supporter, and Lifetime Honorary Member)
TGMM Family of the Bow

Offline onemississipp

  • Trad Bowhunter
  • **
  • Posts: 668
Re: My First Holmegaard Type Bow Attempt (Compleated Pics - 09/14)
« Reply #11 on: August 19, 2008, 04:55:00 PM »
Bernie,
  I started another thread about shave horses over here come check it out.

  http://tradgang.com/cgi-bin/ultimatebb.cgi?ubb=get_topic&f=125&t=000032  

Adding a foot to yours would help alot.
Help keep ya from being being stretched out.
Dustin
_ _ _________________________________ _  _

Offline Tom Anderson

  • Trad Bowhunter
  • **
  • Posts: 672
Re: My First Holmegaard Type Bow Attempt (Compleated Pics - 09/14)
« Reply #12 on: August 19, 2008, 05:04:00 PM »
Bernie,
What exactly is a Holmegaard bow anyway?
(formerly "NativeCraft")
Wilson, NC

"short skirts create less drag in the woods..." (Dave Worden)

Offline ber643

  • TGMM Member
  • Trad Bowhunter
  • ***
  • Posts: 9205
Re: My First Holmegaard Type Bow Attempt (Compleated Pics - 09/14)
« Reply #13 on: August 19, 2008, 05:05:00 PM »
After that, I got my "long String", that I made early this AM, on it, and worked the bow by hand (only drawing about 6-8") aprox. fifty times. Then I went out to the carport, were I have (newly) set up my tillering tree, and put it on that, with the long string, for the first look see. Again I exercised it bout fifty times, drawing only from 6" increasing to 10" this time. Finally, I drew it 12" three times just long enough to have my wife take quick pictures. The weight at the 12" draw was 35#, BTW


The first pic that Rose took for me, she was a little to my left, behind me:


I had her move over opposite the "tree", while I moved a little to the left with my pully rope, to take the next two. The second one, the camera was tilted a little but I will post it for more views anyway:


As you all know, I am a rank amature at this but I was quite pleased with the way it looks for the first long string pull. Guess I'll start tilleriing in earnest now, and I better make a regular (proper length) string for it. as I think I'll be needing it soon. I'm really getting excited now - but I'll still go careful - if I have to hit myself in the head - LOL.

Gotta start being more careful of how much at a time I take off the working limb sections, now. Still a lot of wood (almost half, again. I'd say) to come off the non-working tips, near the transitions, and tapering to the (already at) 1/2" tips. If I was to put a regular string on now, and brace it at 51/2" (If I could - LOL), the string would probably hit the transitions there.

I've been rather busy the last few days (getting bows ready for deer season, etc.) but have done a little refining as i think of it, and hope to get back to the Holmi Type soon. This catches the thread (and progress - or lack of it) up to date. I will continue as i make more progress

Hope you like it so far.
Bernie: "Hunters Are People Too"

Ret'd USMC '53-'72

Traditional Bow Shooters of West Virginia (Previously the Official Dinosaur Wrangler, Supporter, and Lifetime Honorary Member)
TGMM Family of the Bow

Offline ber643

  • TGMM Member
  • Trad Bowhunter
  • ***
  • Posts: 9205
Re: My First Holmegaard Type Bow Attempt (Compleated Pics - 09/14)
« Reply #14 on: August 19, 2008, 05:26:00 PM »
I will check that out, 1Mississip. Someone (perhaps you) mentioned that to me once before when i first had this one given to me. Made sense to me but hadn't got to it yet, and should, so I will be interested in your thread.

Thanks, Jeff and others for the comments as I was posting - I appreciate it/them.

Tom, the original Holmegaard is an artifact bow found in the peat bogs of Scotland/England. TBB III has this (and a lot more) to say about it:

"The Holmegaard is the oldest artifact definitely identified as a bow. It arose from a pre-agricultyral, pre-warfare culture. It's maker was a member of a band which gathered and hunted for a living, without benefit of writing, pottery, cloth, smelted metal, the wheel, or settled communities. It was likely just an average bow of that time and place, but is superior to the average wooden bow of the present day."

LOL - thus the enduring interest and even fascination with this strange looking bow of special design and performance characteristics.(That last is my observation, big buddy, thanks for asking.)
Bernie: "Hunters Are People Too"

Ret'd USMC '53-'72

Traditional Bow Shooters of West Virginia (Previously the Official Dinosaur Wrangler, Supporter, and Lifetime Honorary Member)
TGMM Family of the Bow

Offline ber643

  • TGMM Member
  • Trad Bowhunter
  • ***
  • Posts: 9205
Re: My First Holmegaard Type Bow Attempt (Compleated Pics - 09/14)
« Reply #15 on: August 19, 2008, 06:33:00 PM »
BTW what I am working on is often referred to as a "Modified Holmegaard", by some, as folks only occasionaly attempt to make replicas of the original Holmegaard but instead have studied, improved, changed, the Holmie in the process of learning and researching. I (and some others) simply refer to our attempts as "Holmegaard Type" bows, drawing on what others have learned and/or discerned about their design, and later designs.


Also I just read over what I posted/transferred earlier and found my dume mistakes and omissions of text and pictures that you probably noted - and have corrected them, I hope. Onward and upward -    :archer:
Bernie: "Hunters Are People Too"

Ret'd USMC '53-'72

Traditional Bow Shooters of West Virginia (Previously the Official Dinosaur Wrangler, Supporter, and Lifetime Honorary Member)
TGMM Family of the Bow

Offline onemississipp

  • Trad Bowhunter
  • **
  • Posts: 668
Re: My First Holmegaard Type Bow Attempt (Compleated Pics - 09/14)
« Reply #16 on: August 19, 2008, 09:01:00 PM »
I can't wait until you get it pulling futher, it's very interesting.
Dustin
_ _ _________________________________ _  _

Offline ber643

  • TGMM Member
  • Trad Bowhunter
  • ***
  • Posts: 9205
Re: My First Holmegaard Type Bow Attempt (Compleated Pics - 09/14)
« Reply #17 on: August 19, 2008, 10:35:00 PM »
Yep, me too - LOL. I've got three bows I am doing repairs on and two waiting to be worked on and couldn't do anything to speak of on them today at all.
Bernie: "Hunters Are People Too"

Ret'd USMC '53-'72

Traditional Bow Shooters of West Virginia (Previously the Official Dinosaur Wrangler, Supporter, and Lifetime Honorary Member)
TGMM Family of the Bow

Offline SoNevada Archer

  • Trad Bowhunter
  • **
  • Posts: 327
Re: My First Holmegaard Type Bow Attempt (Compleated Pics - 09/14)
« Reply #18 on: August 19, 2008, 10:51:00 PM »
If pictures tell a thousand words...yours speak volumes! Keep them coming!
The doom of man...that he forgets!

Offline ber643

  • TGMM Member
  • Trad Bowhunter
  • ***
  • Posts: 9205
Re: My First Holmegaard Type Bow Attempt (Compleated Pics - 09/14)
« Reply #19 on: August 20, 2008, 06:31:00 AM »
Thank you so much, SoN A. Hope to get to some more inner limb shaving, and outter limb size reduction within the next couple of days and get update pics up.
Bernie: "Hunters Are People Too"

Ret'd USMC '53-'72

Traditional Bow Shooters of West Virginia (Previously the Official Dinosaur Wrangler, Supporter, and Lifetime Honorary Member)
TGMM Family of the Bow

Users currently browsing this topic:

0 Members and 4 Guests are viewing this topic.
 

Contact Us | Trad Gang.com © | User Agreement

Copyright 2003 thru 2024 ~ Trad Gang.com ©