Author Topic: Peanuts Master bow build  (Read 1514 times)

Offline Pennsyltuckey pete

  • Trad Bowhunter
  • **
  • Posts: 301
Peanuts Master bow build
« on: September 09, 2009, 10:41:00 PM »
I am building this bow for a friend of mine and he has no clue it is coming his way. Hence the strange name. I figured a build along was in order.  We will see if he catches on. Any suggestions on different and better ways to do things are always welcome.

The bow is going to be 58" String Groove to String Groove.  It is a recurve with a set back handle. Nothing fancy in the woods.  All of the woods are woods that I buy at a local saw mill here in Northeast Pennsylvania.

First my pile of lam stock to choose from.  The stock includes Ash, Hard Maple, Black Walnut, and Hickory.


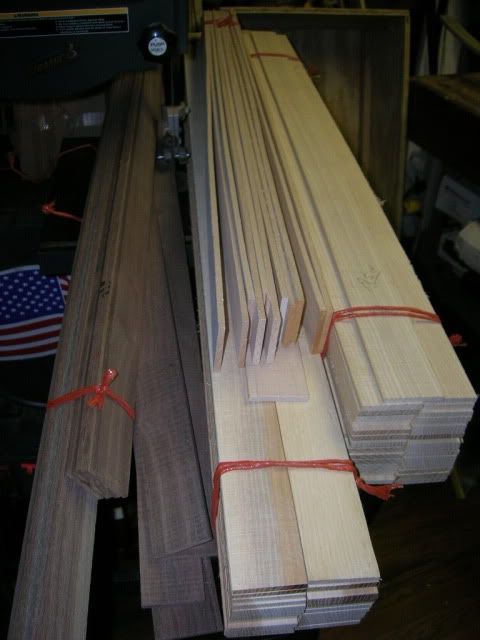
I figured that walnut under clear glass would look good for my friend so I picked out 4 strips and set up the home made lam grinder.  The strips are cut to 3/16 thick+.  The bow has .003 per inch of running taper.  There are two tapers on each limb.  One lam is .120 thick tapered .002 per inch and one lam is .090 and tapered .001 per inch.


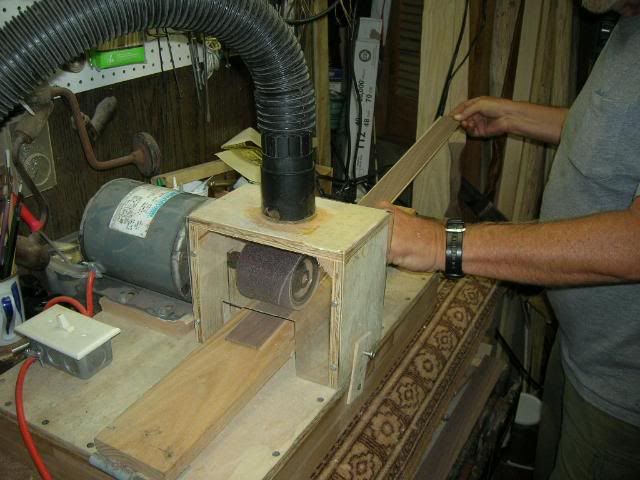
and here is an action shot of the grinder in action.


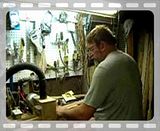
The noise is the vacuum attached to the grinder and it does work!  Here is a little clip of what you get on one pass without the vac hooked up and running. This is also my brothers first experience grinding laminations.  Turns out he doesn't like the smell of walnut.  Then again, neither do I!


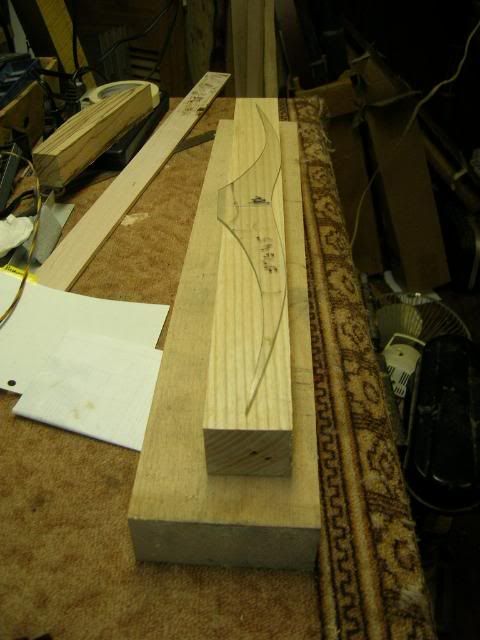
After I got the lams ground it was time to go over to the wood pile and snag a piece of wood for the riser.  I figured ash footed with two strips of walnut would be nice so I selected and cut a nice piece for the riser block.


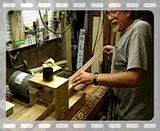
I then set up my footing jig on the band saw. And got ready to start cutting.


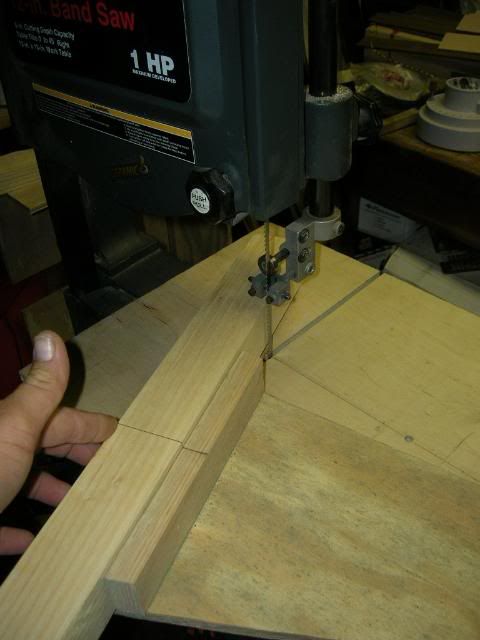
A few cuts later and my riser block is ready for the glue up!


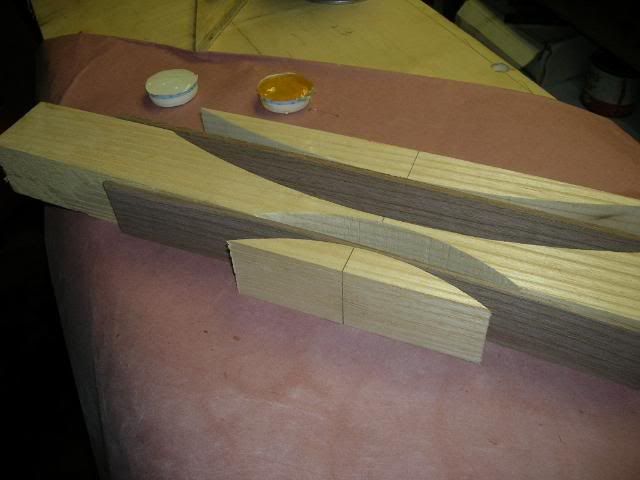
I use Smooth On Epoxy.  I got the glue smeared and pressure added! Always a bit of a messy but fun process.


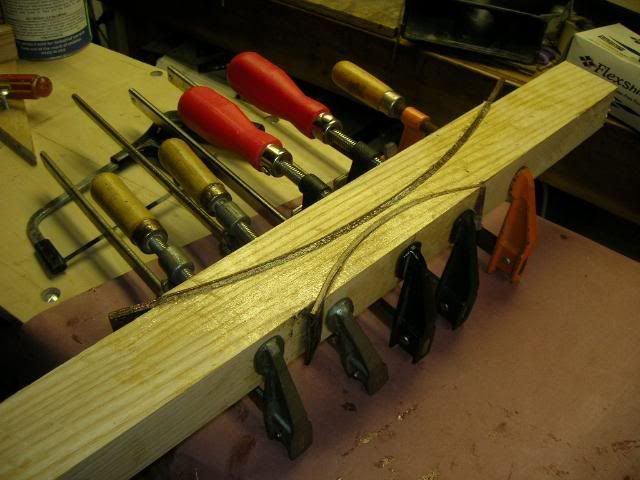
And in to the oven for the night!

pete


pete
Love one woman, Many Bows

Offline 2treks

  • Trad Bowhunter
  • **
  • Posts: 5193
Re: Peanuts Master bow build
« Reply #1 on: September 09, 2009, 10:51:00 PM »
Cool Jig, and cool grinder. Looks good so far.
C.A.Deshler
United States Navy.
1986-1990


"Our greatest fear should not be of failure but of succeeding at things in life that don't really matter.”
~ Francis Chan

Offline Apex Predator

  • Trad Bowhunter
  • **
  • Posts: 3372
Re: Peanuts Master bow build
« Reply #2 on: September 10, 2009, 05:50:00 AM »
I love it Pete!  I'll be following along as usual.
I didn't claw my way to the top of the food chain to eat vegetables!

Offline SteveD

  • Trad Bowhunter
  • **
  • Posts: 545
Re: Peanuts Master bow build
« Reply #3 on: September 10, 2009, 07:00:00 AM »
Looks great. Thanks for sharing.

Offline ChristopherO

  • Trad Bowhunter
  • **
  • Posts: 930
Re: Peanuts Master bow build
« Reply #4 on: September 10, 2009, 03:29:00 PM »
That is the beauty of this site:  So many ways the get the job done and all of them are so educational.

Offline Pennsyltuckey pete

  • Trad Bowhunter
  • **
  • Posts: 301
Re: Peanuts Master bow build
« Reply #5 on: September 10, 2009, 09:08:00 PM »
Sit back this is going to be a long session!  I had the chance to work on the bow for a number of hours and really moved it forward.  Last night I put the riser block in the oven.  THis morning I shut the oven off at 4:00 am on my way to work.  When I got home It was shop time!

The first thing I did was head over to the oven and pull out the blank.  It looked good so I took it over to the Jointer to square the block.  I have to say that the jointer is one of the greatest time saving tools.  In a few minutes I can do hours worth of hand work.


and the finished product!!!


and it is perfectly square!


The next step is to trace the form outline on to my block.  I used to use a template to do this now I use the bow press form.


I always check band saw square before I cut anything that matters in the least.


Always follow the Greywolf rule!
    "Cut outside of the line and sand to the line!"

Here is the riser block set on the bow form after sawing.  I really don't try to get real tight here.  Just a rough fit.


Then I set up my el cheapo sanding station. and yes check it for square!


A few minutes later and we are almost light tight on the fit.

 
lots more soon!
pete
Love one woman, Many Bows

Offline Dmaxshawn

  • Trad Bowhunter
  • **
  • Posts: 1708
Re: Peanuts Master bow build
« Reply #6 on: September 10, 2009, 09:33:00 PM »
Oh boy!!!! Its really starting to get good.  


Shawn

Offline Pennsyltuckey pete

  • Trad Bowhunter
  • **
  • Posts: 301
Re: Peanuts Master bow build
« Reply #7 on: September 10, 2009, 10:05:00 PM »
Then I use the template to draw in the top portion of the riser block cuts.  The band saw is used as well as the sander to bring it to the line.  Here is how a certain someone,  APEX Stand up and be noted, told me how he gets his riser fades so thin! OH wait that might just be a trade secret.  If it is ok with APEX I will share but not till I get his OK>!!!!

Here is a shot of how thin I was able to get the fades using Apex’s method.


My next step is to tooth the riser block. I use an 18 TPI hack saw blade mounted in my vice.  Simple and cheap! I really like that!


Does it work You Ask?


Now we are ready to head towards glue up. First step the lams are cleaned with a bristle brush and placed in the warm bow oven. Here is the form waxed with the eccentric washers and clear plastic wrap in place.


and then the glue table is set up and we start the process of SHMEARing Glue.  I put all of the parts in order before I start the glue process.  I also make sure that the laminations are positioned so the part I want on the outside of the bow is on the outside.  


After the parts are all glued and placed on the bow press the entire mess is covered with plastic wrap and then the taping, wrapping, banding process begins.  This is were it is really helpful to have a friend (In my case my wife, She is a friend too!) help.  


And then it is time for the oven!

Tomorrow We say goodbye to parts hello bow blank!

pete
Love one woman, Many Bows

Offline Pennsyltuckey pete

  • Trad Bowhunter
  • **
  • Posts: 301
Re: Peanuts Master bow build
« Reply #8 on: September 11, 2009, 07:58:00 PM »
I took the bow blank out of the oven tonight and spent about an hour removing the glue boogers and tape and cleaning up the edges so I wont get FG splinters. Inspection showed me two small areas where the glass is foggy but the areas are near the edges at the tips where the bad part will be trimmed off. I guess all I can say is, it is what it is!


pete
Love one woman, Many Bows

Offline toolslinger

  • Trad Bowhunter
  • **
  • Posts: 29
Re: Peanuts Master bow build
« Reply #9 on: September 11, 2009, 08:08:00 PM »
Dang this is good.
It hung in the sky in exactly the same way bricks don't.

Offline metsastaja

  • TGMM Member
  • Trad Bowhunter
  • ***
  • Posts: 1165
Re: Peanuts Master bow build
« Reply #10 on: September 11, 2009, 10:16:00 PM »
Pete real nice build. If your friend decides he does not want it I will personally be more then happy to add it to my collection of the bows you have built for me.

Taking "Lightening" out for a hunt tomorrow.
 
Les Heilakka
TGMM Family of the Bow  
Some times the uneventful nights are just as good if not better than the eventful ones

Offline Apex Predator

  • Trad Bowhunter
  • **
  • Posts: 3372
Re: Peanuts Master bow build
« Reply #11 on: September 12, 2009, 05:26:00 AM »
Pete, my friend, feel free to share anything I share with you.  I am an open book!  Looking good man!
I didn't claw my way to the top of the food chain to eat vegetables!

Offline Pennsyltuckey pete

  • Trad Bowhunter
  • **
  • Posts: 301
Re: Peanuts Master bow build
« Reply #12 on: September 12, 2009, 10:58:00 AM »
Thank you APEX!!

As I said at the beginning of this build I am always looking for a better way to do things.  One of the things I was never happy with were the fades on my riser blocks.  Being a bit of a lurker on this site I would see an Apex build and marvel at the quality of his fades and say "Some Day."

"Some Day" came one day when I sent Marty a simple private message.
 "How do you get your fades so thin?"
The reply was waiting for me the next time I logged on.  
"Back up the fade with the cut off and use the drum sander."  That simple instruction along with a picture was all that was needed.  I would post his original pic but I have no idea where it is so you will have to make due with my el cheapo drum sander shot.


By backing the fade up with the cut off I find that I am able to precisely control the pressure and angles that I am grinding. IF you look closely at the picture you can see a pencil mark at the end of the riser fade.  This is where the  fade will end.

Thank you Apex!

pete
Love one woman, Many Bows

Offline Pennsyltuckey pete

  • Trad Bowhunter
  • **
  • Posts: 301
Re: Peanuts Master bow build
« Reply #13 on: September 12, 2009, 07:22:00 PM »
Somewhere out in the land of electrons are a bunch of pictures that simply disapeared on me.    :eek:

The next step was to retape the bow and find the centerline.  I use the string method with a combination of a flexible straight edge to draw the Center Line on the bow blank.


and then I use a pattern to draw the bow limbs on the bow.  I made the pattern out of formica.  I also use only one side of the pattern to make sure the limb sides are identical.


and then I grind the limbs to shape using my tabletop belt sander.  After the limbs are shapped I cut the nocks in using a file.  I start with a triangle file to cut the initial grove and then round it with a rat tail file. I then string the bow up and check to see that the limbs are pulling balanced and straight.  This pic shows the limb pulling to the left with the  18 inch tiller stick in position.


after triple checking the string nocks I knew I had to remove a little material from the side of the bow limb.  The material has to be removed from the side of the limb that the tip is pointing to or the left side as we look at the limb.  I use a hand held sanding block to do this. it doesn't take a lot to change the limb. This pic shows the limb pulling straight.


Next I check the balance of the limbs with a bowsquare.  I want to make sure the bottom limb is stiffer than the tip limb by about 1/4 of an inch.  This bow was about 1/32" off so I sanded the bottom limb on the glass face and belly to bring the bow in to balance.  To do this I use a flexible sanding pad.  With the limbs balanced it was time to start the riser shaping. First Layout.  I Cover the entire bow with tape to protect it from scratches and make the layout easy to draw and see.


Then the band saw! I use my fiberglass cutting blade to do this. That is why the wood is burned.


and then it is off to the drum sanders to bring in the curves.  NO pics till the  end sorry!


That is all for now.

pete
Love one woman, Many Bows

Offline metsastaja

  • TGMM Member
  • Trad Bowhunter
  • ***
  • Posts: 1165
Re: Peanuts Master bow build
« Reply #14 on: September 14, 2009, 09:00:00 AM »
coming along nicely.  Should be ready for shotability test soon.  Saw your friend this weekend and he sends a big hello.  I didn't say anything about the bow.
Les Heilakka
TGMM Family of the Bow  
Some times the uneventful nights are just as good if not better than the eventful ones

Offline Pennsyltuckey pete

  • Trad Bowhunter
  • **
  • Posts: 301
Re: Peanuts Master bow build
« Reply #15 on: September 14, 2009, 09:22:00 PM »
We wouldn't want to spoil the surprise!

Well,  the bow has moved forward since last post.  It may not seem like much but it is now in to the details.    Here is the bow starting to look like a bow.  The riser is shaped.  This is actually at the first shooting.  I always test the bow at this point to see that the riser is close to comfortable and I want to see that the bow is shooting close to where I want it to hit.  By changing the grip I can change the point of impact.  This one shot fine for this stage. Shooting off the shelf with an improperly set nock point I had a 5 inch group where I wanted it at 15 yards.


The next step is to finish in the tips. This bow is getting Ash String pads and black Linen phenolic tip overlays.  First I cut the string pads way over size.  I boil them for about 15 minutes and then I clamp them on to the bow using C clamps and wood scraps to protect the fiberglass and the new string pad.


I let this sit for 24 hours and then I remove the clamps and the string pads from the bow.  I then dry heat the string pads using a heat gun.  This allows me to add the last little bit of arch that the pad needs to match the tip of the bow without putting any stress on the bow tip or the glue joint.  I also use heat to shape the phenolic tip to match the arch of the bow tips.  Before applying glue I rough sand the tapers in to the string pads and tips using my drill press drum sander.


With all of the parts final shaped and ready for assembly I tooth the pads and mix the glue. I then put all of the parts in place and then wrap the entire tip with plastic wrap.


this mess is then clamped with C clamps and put in the warm box to cure. The next day I remove them and begin the cleanup of the tips.  This tip is rough sanded and ready for shaping.


I use a detail sander to blend the string pads and tip overlay in to the fiberglass.


pete
Love one woman, Many Bows

Online kennym

  • TG HALL OF FAME
  • Trad Bowhunter
  • *****
  • Posts: 17318
Re: Peanuts Master bow build
« Reply #16 on: September 14, 2009, 10:00:00 PM »
Lookin good Pete!!
Stay sharp, Kenny.

   https://www.kennysarchery.com/

Offline coulter

  • Trad Bowhunter
  • **
  • Posts: 63
Re: Peanuts Master bow build
« Reply #17 on: September 14, 2009, 10:41:00 PM »
beautiful bow pete!    noel

Offline Pennsyltuckey pete

  • Trad Bowhunter
  • **
  • Posts: 301
Re: Peanuts Master bow build
« Reply #18 on: September 14, 2009, 10:52:00 PM »
Thanks for the compliments guys! I am planning of finishing with Minwax Helmsman.  What other finishes would you suggest? I do have spray equipment and was actually thinking about one of the automotive clear coats. Anyone ever try that?

pete
Love one woman, Many Bows

Offline Jesse Peltan

  • Trad Bowhunter
  • **
  • Posts: 439
Re: Peanuts Master bow build
« Reply #19 on: September 15, 2009, 11:42:00 AM »
I like tru oil gun stock finish.

Users currently browsing this topic:

0 Members and 1 Guest are viewing this topic.
 

Contact Us | Trad Gang.com © | User Agreement

Copyright 2003 thru 2024 ~ Trad Gang.com ©