Author Topic: Bow tips by Marty  (Read 896 times)

Offline Apex Predator

  • Trad Bowhunter
  • **
  • Posts: 3372
Bow tips by Marty
« on: December 10, 2009, 05:21:00 AM »
It's been requested that I do another tip-a-long.  Here is the promised edition.

After the bow comes out of the form I clean up the blank and then profile the limbs.  I then take the tips down until the width just fits my little string groove guide jig.  I mark the perfect line on either side.


I then cut the first thin groove with either a small triangle file or a hack saw blade.  I will use that groove as a guide for my tile saw, followed by a chainsaw file.  Finally I will hit the grooves with a piece of 150 grit paper.  My thoughts here are to string her up and check alignment and draw weight before spending hours on tips.  After all, I may miss weight and have to cut her down some.  I will narrow the tips later after laminating on overlays.  I will use these grooves as a guide for the final ones.


I had planned to use bocote for the overlays, but changed my mind.  I think the cocobolo looks much better.  The riser is coco/bocote/coco and the limbs are red elm.


I pre-bevel all the overlays before gluing them on.  Here is the coco and phenolic I will use on the tips and the coco for the riser overlay.  The phenolic is not necessary for FF, but many customers feel better with it in there.  It does add a nice accent!


I didn't claw my way to the top of the food chain to eat vegetables!

Offline Apex Predator

  • Trad Bowhunter
  • **
  • Posts: 3372
Re: Bow tips by Marty
« Reply #1 on: December 10, 2009, 05:37:00 AM »
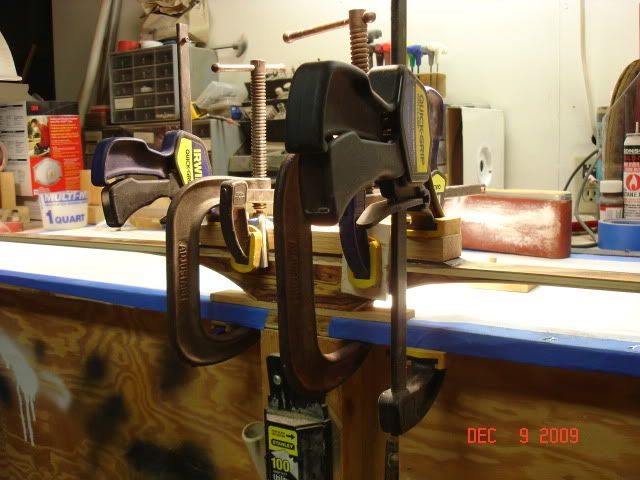
I rough sand the glass with 80 grit right beneath the overlays, and all contact surfaces on the overlay parts.  Everthing is cleaned with acetone.  Now is the time to work all the kinks out of your clamping system.  Overlays will slide all over the place when clamping, so be prepared.  

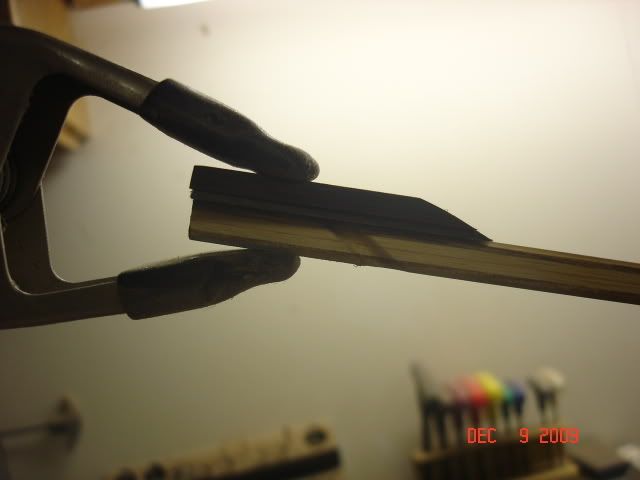
I dry run everything.  Here is a tip clamped to check for fit.  It's always good on these straight bows, unless the surfaces are not flat, but on recurves or R/Ds, the limb tip has some curve to it.  This curve will cause problems if your pieces are too thick.


I now mix up too much Smooth-on epoxy.   :)   After applying epoxy to all glue surfaces and clamping, I will wipe the bead off.  I want it to require as little sanding as possible at that joint later.  These spring clamps are perfect for tips.  You can move them around to get even clamping pressure that holds the slippery tips in place.


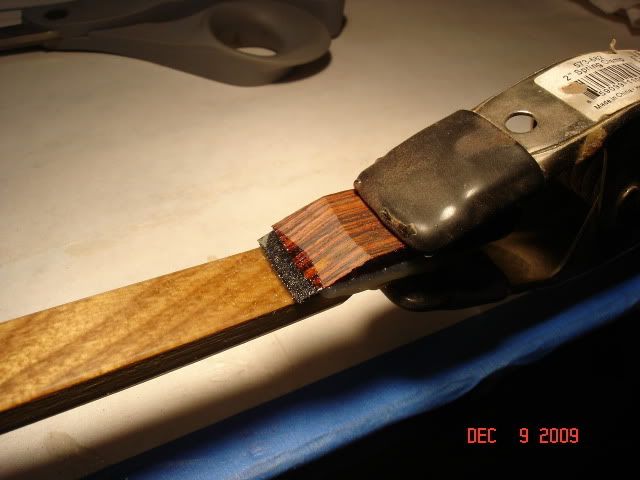
Here is the riser overlay clamped up.  Notice the side clamps.  That keeps the overlay over the bow's surface.  Without those it would slide right off the side of the bow.


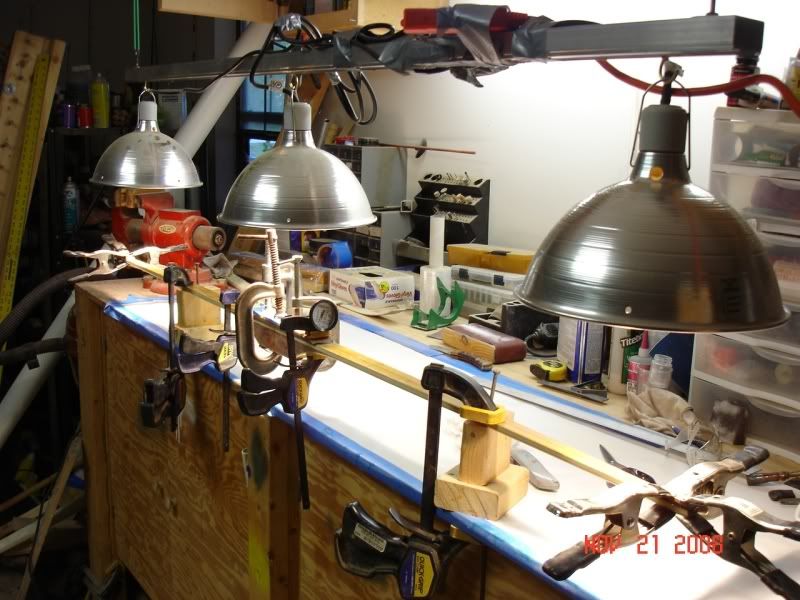
Next, my three headed monster is lowered from the ceiling where she sleeps.  I move the lights to within 12" or a little more, depending on the ambient temp.  I only want around 120-130 degrees here for 4 hours.  I forgot to take a photo here, so this one is from another build.

 
I didn't claw my way to the top of the food chain to eat vegetables!

Offline Dmaxshawn

  • Trad Bowhunter
  • **
  • Posts: 1708
Re: Bow tips by Marty
« Reply #2 on: December 10, 2009, 07:47:00 AM »
Another great thread by Marty. Thanks for the time you spend with us and teaching us as we progress forward here on the bench.  

Shawn

Offline Jason Scott

  • Trad Bowhunter
  • **
  • Posts: 364
Re: Bow tips by Marty
« Reply #3 on: December 10, 2009, 09:17:00 AM »
Thank you

Offline Apex Predator

  • Trad Bowhunter
  • **
  • Posts: 3372
Re: Bow tips by Marty
« Reply #4 on: December 10, 2009, 09:18:00 AM »
Now I file the groove into the whole side of the tip using the earlier ones as a guide.  Take your time here, checking side-side often.  You can correct minor mis-alignments if you catch them early enough.


Now it's off to the sander to start shaping the tips. First the belly, and then the back.


Be careful and tread lightly here, because that 36 grit can eat a bow really quickly.  Keep your work moving and only use feather pressure.
I didn't claw my way to the top of the food chain to eat vegetables!

Offline Apex Predator

  • Trad Bowhunter
  • **
  • Posts: 3372
Re: Bow tips by Marty
« Reply #5 on: December 10, 2009, 09:36:00 AM »
Now I carefully take the groove over the back of the tip with my chainsaw file.


Everything has a rough look to it, but will start to come around in short order.


Some 150 grit paper folded over on itself to match the groove width smooths the groove right out.


This next series of photos shows a part of the tip that must be relieved.  The string will pull out of the groove at the belly as you draw the bow.  If left "groovey"  :) , the string will pop when it jumps that shoulder.  We don't want that!  I use a file to mill down the forward edge of the groove on the tips belly, and fade it into the back.  It's hard for me to explain, so just check out the series of photos.


I didn't claw my way to the top of the food chain to eat vegetables!

Offline Apex Predator

  • Trad Bowhunter
  • **
  • Posts: 3372
Re: Bow tips by Marty
« Reply #6 on: December 10, 2009, 09:42:00 AM »
Now to clean this mess up!  I take my dremel tool to this with a sanding drum.  Once again, you must tread very lightly here.  I don't want to touch the glass at all with the dremel.  


Here she is after dremel, 80, and then 150 grit paper by hand.


Here you can see that a minimal amount of glass is removed.  It looks weird because the top limb edge is rounded towards the tip.  The rest will match after final sanding.

 
I didn't claw my way to the top of the food chain to eat vegetables!

Offline Greg Szalewski

  • Trad Bowhunter
  • **
  • Posts: 1312
Re: Bow tips by Marty
« Reply #7 on: December 10, 2009, 01:30:00 PM »
Great reference. Thanks Marty, always enjoy seeing your work.
PBS Regular, Ask me about The Professional Bowhunters Society; we stand for ethics.
Past President, Wisconsin Traditional Archers
Life member, Wisconsin Bowhunters
Sherwood Forest Bowmen
Traditional Bowhunters of Florida
Colorado Bowhunters Association
Michigan Traditional Bowhunters

Offline bjansen

  • Trad Bowhunter
  • **
  • Posts: 2263
Re: Bow tips by Marty
« Reply #8 on: December 10, 2009, 05:29:00 PM »
Your the best at tips.  Thanks for the tutorial!

Online kennym

  • TG HALL OF FAME
  • Trad Bowhunter
  • *****
  • Posts: 17317
Re: Bow tips by Marty
« Reply #9 on: December 10, 2009, 06:09:00 PM »
Excellent job Buddy!! You ARE the the tipmaster!!  :thumbsup:
Stay sharp, Kenny.

   https://www.kennysarchery.com/

Offline Scott F

  • Trad Bowhunter
  • **
  • Posts: 217
Re: Bow tips by Marty
« Reply #10 on: December 10, 2009, 07:12:00 PM »
Thanks for once again taking the time to post your talents.  I agree with all of the positive comments made above too!

Offline White Oak

  • Trad Bowhunter
  • **
  • Posts: 379
Re: Bow tips by Marty
« Reply #11 on: December 10, 2009, 08:49:00 PM »
Thanks alot Marty. Some great info here. I really enjoyed this post.  :thumbsup:    :clapper:

Offline Furtaker

  • Trad Bowhunter
  • **
  • Posts: 122
Re: Bow tips by Marty
« Reply #12 on: December 11, 2009, 06:54:00 AM »
Fantastic Marty. I think the tips are one of the hardest parts of building bows. You make it look easy.
...........
  Frank

Offline Teagus

  • Trad Bowhunter
  • **
  • Posts: 97
Re: Bow tips by Marty
« Reply #13 on: December 15, 2009, 06:42:00 PM »
Marty,
 Per advise from D. karch, I have been using superglue and small c-clamps on my overlays. I see you use spring clamps. Any thoughts on c-clamps for smooth on? Too much pressure? too much squeeze out?

I went to a used resturant equip. company today and found 3 hanging heat lamps rated for 250w. Thinking of getting them and switching to smooth-on.

Thank you for this lesson.

Offline wihill

  • Trad Bowhunter
  • **
  • Posts: 831
Re: Bow tips by Marty
« Reply #14 on: December 15, 2009, 07:59:00 PM »
Ah HA!  I knew I was doing it the hard way!  I need to get me some powertools - especially the dremel and the sanding drum.

Outstanding Marty!
Support the sport!

Offline Pennsyltuckey pete

  • Trad Bowhunter
  • **
  • Posts: 301
Re: Bow tips by Marty
« Reply #15 on: December 15, 2009, 09:30:00 PM »
Marty,

Thank you for sharing this info!  Tips have always been the toughest part for me. Seeing your method has given me the missing link!

thanks

pete
Love one woman, Many Bows

Offline Teagus

  • Trad Bowhunter
  • **
  • Posts: 97
Re: Bow tips by Marty
« Reply #16 on: December 16, 2009, 09:49:00 AM »
What's up with the tile saw? This has me totally befuddled!

Offline recurvericky

  • Trad Bowhunter
  • **
  • Posts: 657
Re: Bow tips by Marty
« Reply #17 on: December 16, 2009, 09:55:00 AM »
Marty,

Thanks, I love postings such as this.

Ricky
Recurvericky
Richmond, Ks

Traditionalist have more fun!

Offline Tom Leemans

  • Trad Bowhunter
  • **
  • Posts: 2339
Re: Bow tips by Marty
« Reply #18 on: December 16, 2009, 10:28:00 AM »
The duct tape is a nice touch!
Got wood? - Tom

Offline Chisler

  • Trad Bowhunter
  • **
  • Posts: 326
Re: Bow tips by Marty
« Reply #19 on: December 16, 2009, 11:04:00 AM »
Great "how to" thread!  Right when I needed it most!  This is the best forum!!  Thanks so much Marty.  I'll be sure to post some pics of my first recurve in a few weeks.  THANKS!!

Users currently browsing this topic:

0 Members and 2 Guests are viewing this topic.
 

Contact Us | Trad Gang.com © | User Agreement

Copyright 2003 thru 2024 ~ Trad Gang.com ©