Author Topic: building a one piece  (Read 2562 times)

Offline GREG IN MALAD

  • Trad Bowhunter
  • **
  • Posts: 458
building a one piece
« on: July 26, 2010, 02:04:00 AM »
I started a new one piece longbow today, and thought I would share some photos. Previous build-a-longs have covered bow construction very well so I hope this isnt beating a dead horse. Some of the photos are out of sequence, I didnt notice it untill It was too late.
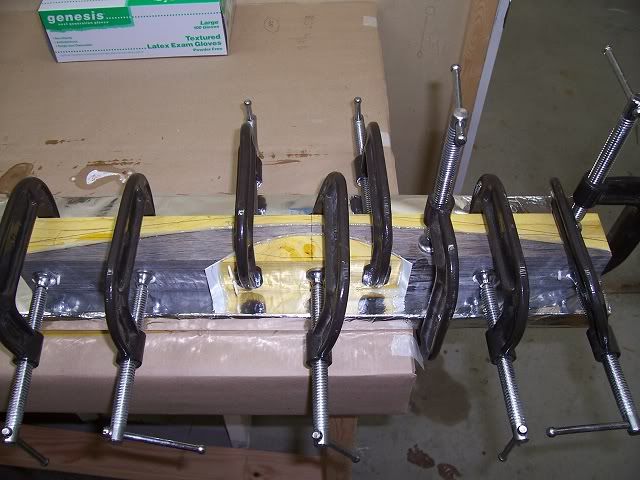
   
I didn't think about taking photos untill I had the riser cut and sanded, so here it is glued up and ready for the oven. It is Yellow actionwood and charcoal dymondwood with white core tuff accents.
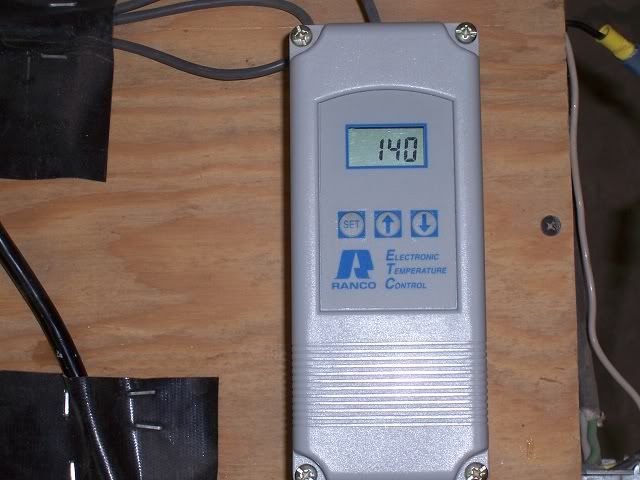
   
I set the temperature at 140 degrees and baked the riser for 3 hrs.The electronic temp control is a valuable addition to an oven.
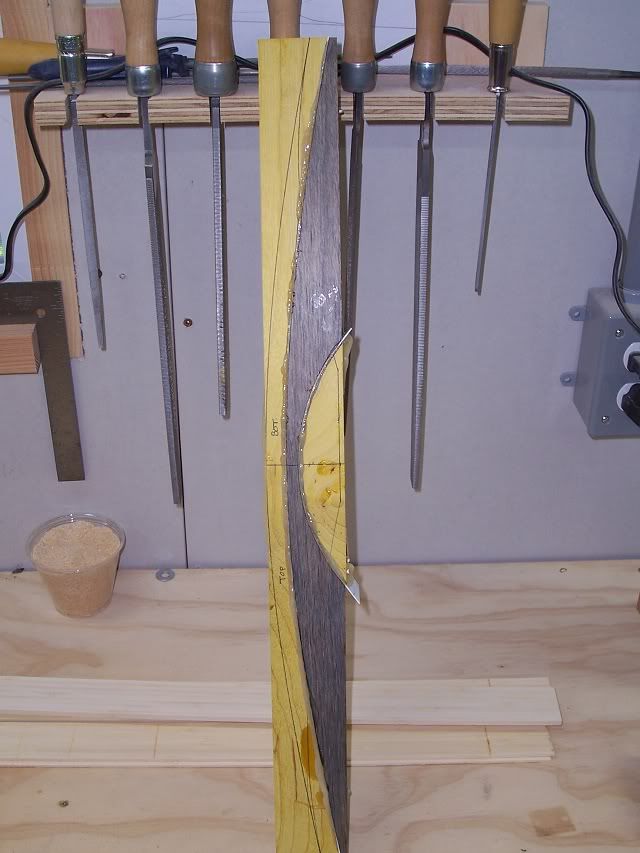
   
 Here it is out of the oven and ready to be squared up.
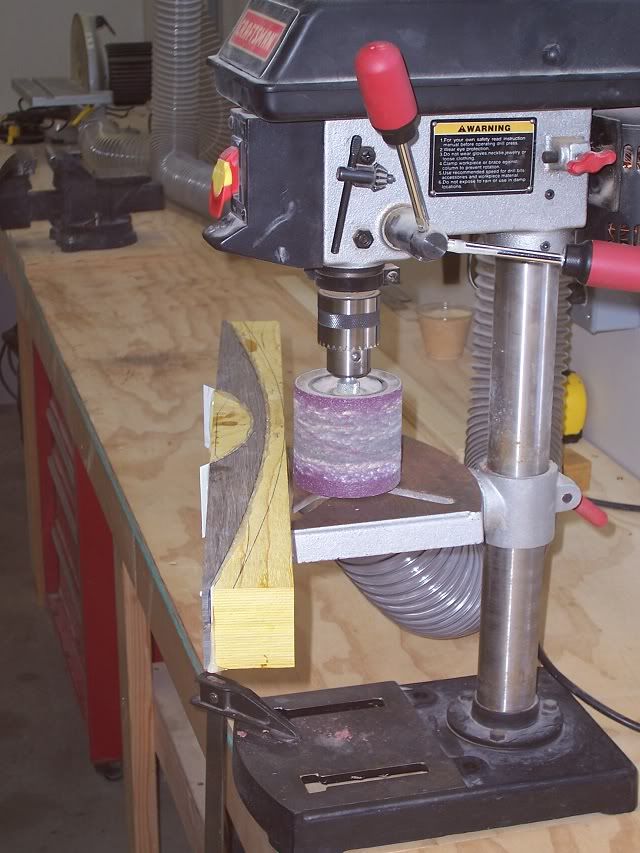
   
 I clean the glue off then sand it to width in the drum sander.
I didnt miss, thats right where I was aiming

Offline GREG IN MALAD

  • Trad Bowhunter
  • **
  • Posts: 458
Re: building a one piece
« Reply #1 on: July 26, 2010, 02:19:00 AM »

It's now 1.5" wide, marked with the template and ready to be cut on the bandsaw. Because it has glass accents that will destroy a blade I will cut around the glass and finish it with a hacksaw.
 
I didnt miss, thats right where I was aiming

Offline GREG IN MALAD

  • Trad Bowhunter
  • **
  • Posts: 458
Re: building a one piece
« Reply #2 on: July 26, 2010, 02:37:00 AM »


It's time to make this fit into the form. First I sand the front profile on the disk sander.
 

Lightly clamp the riser in the form with the laminations to check the fit. Look for light between the lams, if there isnt any and you cant move the lams up and down then your done.


Oh I forgot, while the riser was in the oven I cut and sanded the laminations. These are actionboo
I didnt miss, thats right where I was aiming

Offline GREG IN MALAD

  • Trad Bowhunter
  • **
  • Posts: 458
Re: building a one piece
« Reply #3 on: July 26, 2010, 02:51:00 AM »


Ok, the photos are in the right sequence from here on. With the front profile finished, it's time to rough sand the fadeouts. I use the support block to keep things square.


This fadeout is roughed in and ready to be finished with hand sanding.


Here is a jig I built to hold the riser while sanding.


I use curved sanding blocks with a 60 grit sanding belt to finish the fadeouts.
I didnt miss, thats right where I was aiming

Offline GREG IN MALAD

  • Trad Bowhunter
  • **
  • Posts: 458
Re: building a one piece
« Reply #4 on: July 26, 2010, 02:58:00 AM »


I check my fadeouts by feel. Pull the fade between your thumb and forefinger, it should have a smooth and even taper without any sudden changes in thickness.


This one is finished.
I didnt miss, thats right where I was aiming

Offline GREG IN MALAD

  • Trad Bowhunter
  • **
  • Posts: 458
Re: building a one piece
« Reply #5 on: July 26, 2010, 03:29:00 AM »


I bevel the ends of the laminations before I glue them together with Kwik-it superglue, I lost the photo of the laminations clamped down, end to end while the glue dried.
I didnt miss, thats right where I was aiming

Offline GREG IN MALAD

  • Trad Bowhunter
  • **
  • Posts: 458
Re: building a one piece
« Reply #6 on: July 26, 2010, 03:37:00 AM »


Ok, the Laminations are glued together, everything has been cleaned with acetone and is ready for glue up. And there is the clamps and Kwik-it from the missing photo. Computers hate me.
I didnt miss, thats right where I was aiming

Offline GREG IN MALAD

  • Trad Bowhunter
  • **
  • Posts: 458
Re: building a one piece
« Reply #7 on: July 26, 2010, 03:45:00 AM »


Everything was coated with smooth-on, stacked in the form, taped down and pressurized to 60psi. I didnt take any photos of the glue up because I didnt want to get glue on the camera.
 I bake the bow at 180 degrees for 1 1/2 hrs. This is where the electronic temperature control on the oven is nice.
I didnt miss, thats right where I was aiming

Offline GREG IN MALAD

  • Trad Bowhunter
  • **
  • Posts: 458
Re: building a one piece
« Reply #8 on: July 26, 2010, 03:55:00 AM »


Well, the blank is cured, cooled down, and out of the form. If you look out the window you can see it is now dark outside.


I mark the length with a yardstick and cut the ends off with a hacksaw.
I didnt miss, thats right where I was aiming

Offline GREG IN MALAD

  • Trad Bowhunter
  • **
  • Posts: 458
Re: building a one piece
« Reply #9 on: July 26, 2010, 04:02:00 AM »


After I clean the glue off the edges with the drill press and sanding drum it's off to the drum sander to take it to 1 1/4" wide. 16 passes through the sander and its done.


This is close enough to 1 1/4"
I didnt miss, thats right where I was aiming

Offline GREG IN MALAD

  • Trad Bowhunter
  • **
  • Posts: 458
Re: building a one piece
« Reply #10 on: July 26, 2010, 04:19:00 AM »


The fadeouts look good, it's time for tip overlays.


First I square up the ends on the disk sander.


Then I glue on the first layer of phenolic. If the bow is for me I use Kwik-it, If it's for somebody else I use smooth-on. I've never had an overlay come off with Kwik-it, but smooth-on is a better choice. With superglue the glue joints have to be perfect because it wont fill gaps, epoxy will. But hey, its my bow and I want to shoot it NOW!
 Well it's been a busy day. Tomorrow I will get this thing strung up with the tiller blocks and find the center. I might even get the limbs sanded to width and the rest of the tip overlays glued on. And all before I go to work.
I didnt miss, thats right where I was aiming

Offline Apex Predator

  • Trad Bowhunter
  • **
  • Posts: 3372
Re: building a one piece
« Reply #11 on: July 26, 2010, 07:23:00 AM »
Good stuff Greg!
I didn't claw my way to the top of the food chain to eat vegetables!

Offline mater

  • Trad Bowhunter
  • **
  • Posts: 419
Re: building a one piece
« Reply #12 on: July 26, 2010, 08:34:00 AM »
Good pics and a very nice shop! I wish I were that organised.

Offline bjansen

  • Trad Bowhunter
  • **
  • Posts: 2263
Re: building a one piece
« Reply #13 on: July 26, 2010, 09:36:00 AM »
Outstanding.  Thats the first time I saw the Osage colored actionwood.  I've always wondered what that looked like.  Great looking bow.

Online jess stuart

  • Trad Bowhunter
  • **
  • Posts: 1720
Re: building a one piece
« Reply #14 on: July 26, 2010, 10:46:00 AM »
Nice build a long thanks for taking us along.  That is a nice bow and your shop is to die for.  Mine always looks like a bomb just went off in it.

Offline greyhawk39

  • Trad Bowhunter
  • **
  • Posts: 160
Re: building a one piece
« Reply #15 on: July 26, 2010, 11:13:00 AM »
I agree nice looking bow,and his shop is  so organized.I bet he can find his tools...lol.

Offline Jason Scott

  • Trad Bowhunter
  • **
  • Posts: 364
Re: building a one piece
« Reply #16 on: July 26, 2010, 11:49:00 AM »
I like the colors and the shop. How long do you cook the bow and do you use heat strips or an oven/box? You said you cooked it for 1 1/2 hrs which makes me think you are using heat strips but you refer to an oven. 1 1/2 hrs in an oven is considerably less than the norm. Tell us your thoughts on glue curing times.

Offline GREG IN MALAD

  • Trad Bowhunter
  • **
  • Posts: 458
Re: building a one piece
« Reply #17 on: July 26, 2010, 01:59:00 PM »
Thanks guys,
 This bow was baked in the oven 1 1/2 hrs @ 180 degrees, I use heat strips for the take downs, 45 minutes @ 180 degrees, although they are set up in 30 minutes the edges are a bit sticky because they cure from the inside out. In Jack Harrison's book he recomends 180 degrees for 1 hr, and he uses an oven. The electronic temp control keeps the oven at a constant temp. The snap disk thermometer that Bingham's sells has a 25 degree operating range, It turns off at 180 degrees and back on at 155 degrees. Which adds to the cure time.


I put the tiller blocks on the bow this morning, and found centerline. These are the greatest invention ever, slide them back and forth untill there is no twist and there is the centerline. Scribe a line down both sides of the block, and that marks the limb tip.
I didnt miss, thats right where I was aiming

Offline GREG IN MALAD

  • Trad Bowhunter
  • **
  • Posts: 458
Re: building a one piece
« Reply #18 on: July 26, 2010, 02:03:00 PM »


I slide the blocks with pliers.


Figuring out how to string up the bow with the blocks was the hardest part. A couple bolts in the bench worked fine.
I didnt miss, thats right where I was aiming

Offline GREG IN MALAD

  • Trad Bowhunter
  • **
  • Posts: 458
Re: building a one piece
« Reply #19 on: July 26, 2010, 02:12:00 PM »


I use a straight edge to mark from the fadeout to the marks from the tiller blocks. Now you can sand right to the line and end up with no twist at all.


I dont have room in the shop for an edge sander so I use a sanding drum, It only takes 20 minutes to sand the limbs to width and it's cheaper than bandsaw blades.


Then I use a 12" sanding block with a 60 grit belt to smooth out the edges, this only takes a few minutes.
I didnt miss, thats right where I was aiming

Users currently browsing this topic:

0 Members and 3 Guests are viewing this topic.
 

Contact Us | Trad Gang.com © | User Agreement

Copyright 2003 thru 2024 ~ Trad Gang.com ©