Author Topic: 60” Recurve build along  (Read 1389 times)

Offline MB_Sweden

  • Trad Bowhunter
  • **
  • Posts: 100
60” Recurve build along
« on: September 17, 2013, 09:56:00 AM »
I started building bows a year ago, I read everything on this site and thanks to that I found a new hobby!
Now its my time to post a build along!
This bow is built as cheap as possible, form, hotbox and most of the bow is built from scrap and left overs!
Im born and raised in Sweden so maybe my English isnt the best  :)

Lets start...
Got some used but straight plywood from a construction (Yes, for free), glued and screwed together to get the right dimension 1 3/4" wide!
Marked a straight line in the center of the plywood and traced the pattern made of MDF on both side of the center line!
 

Then I using my jigsaw, sawing outside the line:
 

Then I screw the MDF pattern
 

Make sure it doesnt move and after that its time for my router that has a bearing that copy the MDF pattern straight and nice:
 
Here you see better:


Now the form is almost done, just some washers to keep the bow on the form without sliding and some harware for the press (you will see it when I do to dry run) I also glue a thin aluminum stripe on top of the bottom form.


next update I will show my cheap hot box when I glue my riser out of leftovers  :)
Martin From Sweden

Online cocie

  • Trad Bowhunter
  • **
  • Posts: 27
Re: 60” Recurve build along
« Reply #1 on: September 17, 2013, 01:38:00 PM »
... Hi... can't wait to see this... good luck!   :)

Greetings from Croatia!

Offline MB_Sweden

  • Trad Bowhunter
  • **
  • Posts: 100
Re: 60” Recurve build along
« Reply #2 on: September 17, 2013, 02:55:00 PM »
My hot box is build of styrofoam and duct tape!
Cost is approx 20$ and I can take it to pieces and real easy to store it  :)
Takes 15minutes to assemble it, heat is generated from 5 x 100w lightbulbs!


Riser for this bow is 22" x 1.3/4" Bubinga and Zebrano white and black accent stripes is thin veneers of stained maple
All wood is from my scrap box
 

Cant use to mutch clamps  :)


Im using smooth on epoxy, so cooking it 4-6h @ 170ºF in my hot box
 
Martin From Sweden

Offline BrushWolf

  • Trad Bowhunter
  • **
  • Posts: 1718
Re: 60” Recurve build along
« Reply #3 on: September 17, 2013, 02:58:00 PM »
Lookin good.   :thumbsup:
Kids who hunt, trap, & fish don't mug little old ladies.

Online Roy from Pa

  • Administrator
  • Trad Bowhunter
  • ****
  • Posts: 20668
Re: 60” Recurve build along
« Reply #4 on: September 17, 2013, 03:43:00 PM »
Looks nice, won't the bulbs melt the Styrofoam being so close to them?

Offline MB_Sweden

  • Trad Bowhunter
  • **
  • Posts: 100
Re: 60” Recurve build along
« Reply #5 on: September 17, 2013, 03:51:00 PM »
No melting or burn marks on the styrofoam!
Iam always in my shop when its on for the safety.
Martin From Sweden

Offline LittleBen

  • Trad Bowhunter
  • **
  • Posts: 2970
Re: 60” Recurve build along
« Reply #6 on: September 17, 2013, 03:52:00 PM »
Melting point of expanded polystyrene is 240C or 464F .... I was suprised too ... thought it would be lower than that. Just looked it up.

Glass transition temp is 100C and softening point is 90C ... so it's actually a fairly fine line you walk using it for a hotbox ....

Offline carpin'mark

  • Trad Bowhunter
  • **
  • Posts: 125
Re: 60” Recurve build along
« Reply #7 on: September 17, 2013, 05:52:00 PM »
Looking good, cant wait to see the rest, if you do have a problem with the hot box, lining it with good old kitchen aluminum foil will redirect the heat back in and protect the walls.

Offline MB_Sweden

  • Trad Bowhunter
  • **
  • Posts: 100
Re: 60” Recurve build along
« Reply #8 on: September 17, 2013, 06:01:00 PM »
Thats a good idea,
I have used same styrofoam for 5 bows and I keep the temp 75-80C without no problem!
Riser is cooked, will sand it and saw it later!
Pictures will come
Martin From Sweden

Offline davhoo

  • Trad Bowhunter
  • **
  • Posts: 2
Re: 60” Recurve build along
« Reply #9 on: September 17, 2013, 06:25:00 PM »
Skall följa med här!

I've built the same kind of hot box. Lining it with aluminum foil is probably a great idea. Thanks for the tip carpin'mark!

Offline MoeM

  • Trad Bowhunter
  • **
  • Posts: 491
Re: 60” Recurve build along
« Reply #10 on: September 17, 2013, 06:34:00 PM »
You can also use the alu plaids from first aid kits as heat reflector!
Those router bits are awesome- mine is only 1/2*1/2" and the bearing is on top...
I like your profile can`t wait to see her strung!

Offline chackworth3

  • Trad Bowhunter
  • **
  • Posts: 580
Re: 60” Recurve build along
« Reply #11 on: September 17, 2013, 06:50:00 PM »
Pretty cool stuff!  Never would've thought of using styrofoam like that...

Offline MB_Sweden

  • Trad Bowhunter
  • **
  • Posts: 100
Re: 60” Recurve build along
« Reply #12 on: September 18, 2013, 04:02:00 AM »
Opened the box, removed all clamps!
No slippin or sliding so its time for som dust  :)
First I sanded away all the extra epoxy by hand with my favorite home made special tool  :)
 
16"x2"x1" with 40grit paper, removes smooth-on boogers without any problem, and it doesnt dust as mutch as a belt sander!
But I always use a good respirator!

Now Its nice and square:  
 

Then I draw my riser with a wery thin marker using a pattern cut from MDF, Then I saw outside the line with my bandsaw:
 

Now its time to sand to the line that I marked with the thin marker, Im using a drill and a real basic drill press!
But before sanding, make sure that the sanding drum is square against table:
 

Grinding down the fadouts to paperthin using my drillpress:
 
I measure fadeouts on the riser with vernier caliper, from paperthin and 1" in 1/16" and 2" 1/8" thick hope this picture explain:
 
 
Now its time to clean my shop before the glue up!
Martin From Sweden

Offline MB_Sweden

  • Trad Bowhunter
  • **
  • Posts: 100
Re: 60” Recurve build along
« Reply #13 on: September 18, 2013, 04:19:00 AM »
Martin From Sweden

Offline Buemaker

  • Trad Bowhunter
  • **
  • Posts: 3113
Re: 60” Recurve build along
« Reply #14 on: September 18, 2013, 05:28:00 AM »
Jæklar hur det går, hej fadderullan   ;)  Looking good so far, waiting for more. Where do you buy a router bit like that with the bearing on top? Bue--.

Offline MB_Sweden

  • Trad Bowhunter
  • **
  • Posts: 100
Re: 60” Recurve build along
« Reply #15 on: September 18, 2013, 05:36:00 AM »
Bue, Här går det undan  :)
You got a PM!
Martin From Sweden

Offline MB_Sweden

  • Trad Bowhunter
  • **
  • Posts: 100
Re: 60” Recurve build along
« Reply #16 on: September 18, 2013, 06:55:00 AM »
Martin From Sweden

Offline MB_Sweden

  • Trad Bowhunter
  • **
  • Posts: 100
Re: 60” Recurve build along
« Reply #17 on: September 18, 2013, 10:03:00 AM »
Started to cut the glass and masked it with blue painters tape on the shiny side of the glass!
I also drilled a 6mm hole in the bottom / center of my riser, I also drilled and glued a 6mm dowel pin in center of the bottom form:
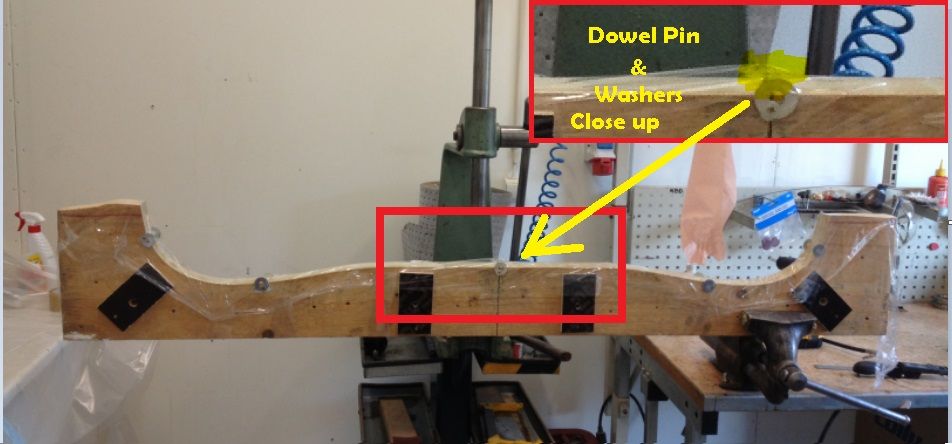
 

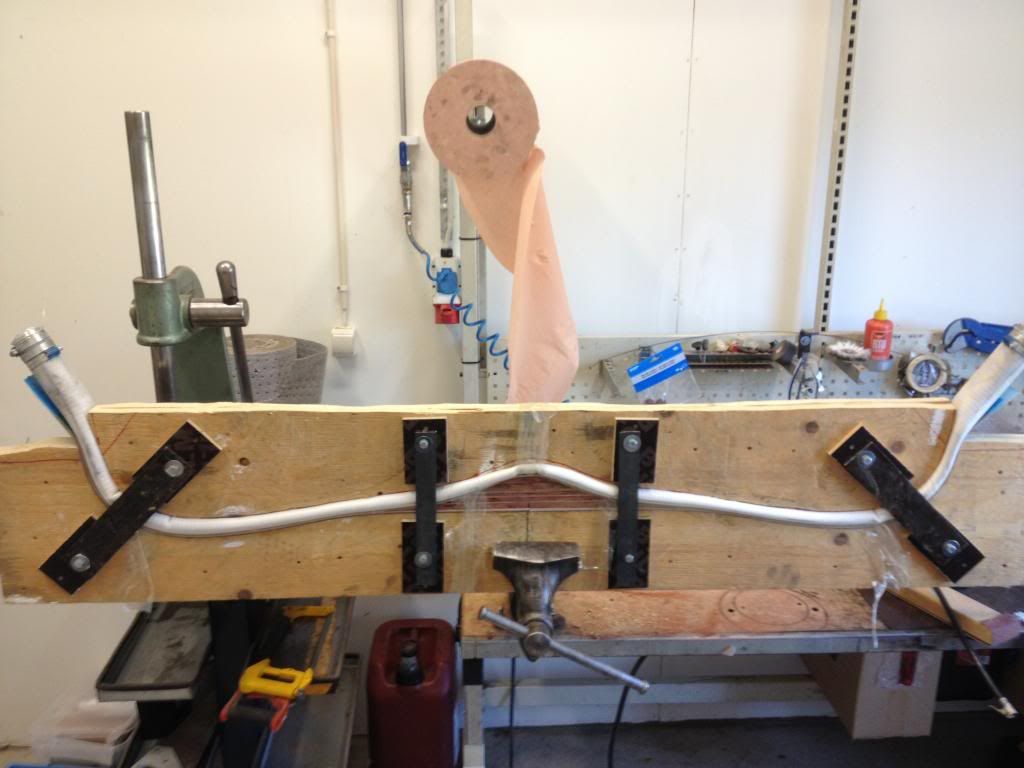
Put some painters plastic on my bench and form and suddenly my shop now looks inspired by Dexter 
Lay up from Right to left on the pic (Bottom of the form and up) starting with:
0,050” Clear Glass (cut in half because of the dowel pin)  
0,110” Taper 0,002” Red Elm (2pcs because of the dowel pin)  
22” Riser
0,063” Paralell Red Elm (2pcs glued together with CA)
0,050” Clear Glass
 

Before dry run and glue up I always testing my air hose for leakage with 5bar and a bucket of water for a couple of minutes!
I always do a dry run mostly to see if fadeouts are OK!
On top of the bow and between the airhose I use a 0,040” aluminum pressure strip


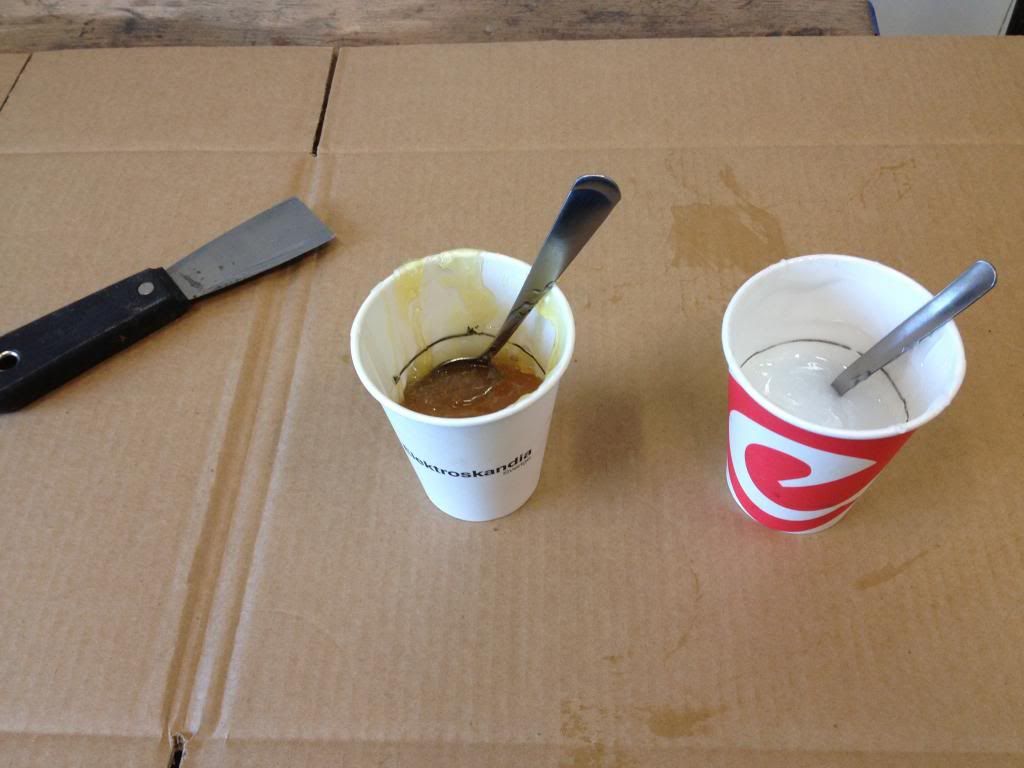
I mix equal parts of smooth-on in paper cups and spread it with a filler spreader, we don’t want any dry spots so a lot of expoxy on all sides! Wet to wet!
 
It isn’t that messy if your organized, I use plastic gloves at least 3pairs each glue up!

Couldn’t take any pictures during the glue up, but here is a picture when everything is in place before cooking 6-8h @ 170F
As you see I use a lot of tape to keep everything in place, it get really slippery when its glued!
When all laminates and pressure strip is in place and taped I screw the top of the form in place and fill the airhose with :
10-15PSI (0,5-1bar)  then I wait approx. 2minutes  
30PSI (2bar)  then I wait approx. 2minutes
45PSI (3bar) then I wait approx. 2minutes
65PSI (4,5bar) if everything is looking good I take a piece of scrap wood and scrape of the epoxy that has leaked out on the sides before I put it in my hot box for 6-8h @ 170F
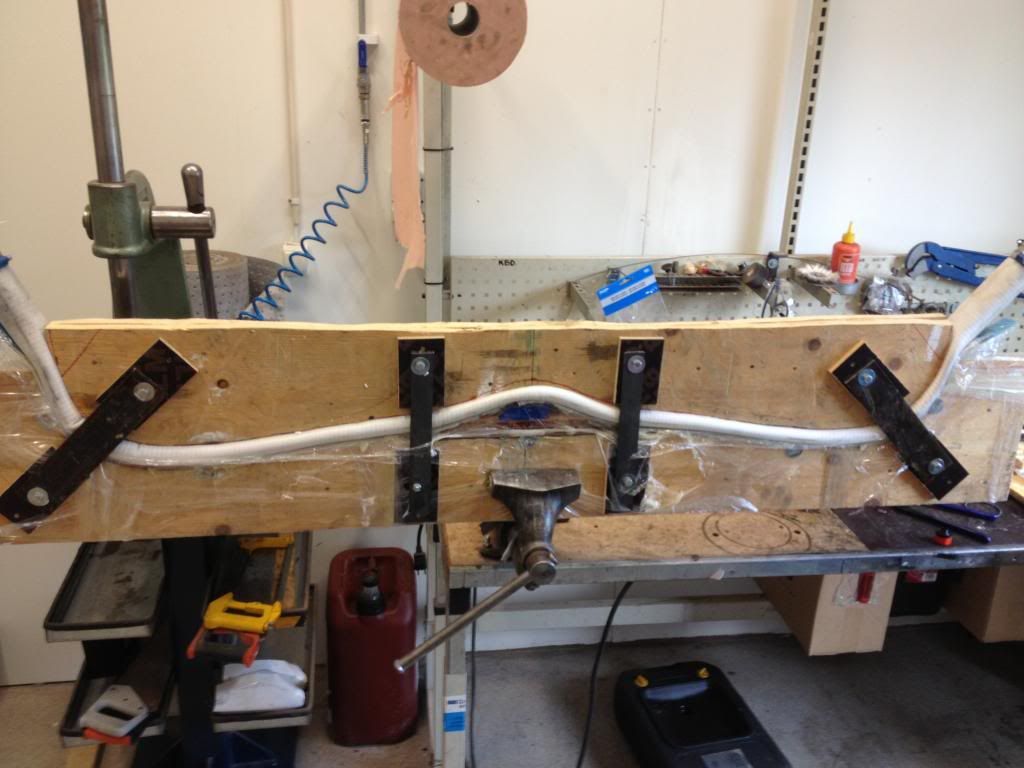
 

Now its just waiting…..
I open the lid on the box a couple of times to check pressure and temperature!
Martin From Sweden

Offline MB_Sweden

  • Trad Bowhunter
  • **
  • Posts: 100
Re: 60” Recurve build along
« Reply #18 on: September 19, 2013, 03:06:00 AM »
After 6h @ 170F I pull the plug and let it cool slowly over night!
Clamped the form into my vice and let the air out of the hose before I screw the top of the form !
No sliding what I can see yet  :)
No leakage in the plastic so the bow came of the form real easy!
Clamped it on the bench and started to sand of all boogers with my 16” sanding block:
 
Martin From Sweden

Offline MB_Sweden

  • Trad Bowhunter
  • **
  • Posts: 100
Re: 60” Recurve build along
« Reply #19 on: September 20, 2013, 03:05:00 AM »
Now its time for one of the best moments during the build! take away the tape and see the wood shine
 
Looking Good!!!
next step it to find center of the bow, first I use my special penn that is schimmed into center using a nut, washer all glued together with CA glue  :)
You also need a 100% straight bench.


After that I double check with some fast flite string !
 

When centerline is marked its time to mark out the limb using a pattern
 

I use a thicker tape and cut after my pattern so when its done I just have to sand to the tape line
 
Martin From Sweden

Users currently browsing this topic:

0 Members and 1 Guest are viewing this topic.
 

Contact Us | Trad Gang.com © | User Agreement

Copyright 2003 thru 2024 ~ Trad Gang.com ©