Author Topic: My First Bow, BBI Build Along  (Read 2373 times)

Offline Pyro43

  • Trad Bowhunter
  • **
  • Posts: 44
Re: My First Bow, BBI Build Along
« Reply #20 on: June 21, 2015, 12:27:00 AM »
Hey guys.

So I only had a little free time this afternoon to work on the bow. I started with the bamboo to get it down to a 1/16" edge. I used a large piece of flat foam like Macbow said and it worked great. After planing it down to where I wanted it, I didn't have any divots at all around the nodes. Then I used the hacksaw blade and scuffed it up well, I went at apposing angles and got a real nice cross hatch pattern that should provide a really good glue bond.

I then sharpened the blade on my plane to a fine keen edge, clamped down the ipe and went to work. With a good sharp edge the stuff planes rather well. It has terrible interlocking grain, so even with a sharp blade and the chipbreaker set close, I got some tearout. Nothing I need to worry about for the bow, but if I were making a cabinet or such out of it, I'd have to make some adjustments to get the tearout to near 0.


For a hand plane guy, that curly little ribbon looks beeeeeautiful    :saywhat:   . I got about half of the one side done before I needed to clean up. My wife and I had a pair of tickets to the Rattlers game tonight, and she's been wanting to go for a while. Good game, they kicked Orlando's butt.

Anyway, might be a few days before I get back to it, but ya'll have a nice weekend.
It takes being smart to know that not everything is true, but you become wise once you learn to distinguish truth from not.

Offline Pyro43

  • Trad Bowhunter
  • **
  • Posts: 44
Re: My First Bow, BBI Build Along
« Reply #21 on: June 21, 2015, 12:33:00 AM »
I forgot to ask. I looked a little and couldn't find anything right off the bat about tapering. Macbow you said:

"Might start with 1/2 inch thick in center tapering .004 to tips."

 I am planing down to where the limbs will be 1/2" thick from fades to tips right now. But what exactly do you mean by tapering .004 to tips? If you could help me better understand that I would be real appreciative. Thanks
It takes being smart to know that not everything is true, but you become wise once you learn to distinguish truth from not.

Offline macbow

  • Trad Bowhunter
  • **
  • Posts: 2870
Re: My First Bow, BBI Build Along
« Reply #22 on: June 21, 2015, 08:06:00 AM »
Tapering .004 means .004 per inch.
So if my math is right figure if 35 inches from center of bow to tip times .004 that would be .14 removed at the tip end.

I think you could be a little more aggressive even.
Using hand planer vs a thickness planer or thickness sander with a sled I would shoot for 1/2 at fades to 3/8 at tips.
This really is just pre tillering before glue up. Lesson wood to bend and glue the easier it goes.
United Bowhunters of Mo
Comptons
PBS
NRA
VET
"A man shares his Buffalo". Ed Pitchkites

Offline Pyro43

  • Trad Bowhunter
  • **
  • Posts: 44
Re: My First Bow, BBI Build Along
« Reply #23 on: June 21, 2015, 11:31:00 AM »
Thanks Macbow, that helps out a lot.
It takes being smart to know that not everything is true, but you become wise once you learn to distinguish truth from not.

Offline macbow

  • Trad Bowhunter
  • **
  • Posts: 2870
Re: My First Bow, BBI Build Along
« Reply #24 on: June 21, 2015, 12:51:00 PM »
I edited the last post was,supposed to read 3/8 thick at tips.
United Bowhunters of Mo
Comptons
PBS
NRA
VET
"A man shares his Buffalo". Ed Pitchkites

Offline Pyro43

  • Trad Bowhunter
  • **
  • Posts: 44
Re: My First Bow, BBI Build Along
« Reply #25 on: June 21, 2015, 09:22:00 PM »
That's what I figured, I'll read through my posts several times and still find mistakes. No big deal
It takes being smart to know that not everything is true, but you become wise once you learn to distinguish truth from not.

Offline Pyro43

  • Trad Bowhunter
  • **
  • Posts: 44
Re: My First Bow, BBI Build Along
« Reply #26 on: June 24, 2015, 12:31:00 AM »
So I got some time to work on the bow this afternoon and I was able to get quite a bit done. I finished shaping the piece of ipe, first down to thickness, then to the width profile to match the bamboo.


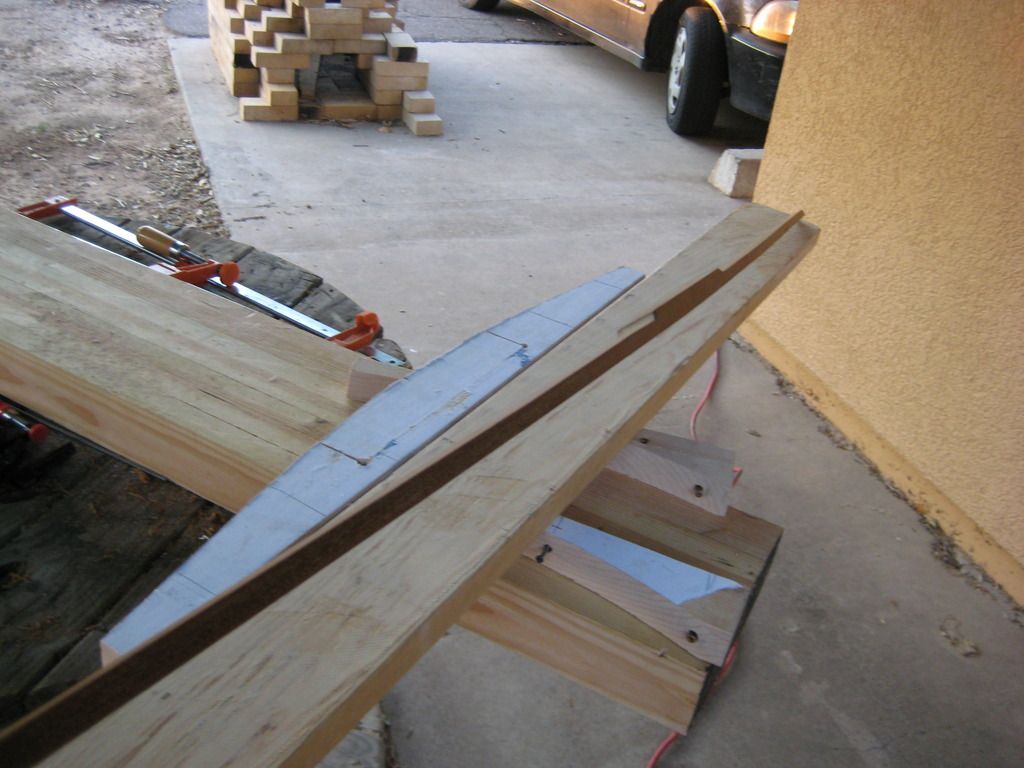
At the fades it measures 1/2" then it tapers down to the tips to around 7/16". I realized that wasn't enough once I got it into the form to test clamp it. I'll take it down to 3/8" once it take it out tomorrow like Macbow had said.

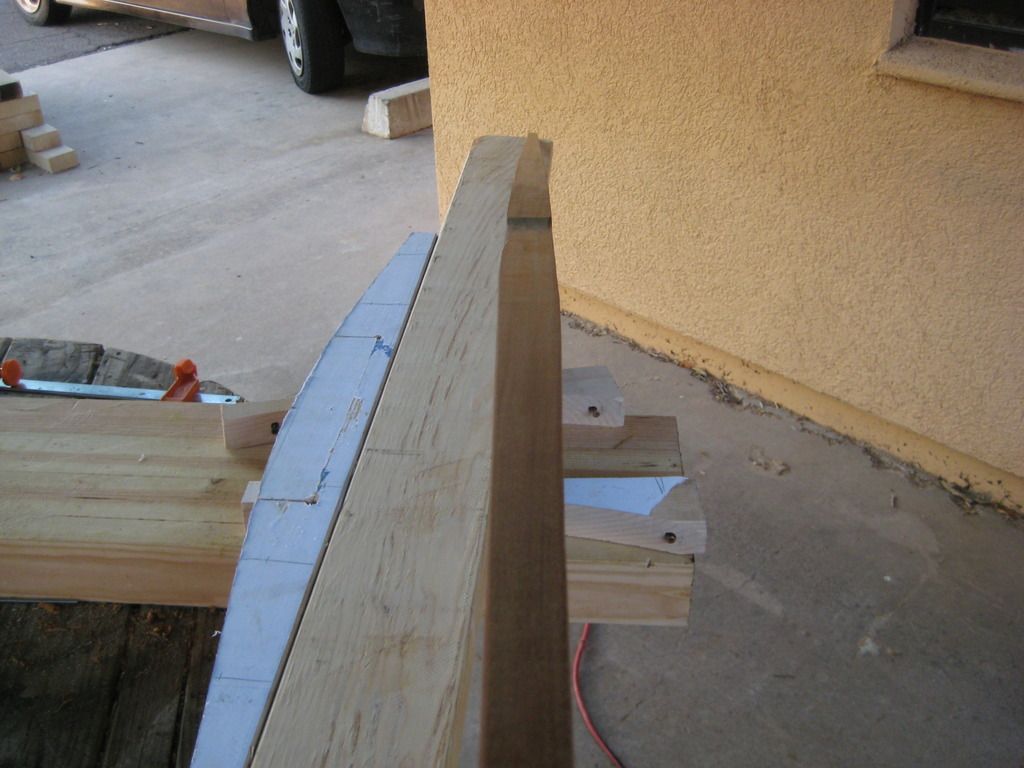
I bent the handle after I finished preparing the stave. Following some instructions on an old Tradgang post I managed to heat bend a little curve into the handle that holds when taken from the form.

I would imagine all that heat probably damages the wood fibers, so like so many have said, I don't think the technique could be used on the limbs. Though some testing would need to be done to verify that. But where the handle area is it won't affect the rest of the bow if the wood was weakened. I didn't heat too close to the fades just to be sure. So if anyone says you probably can't bend 3/4" ipe, here's your proof.
   

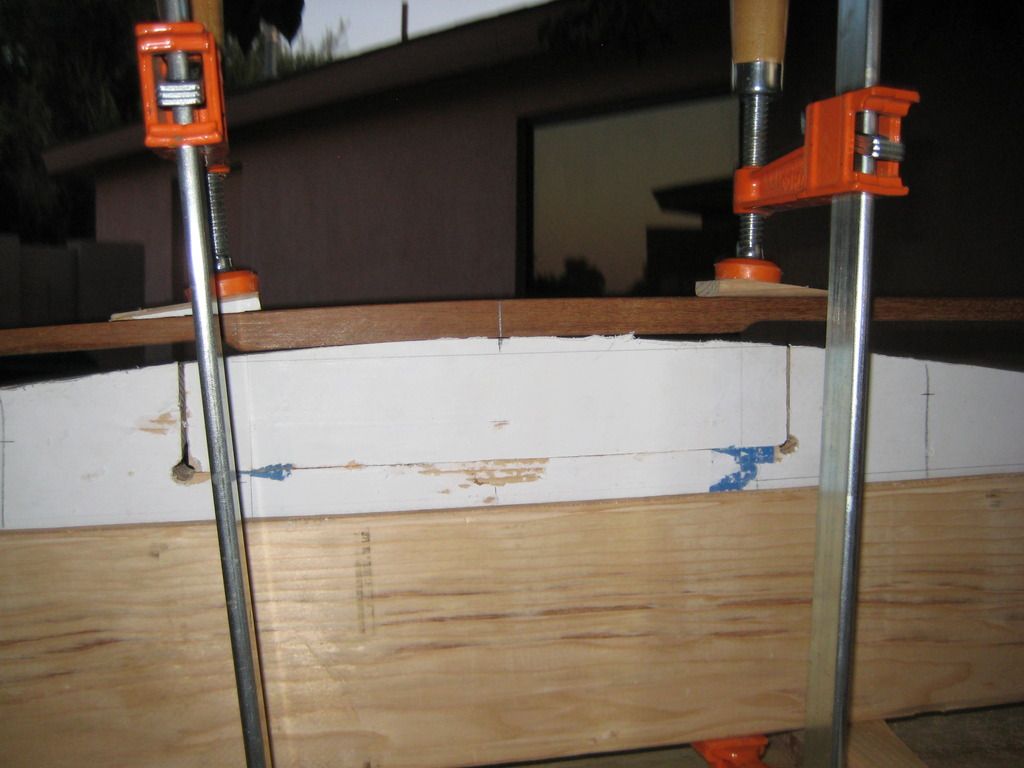
Just a little past this point is as far as I felt comfortable tightening the clamps. I used a heat gun and got the wood nice and hot. As others have said in other posts, little bits of black tar looking stuff comes out of the wood and it smokes a bit once good and hot. I alternated heating and clamping until I made it all the way to the form.
   

I may have gotten the wood to bend as far as I needed it to without heat, but I doubt it would have held its shape after unclamping. I wanted it to hold it's shape to reduce the chance of the handle popping off later down the road if the glue failed.

At one point I placed some paper shims in the center of the handle to bend the handle a little more than the form would allow. What bend I did get is probably about the limit with a 3/4" thick board, as I clamped it down with the shims in place a little bit of wood at the apex of the curve started to splinter    :banghead:   
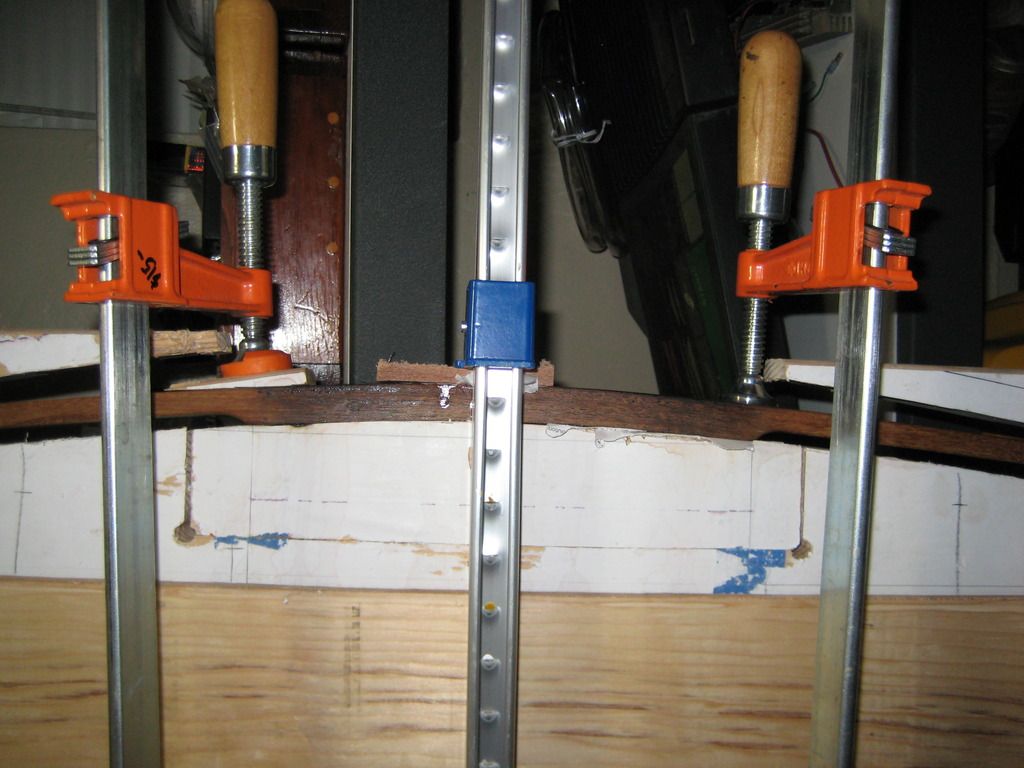
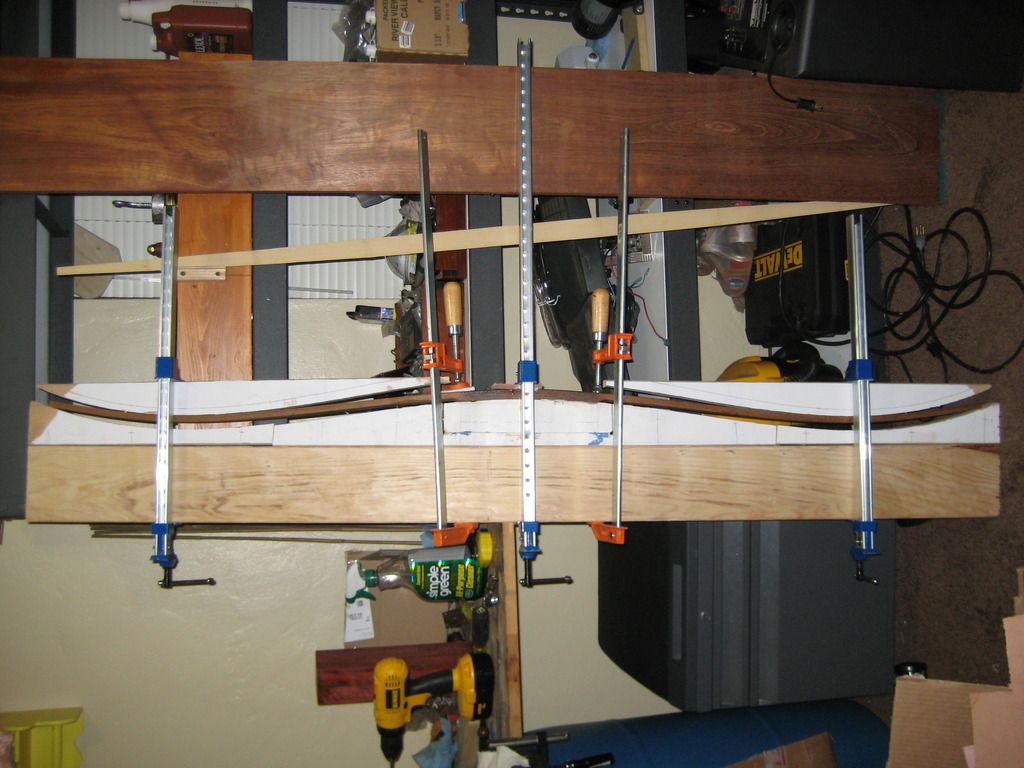
. I stopped there and called it good. You can see in pic above the center blue clamp, that is where I took some thin super glue and clamped the splinters back down.

I left it in the form for tonight, I figure it should help the handle take set better, I'm happy with the slight bend I got, I think it will look real nice when it's finished.

While it is in the form I figured I might as well start to develope the bends in the limbs.
   

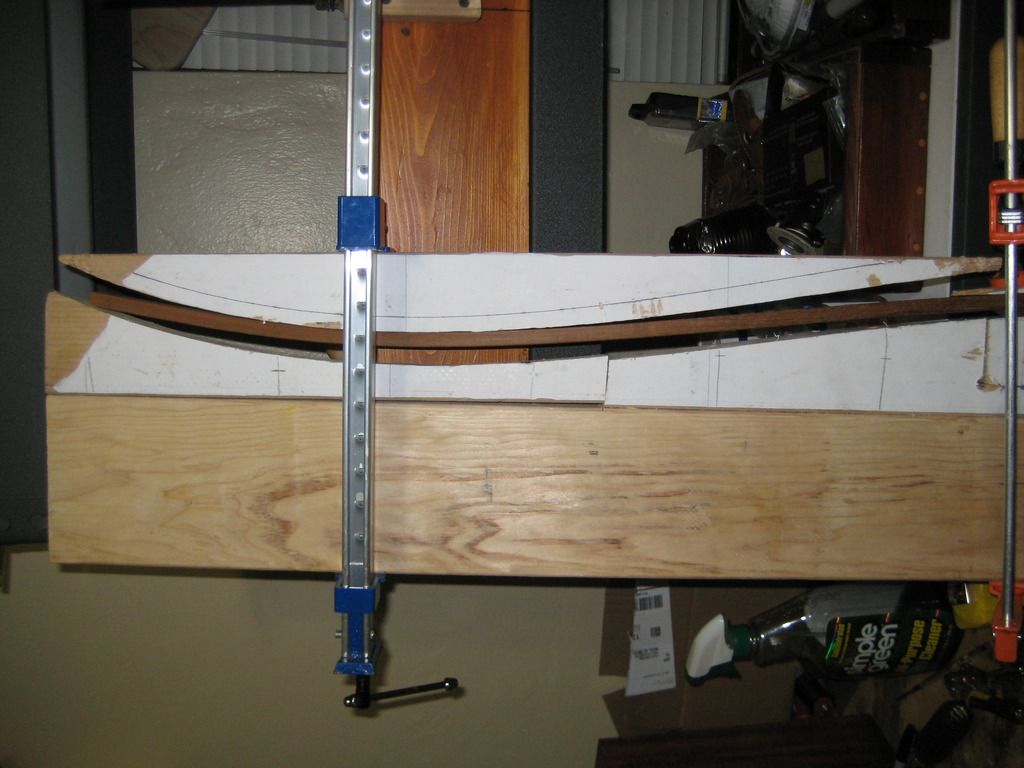
It was at this point I realised I needed to taper the limbs more. Looking back at Macbows last post I realized I needed to take the taper down to 3/8" at the tips.

One question I had was about the tips of the bow and their relative bend to the rest of the bow. It was my understanding that with a R/D bow, you want the tips, maybe the last 8-10", to be relatively stiff, so most of the energy is stored in the first 2/3rds of the limbs. So the tips kinda act to snap the string. So if I taper the ipe both in thickness and width, will I still get those stiff tips I'm looking for? It would seem to me like the two tapers would cause the tips of the bow to bend uniformly with the rest of the limbs.

Anyway. this last pic is just a close up of the clamping pressure on the limbs. I'm afraid to try and clamp them all the way down for fear of them breaking.
   

Will tapering them down the last 1/16" allow them to bend as far as I need without breaking. I wanted to put some shims in the form at the tips to give maybe another inch of reflex, will I be able to do that?  

Sorry for all the questions. Thanks for any help offered. I'm excited that it is starting to take shape, hopefully I can get it glued up and start tillering it this week    :archer2:   .

Anyway, thanks for all the advice so far. I'll post some more pics once the bow comes out of the form.
It takes being smart to know that not everything is true, but you become wise once you learn to distinguish truth from not.

Offline mikkekeswick

  • Trad Bowhunter
  • **
  • Posts: 988
Re: My First Bow, BBI Build Along
« Reply #27 on: June 24, 2015, 02:31:00 AM »
Now you are running into the problems of no core! That's why I suggested it earlier and would still do so. You will get a fair amount of spring back from trying to make ipe that thick conform to your form. Personally I wouldn't be happy about trying to get those outer limbs clamped down to your form without too much risk of them breaking/lifting splinters. Ipe will split as soon as you look at it! Try spliting some of your offcuts with an axe....no interlocking grain here  ;)
To answer your questions - Yes the taper should certainly continue out to the tips.
A r/d bows outer limbs look stiff due to the reflex there but they are still working. If not then you will get excessive set inner limb. A wooden bow needs to have the bending stresses spread out along it length. That is your aim - to distribute the stress as well as you can, not concentrate it.
Don't add more reflex - trust me! Get this bow built first then maybe think about making a new form.

Offline macbow

  • Trad Bowhunter
  • **
  • Posts: 2870
Re: My First Bow, BBI Build Along
« Reply #28 on: June 24, 2015, 07:20:00 AM »
Agree that you've gone far enough with the bends. Would glue it up just like that.
As far,as tip thickness you can always glue in some over lays like hardwood or buffalo horn.

With the weight your shooting for 3/8 may be a narrow as the,tips need to be.
On 50 # bows I go narrower after the overlay and string grooves are in.
United Bowhunters of Mo
Comptons
PBS
NRA
VET
"A man shares his Buffalo". Ed Pitchkites

Offline John Scifres

  • TGMM Member
  • Trad Bowhunter
  • ***
  • Posts: 4540
Re: My First Bow, BBI Build Along
« Reply #29 on: June 24, 2015, 11:53:00 AM »
I never cut the belly slat to profile until after glue-up. That's how Dean Torges taught me.  Have I mentioned his video ("Hunting the Bamboo Backed Bow" - bowyersedge.com)?

Get your belly slat thinner.

If you use a belly slat that is the same thickness at the handle as the rest of the length, it will bend during glue-up.  Then you glue on a handle later.
Take a kid hunting!

TGMM Family of the Bow

Offline Bowjunkie

  • Trad Bowhunter
  • **
  • Posts: 2324
Re: My First Bow, BBI Build Along
« Reply #30 on: June 24, 2015, 12:42:00 PM »
I was going to post EXACTLY what John just did.

I dont cut the wood to its front profile until after glue up. The bamboo, yes.

And like he said, I make the whole slat the 'working thickness' I expect it needs to be for the target weight, then pretaper from dips to tips, leaving it parallel in thickness between the dips (or fades, if you'd rather call them that). I have never left a thicker 'pedestal' of wood under the handle, and they don't delaminate.

I second Dean's video. You'll love it.

Offline Pyro43

  • Trad Bowhunter
  • **
  • Posts: 44
Re: My First Bow, BBI Build Along
« Reply #31 on: June 24, 2015, 04:30:00 PM »
Thanks guys for the feedback. I appreciate it and try to get the most out of it.

I am seeing what you mean mikkekeswick about using multiple laminations. For my next bow I want to try a Bamboo Ipe Bamboo trilam with the belly lam running up the handle, I really like the look of it, and like you said, I think I'll be able to get a better R/D glue up out of the form. Ipe is some 'fun' stuff to work with that's for sure. And what you explained about the stress distribution along the limbs make sense, and I can see how because of the relex they would appear to be more stiff.

And just a side note, not to discount what you said about interlocking grain, but at least in woodworking, interlocking grain refers to the grain running opposing directions from growth ring to growth ring. It is most evident in quarter sawn wood, as when you plane it, especially with a hand plane, you'll get a nice smooth cut in some areas, generally between each set of rings, and others will tear out. There isn't much of a 'with the grain of the wood' when it comes to working with interlocking grained woods. They require a lot more care when working with only hand tools, some are about impossible to plane and you end up using a scraper a lot. A lot of the tropical woods are that way, Ipe being one of them. Hope that doesn't sound too know-it-ally, that's my woodworking background coming out.

MacBow I planned on using some of the same bloodwood and zebra  from the handle as the tip overlays, I assume those will work ok?

And I appreciate the tip about not cutting the profile until after glue up John. I had seen some people do that so I just assumed that is what you  do, especially because like you said you usually always to the bamboo before. I'll be sure to keep that in mind for the next one. My riser design will be different on the next one too. I've learning a lot to take to the next bow build.

I'll put that video on my list of bowyering educational material to purchase, He looks like he knows what he is talking about    :readit:
It takes being smart to know that not everything is true, but you become wise once you learn to distinguish truth from not.

Offline macbow

  • Trad Bowhunter
  • **
  • Posts: 2870
Re: My First Bow, BBI Build Along
« Reply #32 on: June 24, 2015, 06:23:00 PM »
Yes those should be fine for overlays.
I agree with the Dean Torges video. It is a gem.
Get it before your next build it will change things especially your form.

I also,cut the board to the bamboo after glue up. But I have a bandsaw.
United Bowhunters of Mo
Comptons
PBS
NRA
VET
"A man shares his Buffalo". Ed Pitchkites

Offline Pyro43

  • Trad Bowhunter
  • **
  • Posts: 44
Re: My First Bow, BBI Build Along
« Reply #33 on: June 24, 2015, 11:31:00 PM »
So I just tapered the limbs some more today. I have both limbs tapering fairly evenly from 1/2" down to 3/8". Using a pair of calipers, (why do we call them a pair or set when it's just one?), I was able to check that both limbs are pretty closely matched, I'll have to wait until I get it on the tree, but they should bend evenly.

Once I got it back in the form I was very happy to be able to clamp it all the way to match the form. No splitting or odd sounds at all.
     

It's looking pretty good. Unless I end up having something come up tomorrow afternoon, I plan on gluing her up.

A few questions for those that might have some input       :help:       .

First is whether I should leave the ipe stave in the form for a day or more to get it to take some set? I'm thinking if the bow clamped down in the form starts to take the shape of the form, there won't be as much springback after glue up. Would it be better if the ipe 'gave into' the shape of my form a little first by leaving it in? Or do I want that all that stress from bending to get glued permanently into place? I can't think as to which is best, and if leaving the stave clamped down will damage the wood fibers too much.

Also with that same idea in mind. If I glue it up needing to apply a lot of clamping pressure to get to to bend where I want it, will that much pressure glue starve my joint? I've looked at quite a few peoples pictures of their glue ups, and some look like they are really clamping down, or forcing a lot of bend, which would force more glue out. Is that even something I need to worry about? I roughed up all my surfaces really well with a hacksaw blade, got a real nice crosshatch pattern from the scratches. I'd hate to glue starve the joints, not much can be done to repair that, at least that I know of.

And lastly, if you've made it this far       :thumbsup:    . I will be using rubber inner tubes to wrap the pieces together before going into the form. I've looked and cannot find anything on how tight to wrap. I don't want to squeeze too much glue out, but at the same time I'd like to get as tight a seam as possible. Nothing compares to a seamless glue joint as far as I'm concerned. But I've never used a glue like UniBond 800 before, just the titebond glues and gorilla glue. So how tight do you wrap yours? I know it's hard to say, but do you wrap as hard as the rubber feels like it will stretch, or just barely enough to where the joint looks like there are no gaps?

I'm excited to glue it up tomorrow. Unless I hear to leave it in the form for a few days to take shape. Thanks for all the help, hope you guys are enjoying the build.

Chris
It takes being smart to know that not everything is true, but you become wise once you learn to distinguish truth from not.

Offline Pyro43

  • Trad Bowhunter
  • **
  • Posts: 44
Re: My First Bow, BBI Build Along
« Reply #34 on: June 24, 2015, 11:38:00 PM »
Sorry. I forgot I had one more question. Any tips on what I can use between my wooden cauls and the wrapped bow. I don't want to damage the bamboo nodes with the clamping pressure. I was thinking along the lines of layered carpet or some foam or something. I've seen people use pressurized fire hose for laminated glue ups, but I'm afraid I don't have that option. Thanks for the ideas.
It takes being smart to know that not everything is true, but you become wise once you learn to distinguish truth from not.

Offline mikkekeswick

  • Trad Bowhunter
  • **
  • Posts: 988
Re: My First Bow, BBI Build Along
« Reply #35 on: June 25, 2015, 02:02:00 AM »
You don't need the top half of your form. No need to sandwich the bow! If you just have the bottom half then there is no need to make a spacer to protect your bamboo. Just wrap the inner tubes around. As for tightness I always pull them until the edge of their stretch. People talk about 'dry' glue joints but these glues works on a microscopic level and are meant to be very thin layers, glue starved joints get blamed for a lot of other problem imo. Pull the tubes so they are at the edge of their stretch and you will be fine. I used to make laminated elb's, I must have made 200+ of them and i've never had a single glue problem with the inner tube method.
As for wether or not to leave the ipe in your form...well if it clamps down to the form well then there is no need  but it wouldn't harm anything if you did leave it in your form. Personally I wouldn't leave it in because you'll lose some of the advantage of gluing in Perry reflex (but you shouldn't really think about that yet!). There is also no need to score the surface with modern glues as they wet the surfaces so well. As for perfect surface preparation for that glue then a quick email to Unibond and they will send you the glues datasheet. I always do this with any unfamiliar glue as you know 100% that the information is correct and not just somebodies 'the way I do it'.  ;)

Offline John Scifres

  • TGMM Member
  • Trad Bowhunter
  • ***
  • Posts: 4540
Re: My First Bow, BBI Build Along
« Reply #36 on: June 25, 2015, 10:36:00 AM »
In order:

No

You will be fine

Make your belly, glue, backing sandwich.  Wrap your sandwich with one wrap of electrical tape at the handle, midlimb, and tips.  Wrap the sandwich with Saran Wrap.  Put it in your form.  I would not use rubber innertube strips in that kind of a form. Put a strip of foam on top.

I would have some foam packaging material set on top of the bamboo to hopefully get even pressure.  Add extra pieces between the nodes.  Still, I would not expect great glue lines. That's one reason why Dean came up with his system for glue-up so that clamps (or rubber innertube strips) could be used on the entire length.
Take a kid hunting!

TGMM Family of the Bow

Offline Pyro43

  • Trad Bowhunter
  • **
  • Posts: 44
Re: My First Bow, BBI Build Along
« Reply #37 on: July 01, 2015, 01:47:00 AM »
So, it's been a busy last few days. I haven't had the chance to post any of the work I got done, though it hasn't been a whole lot.

I didn't get to glue everything up until saturday. That gave me some time to work out just how to do it. Thanks to the input on the forum and from a friend, everything went well. I put it together with the electrical tape and saran wrap. I got it in the form and used some scrap leather I had cut to fit between the nodes to spread the clamping pressure. It worked out well. Got some really good glue lines, at least I'd consider them pretty good.


I left it in the form till the next evening. I couldn't hardly wait to pull it out, though a little apprehensive at the same time. Pulled it out clamps came off easy, and the bow only had about an inch of springback.


Sorry the picts aren't the best, its an old camera. But I think you'all agree it turned out pretty good. Unclamping after glue up is a little nerve racking. I'm very pleased with it, I think it will turn out well, and they should only get better from here.
It takes being smart to know that not everything is true, but you become wise once you learn to distinguish truth from not.

Offline Pyro43

  • Trad Bowhunter
  • **
  • Posts: 44
Re: My First Bow, BBI Build Along
« Reply #38 on: July 01, 2015, 01:48:00 AM »
The glue lines are good too, better than I expected from what some people had said, but I think what I imaged was pretty bad.


I have to say, the painters tape before glueup saves a lot of work, tape that whole thing up top to bottom, cause that glue gets everywhere. Though a little heads up, the tape isn't too easy to get off, the hardened glue makes it about impossible to just pull the tape off, But scraping/peeling the tape off would be way easier than having to scrape that hard glue off the wood.      

After getting the tape off and cleaning up any other squeeze out left, I used a sharp scraper and worked down the joints to see the glue lines along the whole bow, they all looked real good, no gaps anywhere.

So I started to work on the handle and tip overlays. For the overlays I went with bloodwood over zebra. The handle is cherry, zebra, cherry, bloodwood. It's a little odd, I just used the wood I had lying around, but I'm sure after the bow is finished it will look great, just hard to see now. Once the cherry takes some color from age I think it will look less odd.

I glued up the handle lams first, same with the overlays. Then I prepped the surfaces to mount them to the bow.

Mating the two curves of handle and bow took some time. I used a pencil to put graphite all over the bow where the handle would go, then I held the handle blank tight to where it would mate with the bow and just moved it around in little circles to transfer the graphite, leaving marks wherever there were high spots. I had to do that maybe 10-15 times, scraping down the high spots each time, until I had an almost perfect fit. Knowing that the glue would make up the difference, I didn't get it 100%, but I'm glad I did as much as I did, cause the seam between the handle and the bow turned out really well too. I just hope it is a good glue joint, and doesn't pop off down the road    :knothead: .

Should have some time tomorrow to start tillering, wish me luck.
It takes being smart to know that not everything is true, but you become wise once you learn to distinguish truth from not.

Offline mikkekeswick

  • Trad Bowhunter
  • **
  • Posts: 988
Re: My First Bow, BBI Build Along
« Reply #39 on: July 01, 2015, 02:23:00 AM »
Good luck!
This is the stage where plenty of pictures will really help. Go slowly,slowly!

Users currently browsing this topic:

0 Members and 1 Guest are viewing this topic.
 

Contact Us | Trad Gang.com © | User Agreement

Copyright 2003 thru 2024 ~ Trad Gang.com ©