3Rivers Archery


The Trad Gang Digital Market


Contribute to Trad Gang and Access the Classifieds!

Become a Trad Gang Sponsor!

Traditional Archery for Bowhunters


LEFT HAND BOWS CLASSIFIEDS TRAD GANG CLASSIFIEDS ACCESS RIGHT HAND BOWS CLASSIFIEDS


Author Topic: Hip quiver build along  (Read 784 times)

Offline RGK

  • Trad Bowhunter
  • **
  • Posts: 845
Hip quiver build along
« on: March 31, 2007, 09:31:00 AM »
After searching for the hip quiver design that I want, I started the project. I used cardboard to make a template for the back of the quiver.


Then cut the quiver face.


I wet the leather of the quiver face and spent some time tooling it. I added the "K" so it matches the arm guard.


As long as I had the leather wet. I creased and folded the top of the face (where the arrows will slide in) to keep it from swelling and getting fuzzy from the field points hitting it.


Next up is tooling the upper portion of the back of the quiver.
Member: WI Bowhunters Association
Member: WI Traditional Archers
Member: American Broadhead Collectors Club
Member: Sherwood Forest Bowmen

Offline Whip

  • Moderator
  • Trad Bowhunter
  • ***
  • Posts: 8189
Re: Hip quiver build along
« Reply #1 on: March 31, 2007, 11:30:00 PM »
Ron, Great to meet you today!
Are you making this quiver from a plan with dimensions for the pieces, or just judging it as you go along?  
I'll have to watch this one - I like that style of quiver for summer shoots.
PBS Regular Member
WTA Life Member
In the end, it is not the years in your life that count. It's the life in your years. Abraham Lincoln.

Offline RGK

  • Trad Bowhunter
  • **
  • Posts: 845
Re: Hip quiver build along
« Reply #2 on: April 01, 2007, 10:38:00 AM »
Great to meet you as well. No patterns here. It's all by guess and by gosh. I like to create on the fly. I get burnt some times doing that but it makes it more fun that way.
Member: WI Bowhunters Association
Member: WI Traditional Archers
Member: American Broadhead Collectors Club
Member: Sherwood Forest Bowmen

Offline RGK

  • Trad Bowhunter
  • **
  • Posts: 845
Re: Hip quiver build along
« Reply #3 on: April 01, 2007, 10:39:00 AM »
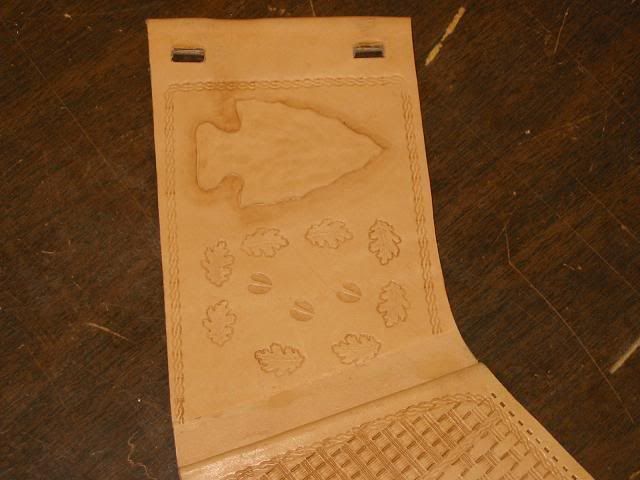
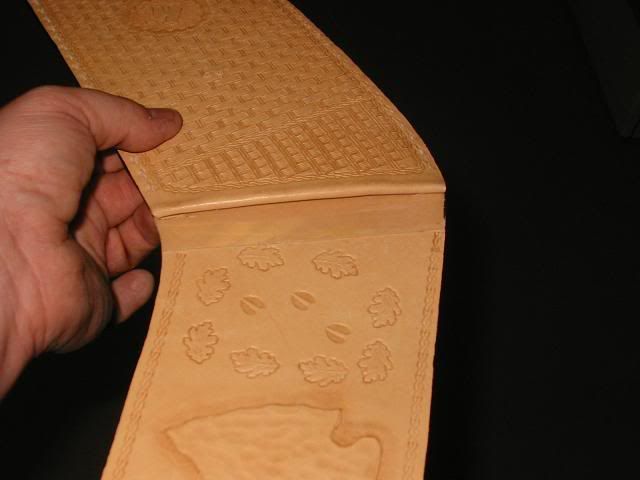
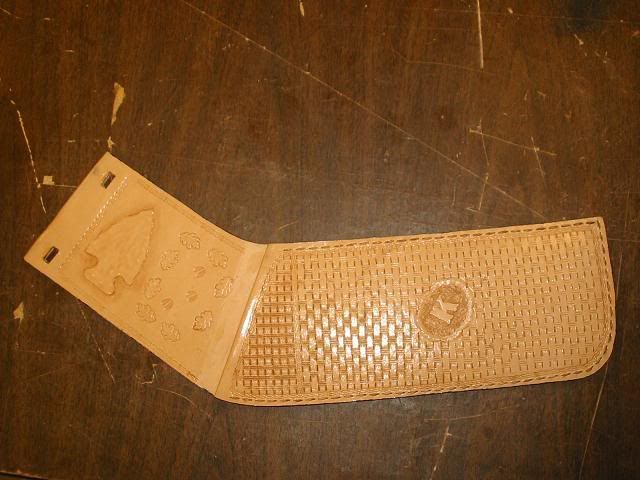
I stamped the upper/back portion of the hip quiver with a pattern I sketched on the leather. The deer hoof and the oak leaves were stamps. I framed it with a rope stamp. I also cut two holes for the belt clips.


I used the forked punch for the stitching holes and used a 2 mm leather thong for sewing the two halves together.


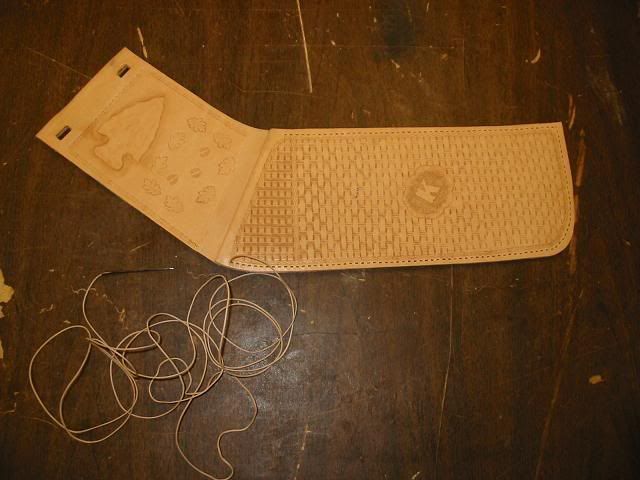
I was great to sew with and it is very strong.


I forgot to take pics of one step. I cut up a very thin plastic cutting board and used rubber cement to attach them to the inside faces of the quiver. This will allow the arrows to slide in and out of the quiver without wearing it down and it added some stiffness. I left a short amount it sticking out on the back face to act as a buffer for when I am inserting arrows.


After stitching both halves, I trimmed then with a razor knife so both edges were even. I then used edge kote to seal and waterproof the end grain so it will not swell or get fuzzy.


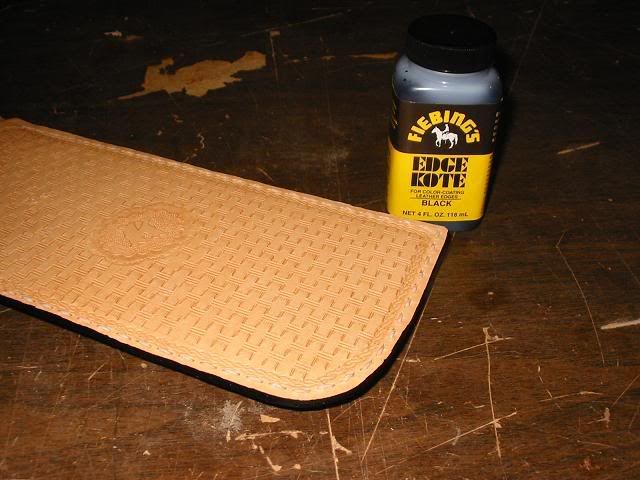
I then gave the outer surfaces two coats of super sheen to seal and waterproof the leather as well as give it a nice shine.


Only a few more steps to do before It's done. I hope to finish it today.
Member: WI Bowhunters Association
Member: WI Traditional Archers
Member: American Broadhead Collectors Club
Member: Sherwood Forest Bowmen

Offline RGK

  • Trad Bowhunter
  • **
  • Posts: 845
Re: Hip quiver build along
« Reply #4 on: April 01, 2007, 07:11:00 PM »
I'm guessing that over time, the quiver will get flexible or loose and the arrows won't be held as tightly as they are when it's new.


to cure this, I punched two holes through both sides of the quiver so that I can tie it closed with a leather thong. To dress up this feature I cut an antler button and then decided to add some bear claws to the ends of the thong. I have a few bear claws packed away in salt and borax.


After cleaning off the toe jam and giving them a coat of polyurethane. I had done my first bear manicure.


I had my son model the quiver for me. I used two belt clips to hold it in place. It holds 6 arrows very well.

 
Member: WI Bowhunters Association
Member: WI Traditional Archers
Member: American Broadhead Collectors Club
Member: Sherwood Forest Bowmen

Offline Chuck Fawcett

  • Trad Bowhunter
  • **
  • Posts: 70
Re: Hip quiver build along
« Reply #5 on: April 01, 2007, 07:38:00 PM »
Nice work, gorgeous tooling job. You'll enjoy that one for years for sure.

Online The Whittler

  • TG HALL OF FAME
  • Trad Bowhunter
  • *****
  • Posts: 2866
Re: Hip quiver build along
« Reply #6 on: April 01, 2007, 08:26:00 PM »
You do some very nice work. Thanks for sharing. Alan

Offline Whip

  • Moderator
  • Trad Bowhunter
  • ***
  • Posts: 8189
Re: Hip quiver build along
« Reply #7 on: April 01, 2007, 08:28:00 PM »
That is really cool Ron!  You make it look so easy you've almost got me to thinking I could do that!  I know it wouldn't turn out quite so nice, but I may have to give it a try.
PBS Regular Member
WTA Life Member
In the end, it is not the years in your life that count. It's the life in your years. Abraham Lincoln.

Offline JEFF B

  • TGMM Member
  • Trad Bowhunter
  • ***
  • Posts: 8246
Re: Hip quiver build along
« Reply #8 on: April 01, 2007, 08:40:00 PM »
hey real nice quiver. oh by the way the edge kote you dont have to spend the money i use black die and bees wax what you do is melt the wax and put the die in give it a good mix up and keep it hot and while it is hot put it on with a cotton bud and once it has dried get some canvas and rub the hell out of it and boy does it shine real good and lasts for ever. give it a go you wont be sorry.  :thumbsup:    :campfire:
'' sometimes i wake up Grumpy;
other times i let her sleep"

TGMM FAMILY OF THE BOW

Offline RGK

  • Trad Bowhunter
  • **
  • Posts: 845
Re: Hip quiver build along
« Reply #9 on: April 01, 2007, 09:20:00 PM »
Thanks wolfman.
Member: WI Bowhunters Association
Member: WI Traditional Archers
Member: American Broadhead Collectors Club
Member: Sherwood Forest Bowmen

Offline OconeeDan

  • Trad Bowhunter
  • **
  • Posts: 1685
Re: Hip quiver build along
« Reply #10 on: April 02, 2007, 07:09:00 AM »
That is nice, and love the toenails!

Offline the Ferret

  • Trad Bowhunter
  • **
  • Posts: 3232
Re: Hip quiver build along
« Reply #11 on: April 02, 2007, 07:14:00 AM »
On Bearclaws the matter inside the claws will shrink over time making the claws basically hollow and allowing the hard outer shell to come off. Take some 2 part epoxy and force it into the inside as best you can to keep it from falling apart.

Very nice work BTW   :notworthy:
There is always someone that knows more than you, and someone that knows less than you, so you can always learn and you can always teach

Offline RGK

  • Trad Bowhunter
  • **
  • Posts: 845
Re: Hip quiver build along
« Reply #12 on: April 02, 2007, 07:07:00 PM »
Thanks for the info. Your right they are hollow. Epoxy is a great choice.
Member: WI Bowhunters Association
Member: WI Traditional Archers
Member: American Broadhead Collectors Club
Member: Sherwood Forest Bowmen

Users currently browsing this topic:

0 Members and 2 Guests are viewing this topic.
 

Contact Us | Trad Gang.com © | User Agreement

Copyright 2003 thru 2024 ~ Trad Gang.com ©