3Rivers Archery


The Trad Gang Digital Market


Contribute to Trad Gang and Access the Classifieds!

Become a Trad Gang Sponsor!

Traditional Archery for Bowhunters


LEFT HAND BOWS CLASSIFIEDS TRAD GANG CLASSIFIEDS ACCESS RIGHT HAND BOWS CLASSIFIEDS


Author Topic: El Cheapo TD Longbow Build Along - Finished!!!  (Read 1388 times)

Offline SOS

  • Trad Bowhunter
  • **
  • Posts: 1571
El Cheapo TD Longbow Build Along - Finished!!!
« on: June 25, 2007, 10:58:00 PM »
Well....here goes.  I've watched you all do it, and I'm tempted to flash to the end of the line to show the finished product, but here goes a build along for a 64" Pronounced TD Longbow for about as cheap as you can do it....and I LOVE IT!

While on business travel I stopped by Binghams (no shipping...but alas, had to pay tax) and bought the plans and instructions (no video - too expensive and lot's of good advice here!!), SmoothOn, 2 0.050 black glass lams (cheaper than clear), one .060 parallel coreflex lam, one .120 tapered coreflex lam and a 1/4" black phenolic chunk.  Wanted the 22"x1 1/2" piece but didn't have it so got the 18 inch piece plus another 5" piece.  The extra phenolic will be evident later.  Also sprung for the 36" piece of 1 1/2inch metal strip.  I think my Binghams bill was right at $94. (Also got a piece of red coreflex that I didnt' use - as you'll see, I stuck with basic black and walnut and simple turned out looking GREAT)

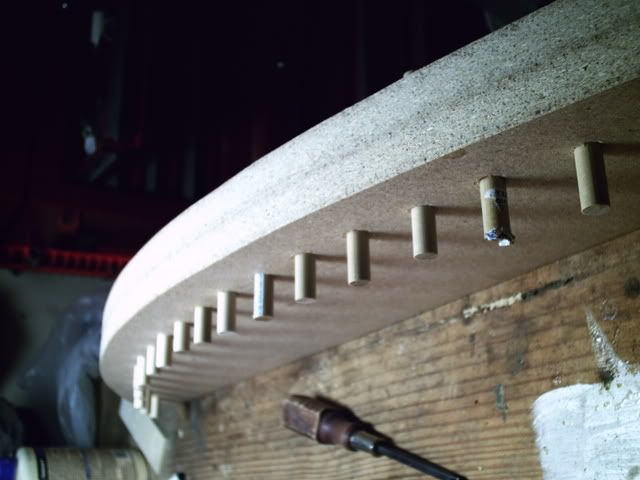
With plans in hand, I built the form out of 3/4" particle board shelving from Lowes - it is actually 3/4's of an inch.  (Also bought 2 dowels, wedges and the rubber carpet moulding strip for the form work while there) Carefully made one half the form, then glued up the other half and routed it's mate.  And by the way...no expensive fire hoses and hot boxes here...we are doing dowels, twine and wedges.  Here I am mating the form halves together.        :clapper:  

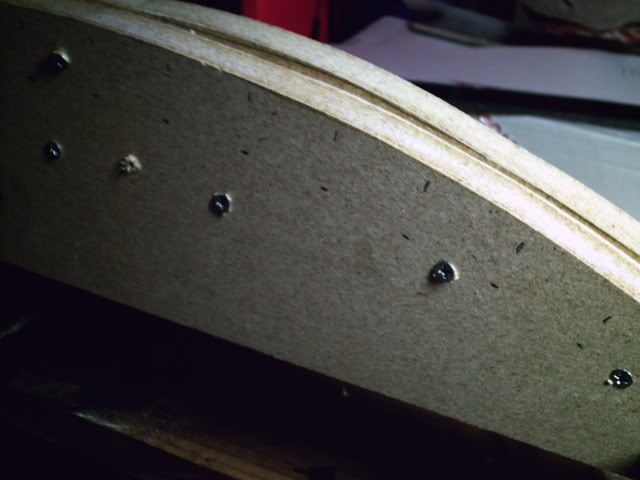
And here's the formed glued, screwed, routed and doweled.
   

Note I did add two pieces of wood on each side to hold the limb in place during glue up.  

One thing I didn't buy, nor did I take photos of, was I made my own wedges out of 1/4" hard wood from Lowes and a jig I made for my belt sander.  I can show that if anyone is intersted.  Wish I'd made the parallel part a little longer, but will explain that later....

Any way, I went for the glue up as directed.  Arranged the parts - and checked them twice.  Cleaned surfaces with acetone then mixed the SmoothOn.  Laid plastic wrap on the form, then fiberglass, parallel lam, wedge, tapered lam and belly fiberglass lam - and all with about twice as much epoxy as I probably needed.  Folded the plastic wrap over the mess, topped with the rubber carpet molding strip I'd cut to fit and laid on the metal strip.  Then, similar to the longbow buildalong in TBM last fall, I criss-crossed twine along the entire length of the mold.  Once in place and positioned, I slide the wedges under the "X"'s of the twine, and went up and down the mold sliding them in tighter and tighter until it felt even.  Could use a little practice here, glue lines ended up a little tighter in one limb than the other.  Now here's the benefit of living in the south, threw that "puppy" in the old Volvo in the driveway on a hot spring day.  Got up to a 122 degrees on day one - left the form in there for 24 hours.  Day 2 got to 132.  Now that summer is here, bet 140 plus would be no problem.  Here's a photo of limb 1, and limb 2 in the form.  Cheers, Steve

       :pray:  

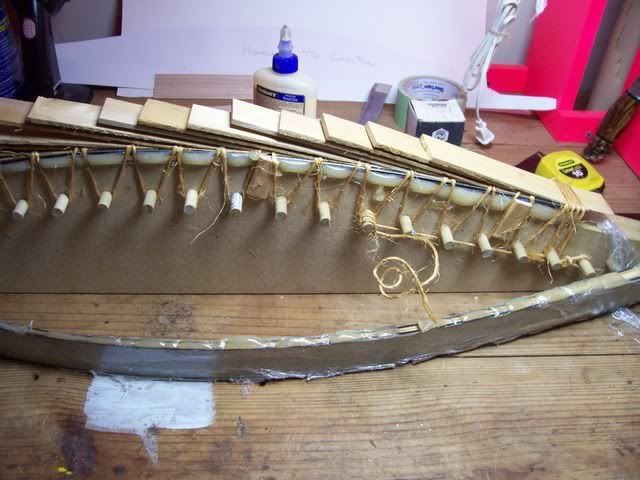
Ya think I got enough glue!?!?!?

Also, note that 1 1/2" masking tape is actually 1.4 inches or some such - I taped the outer surfaces of the glass lams, but still got epoxy down each edge - won't make that mistake again.  I'm sure I've forgotten stuff, so ask.  Good Night!

Offline TumbleFoot

  • Trad Bowhunter
  • **
  • Posts: 1
Re: El Cheapo TD Longbow Build Along - Finished!!!
« Reply #1 on: June 26, 2007, 10:35:00 AM »
Very nice pics and explanation.http://tradgang.com/noncgi/icons/icon12.gif

Offline madness522

  • TGMM Member
  • Trad Bowhunter
  • ***
  • Posts: 1743
Re: El Cheapo TD Longbow Build Along - Finished!!!
« Reply #2 on: June 26, 2007, 10:45:00 AM »
Very cool!  Now I'm waiting patiently for the next installment.
Barry Clodfelter
TGMM Family of the Bow.

Offline the Ferret

  • Trad Bowhunter
  • **
  • Posts: 3232
Re: El Cheapo TD Longbow Build Along - Finished!!!
« Reply #3 on: June 26, 2007, 11:11:00 AM »
Those aren't glue boogers...that's downright glue pneumonia     :biglaugh:  

Be sure and wear gloves sanding that glue off, that stuff wil slice you like a razor blade.
There is always someone that knows more than you, and someone that knows less than you, so you can always learn and you can always teach

Offline elk ninja

  • Trad Bowhunter
  • **
  • Posts: 1024
Re: El Cheapo TD Longbow Build Along - Finished!!!
« Reply #4 on: June 26, 2007, 11:22:00 AM »
SOS, you beat me to it!  I am getting ready for a similar build along.... I was going to call it Junk Yard Dog, Dirt Cheap.  When you order from Binghams, they package the lams in action boo.  I am planning a cheap form and a Hill style bow, clear glass though (I love wood, so I am going to spring for the extra $5).  Some leftover walnut and smooth on from my last bow... I will be paying attention to this one so I can pick up some other good hints.
Semper Fi,
Mike
>>>--Semper-Fi--->

It is better to remain silent and be thought a fool than to open one's mouth and remove all doubt.
-Abraham Lincoln

Offline SOS

  • Trad Bowhunter
  • **
  • Posts: 1571
Re: El Cheapo TD Longbow Build Along - Finished!!!
« Reply #5 on: June 26, 2007, 06:29:00 PM »
One thing I might mention, is Bingham said if you want a shorter limb, follow the plan but just start the butt end closer to the nock.  I think I moved mine 1 1/2 inches and it is coupled with a riser 2 inches shorter than the plan.

With the limbs formed, I used a bandsaw to cut most of the "Glue phlegm" (thanks, Ferret!) off and a belt sander to cut it down just to the edge of the limbs.  Besides sharp, with all the sanding, use a dust mask or you'll be coughing up real phlegm and waking up your spouse,  Meanwhile, I took my next cheap piece of bowmaking material, the lovely walnut riser block I got out of a wood working buddy's scrap box.  Cost....FREE!  It was 16 inches long and I ripped about where I thought the locator grip would hit and glued in the black phenolic.  This is where I wanted the 22 inch long phenolic, so I would have leftover for overlays.  No such luck, so I had to buy the extra.  Word of advice on glue stacks for the riser, clamp appropriately to make a good glue line, but then also clamp boards down the length to keep the parts from sliding out of square...oopps.  Wonder how I learned that?    :readit:  

Later - Steve

Offline Shawn Leonard

  • Trad Bowhunter
  • **
  • Posts: 7837
Re: El Cheapo TD Longbow Build Along - Finished!!!
« Reply #6 on: June 26, 2007, 06:46:00 PM »
Very cool so far!! Keep it up! Shawn
Shawn

Online kennym

  • TG HALL OF FAME
  • Trad Bowhunter
  • *****
  • Posts: 17318
Re: El Cheapo TD Longbow Build Along - Finished!!!
« Reply #7 on: June 26, 2007, 07:23:00 PM »
Lookin good! When ya glue up your riser block,apply glue,wrap in saran wrap, and clamp a couple blocks the other way first to prevent slippage, then clamp as usual. Works for me anyway!  :thumbsup:
Stay sharp, Kenny.

   https://www.kennysarchery.com/

Offline SOS

  • Trad Bowhunter
  • **
  • Posts: 1571
Re: El Cheapo TD Longbow Build Along - Finished!!!
« Reply #8 on: June 26, 2007, 07:25:00 PM »
Thanks, Kenny....nnoooowwwww you tell me!

Offline mmgrode

  • Trad Bowhunter
  • **
  • Posts: 1314
Re: El Cheapo TD Longbow Build Along - Finished!!!
« Reply #9 on: June 26, 2007, 09:00:00 PM »
This is cool! Looking forward to the rest of it.
"We are what we repeatedly do. Excellence, then, is not an act, but a habit."  Aristotle

Offline Crooked Stic

  • TG HALL OF FAME
  • Trad Bowhunter
  • *****
  • Posts: 6065
Re: El Cheapo TD Longbow Build Along - Finished!!!
« Reply #10 on: June 26, 2007, 09:30:00 PM »
Love these build-a-longs. Looking good.
High on Archery.

Offline sticshooter

  • Trad Bowhunter
  • **
  • Posts: 4210
Re: El Cheapo TD Longbow Build Along - Finished!!!
« Reply #11 on: June 26, 2007, 09:35:00 PM »
MORE PLEASE!<><
The Church of God is an anvil that has worn out many hammers.

"Walk softly..and carry a sharp   Stic."
TGMM

Offline sticshooter

  • Trad Bowhunter
  • **
  • Posts: 4210
Re: El Cheapo TD Longbow Build Along - Finished!!!
« Reply #12 on: June 26, 2007, 09:36:00 PM »
You do know that if it turns out cool I am going to want one.   :bigsmyl:   <><
The Church of God is an anvil that has worn out many hammers.

"Walk softly..and carry a sharp   Stic."
TGMM

Offline madness522

  • TGMM Member
  • Trad Bowhunter
  • ***
  • Posts: 1743
Re: El Cheapo TD Longbow Build Along - Finished!!!
« Reply #13 on: June 27, 2007, 06:52:00 AM »
This is better than watching the New Yankee Workshop.  And I really dig that show.
Barry Clodfelter
TGMM Family of the Bow.

Offline Jason Jelinek

  • Trad Bowhunter
  • **
  • Posts: 485
Re: El Cheapo TD Longbow Build Along - Finished!!!
« Reply #14 on: June 27, 2007, 08:47:00 AM »
I'm glad to see people are using the rope and wedges method to glue up fiberglass bows.  It's a little time consuming, but cheap and works pretty well.  I read about it in a Primitive Archer article about 4-5 years ago written by Kay Koppedreyer (sp?), something the Japanese used for centuries.

Jason

Offline SteveD

  • Trad Bowhunter
  • **
  • Posts: 545
Re: El Cheapo TD Longbow Build Along - Finished!!!
« Reply #15 on: June 27, 2007, 09:41:00 AM »
Looks great. Keep it coming

Offline Jack Guard

  • Trad Bowhunter
  • **
  • Posts: 1047
Re: El Cheapo TD Longbow Build Along - Finished!!!
« Reply #16 on: June 27, 2007, 05:57:00 PM »
I am dieing here, waiting for the next installment.  your build along is looking great.  its getting me pumped to try one too.
TGMM Family of the Bow
Proud Member of the Twister Twelve

Offline cthorness

  • Trad Bowhunter
  • **
  • Posts: 6
Re: El Cheapo TD Longbow Build Along - Finished!!!
« Reply #17 on: June 27, 2007, 09:30:00 PM »
I would like to see a pic or two of your sanding jig, if you can. Thanks, by the way. You make it look easy.

Offline SOS

  • Trad Bowhunter
  • **
  • Posts: 1571
Re: El Cheapo TD Longbow Build Along - Finished!!!
« Reply #18 on: June 27, 2007, 10:20:00 PM »
Not too much time tonight, but we'll do a little.  I'm afraid the photo's are a little scant at this point for a couple of reasons - 1) was having too much fun building and forgot to take pictures and 2) hard to take photos when running table saws and drill presses....SORRY!

Anyway, once your pads are cut and your limb butts are evened up, time for the testy job of drilling holes.  Again, since this is El Cheapo, we "ain't gonna spring for no $50 drilling jig."  Going to carefully position the limbs an even distance from the end of the riser, think mine were 4 1/2 inches and carefully align and clamp the limb to the riser.  Without a jig, a drill press is almost a must...I guess.  I rotated the table to 11 degrees to match the angle of the limb pad and drilled the 5/16" hole according to the position on the Bingham's plans, then moved to teh other side and did the same with the other limb.  Don't worry about the pin yet.  Now is time to put the threaded inserts in the riser.  You can buy fancy ones from Binghams that are tapped into the riser, or go to Lowe's and get them for about a buck a piece...so off to Lowe's.  Using the drill press and the 5/16" pilot hole already drilled, I enlarged the hole to the OD of the insert, not including the threads.  Made sure the holes were deep enough to completely seat the insert.  Since these inserts have very thin threads, I counter bored the holes just an 1/8" or so at the OD of the threads to help guide the insert in the hole straight and let the threads "bite" without breaking out wood.  These inserts have groves for a big ole screwdriver but a better way is to get 5/16 X 1 1/2" hex head bolt and nut.  Run the nut on the bolt then spin on the insert - the bolt should be about flush with the bottom.  Put a tiny piece of masking tape across the bottom to keep epoxy out, then mix up a dab of any epoxy, I used Devcon 2-Ton in the syringes.  Clamp the riser in the vice and
smear a little epoxy on the threads - don't need much or it will go everywhere.  Take a socket and rachet and put A LOT of downward pressure on the wrench as you drive the insert in - help force it in and keeps the threads from gouging/drilling out the hole.  Crank it in until the nut on the bolt is flush with the wood.

Thank goodness...finally a picture!
  :scared:  

Now for the first time is a fun part...take another sip of gin and tonic...it's hot in the garage, and bolt on the limbs and pretend it is a bow!!!  YAY!
    :D  

Now lay the bow on one side or the other on a flat surface and see which side seems to line up the limbs and the riser the best.  If you are a really talented wood worker, they should both be close...if your me one side seemed best.  Once you get it all lined up, tighten down the limb bolts and put a 1/4 inch drill in the drill press.  Once again, used dimensions from Binghams.  Doing the drill through method, I don't think it has to be super precise, but I guess you don't want to look like an idiot either.  On drilling the insert holes and the pin holes, I used the old masking tape depth gage on the drill so I didn't go too deep.  Once the pin holes are drilled, rough up one end of the pin and epoxy it in... and this is where you are!


Bad news is - I had to leave on business about this time.  Talk about withdrawals!  Good news is, it was to Denver and by abusing the rental car was able to enjoy stuff like this:


and this:


Things could be worse!  Good night, Steve

Offline SOS

  • Trad Bowhunter
  • **
  • Posts: 1571
Re: El Cheapo TD Longbow Build Along - Finished!!!
« Reply #19 on: June 27, 2007, 10:27:00 PM »
Elk Ninja...an extra $5 for clear glass!?!!  Are you insane?  Then you have to spend fifteen or twenty more dollars for good looking wood laminations to see through that clear glass.  You obviously aren't an engineer...you t'aint cheap enough!  :biglaugh:  

cthorness, were you interested in the wedge sanding jig?

Users currently browsing this topic:

0 Members and 2 Guests are viewing this topic.
 

Contact Us | Trad Gang.com © | User Agreement

Copyright 2003 thru 2024 ~ Trad Gang.com ©