A friend of mine and I are going moose hunting for the first time this September. We are going to Alberta and are using Ryk Visscher as our outfitter. Besides all the logistical problems of getting our stuff there and getting moose meat back to Missouri, we knew another issue we faced was getting a feel for how big these animals really are. Even a big whitetail looks pretty small compared to a fully grown moose. To that end we decided to make life sized moose targets to practice shooting at. This post is the process I went through to make mine.
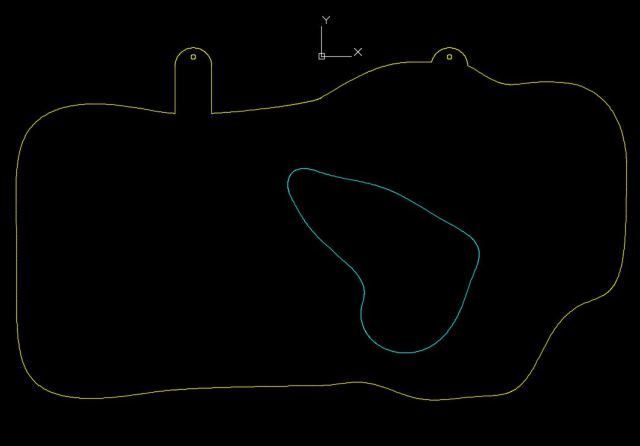
The first thing I did was go to the shot placement thread on this forum and download the moose pictures. I am an engineer/computer guy by trade and I have access to a slew of computer graphic and drawing programs. Using these, I was able to trace around one of the moose pictures showing the vitals and then scale it up to life size. For reference, I figured the top of the moose's hump would be 6' 6" from the ground and scaled everything accordingly. This is the profile I came up with.
So I had my moose target shape, now I needed to figure out what to make the target out of. After much research and pondering on the subject, I decided to cut the target out of a 4’x6’x3/4” rubber horse stall mat. These are relatively cheap ($40), fairly common and would definitely hold up against the barrage of arrows I would be throwing against it. One problem I saw with this, though, was that the arrows could be difficult to pull out so I bought a 2’x2’x2” piece of high density foam (6 lb) that I cut into the shape of the vitals area. I fastened this onto the rubber with some zip ties and my moose target was complete!
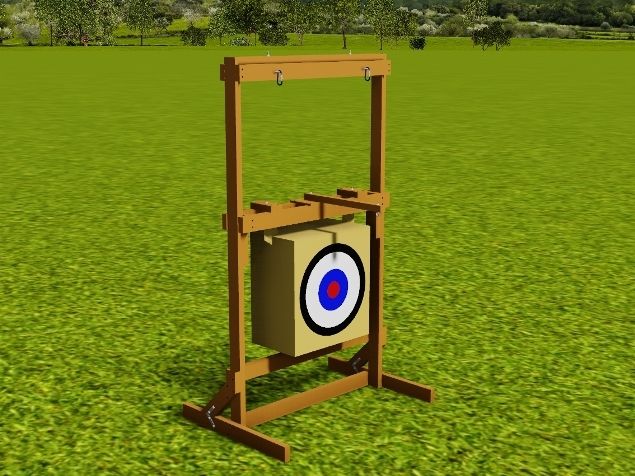
Now I needed to design and build a stand to hold the moose target or my bag target. Again with the help of some solid modeling software, I came up with the following design. This is a view with the moose target.

And this is a view with the bag target.
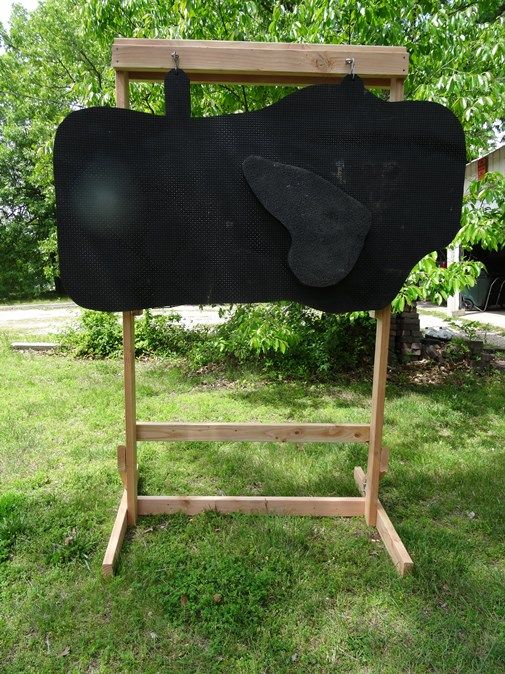
My wife always tells me that my computer models look a lot better than the actual product but this time I think I got pretty close. The top of the hump of the actual hanging moose target is 6’ 8” from the ground instead of the 6’ 6” I designed for. The one thing I really didn’t count on was how heavy the rubber target is. It is definitely a chore to hang it up and take it down! But it does work very well.
Picture of the actual moose target.
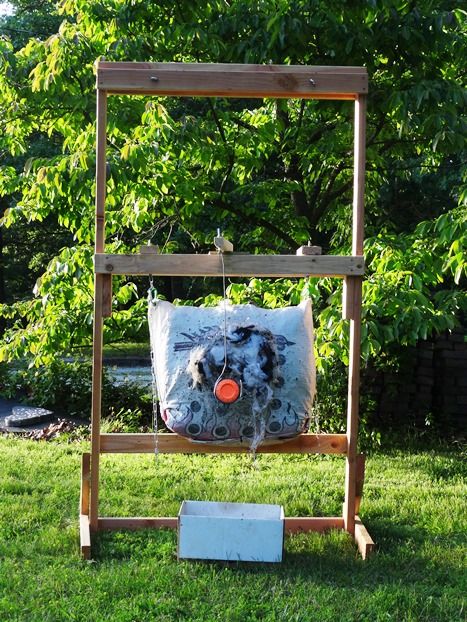
Picture of my bag target and clay bird attachment.
It was a fun project and I sure hope it pays off with moose meat this fall.
Darren


 Topic: My homemade moose target (Read 705 times)

